
“`html
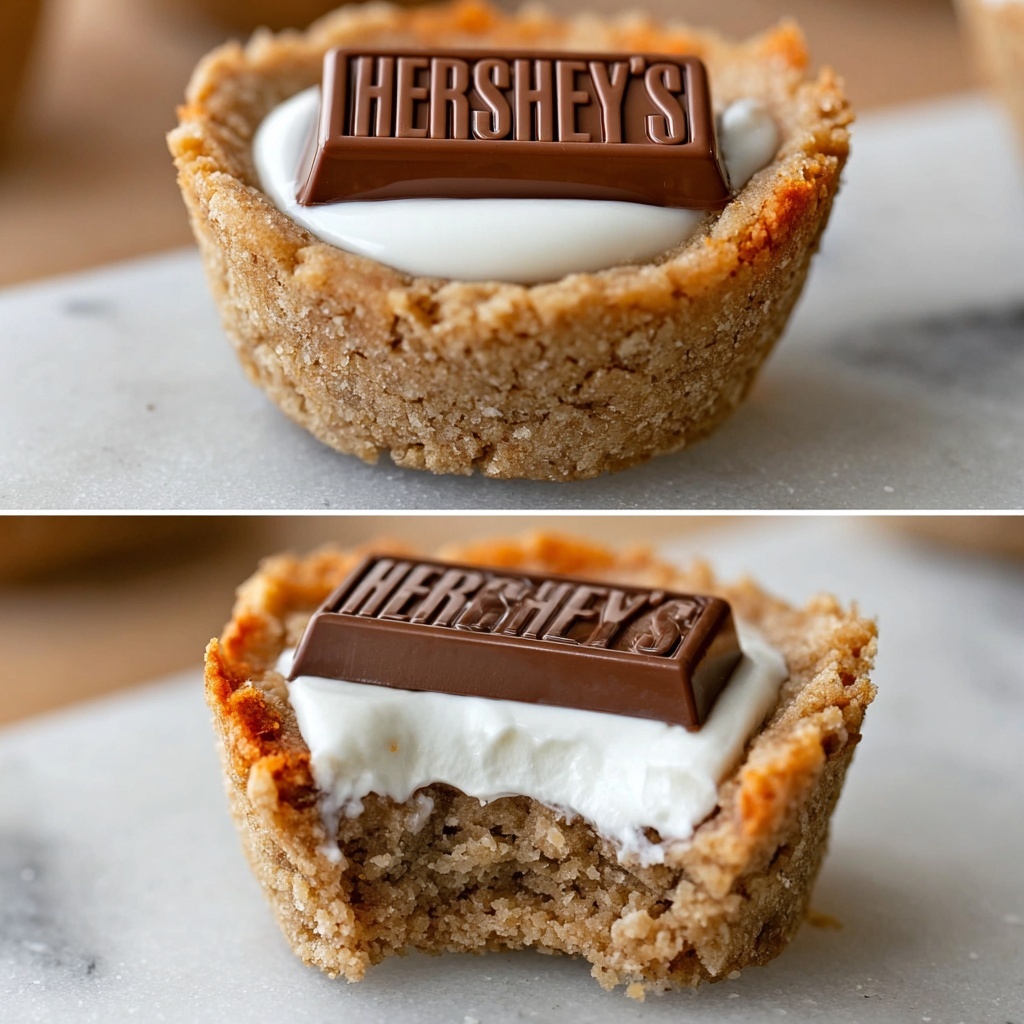
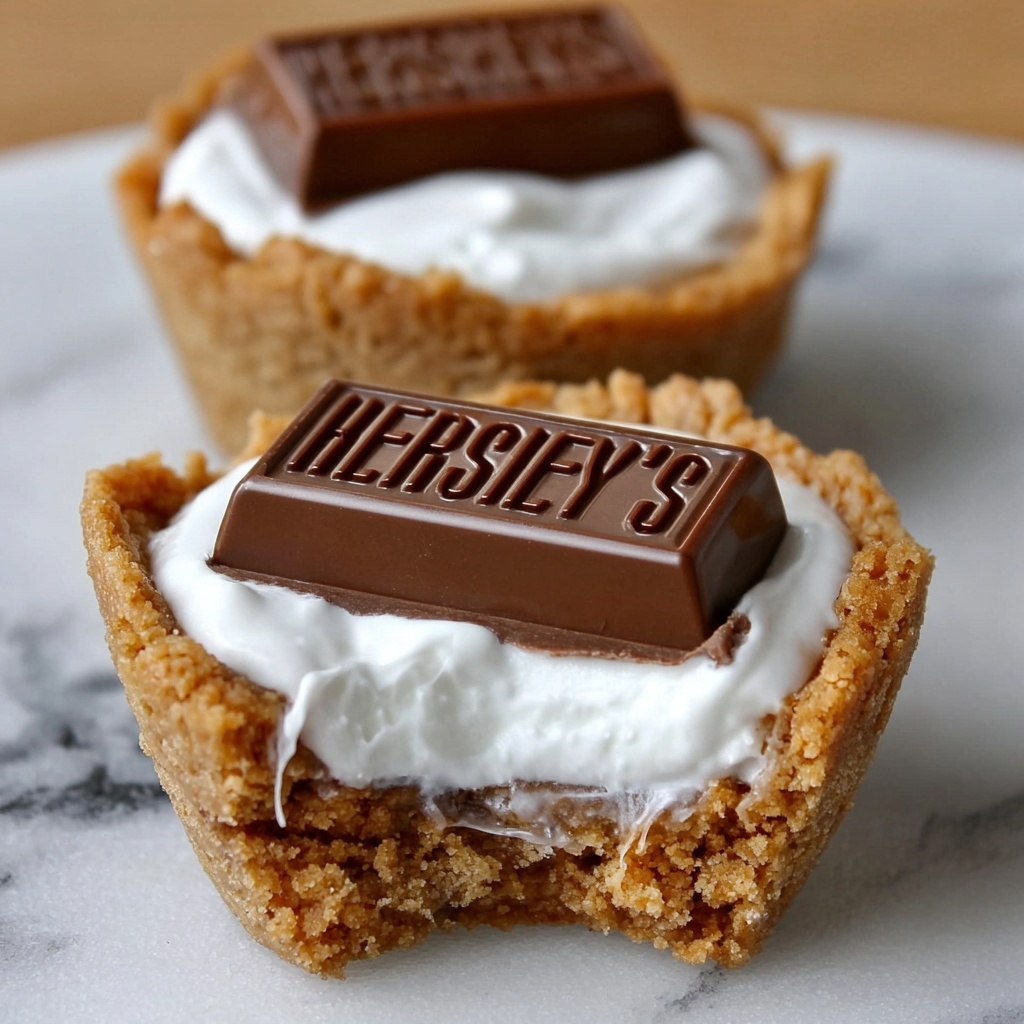
There is something truly magical about melting chocolate and toasted marshmallows nestled in a perfectly crisp, buttery graham cracker crust, and that’s exactly what the S’mores Cookie Cups Recipe delivers in every bite. These little desserts capture the nostalgic flavors of campfire s’mores but in a charming, bite-sized form that’s perfect for parties, snacks, or anytime you need a sweet pick-me-up. The way the cookie cups hold all those melty, gooey layers together makes each mouthful an irresistible mix of crunchy, soft, and creamy textures that’ll have you reaching for just one more.
Ingredients You’ll Need
These ingredients are simple pantry staples, but when combined, they create a fantastic balance of texture and flavor that gives the S’mores Cookie Cups Recipe its unforgettable character. Each one plays a crucial role in making these treats both irresistible and easy to whip up.
- Graham cracker crumbs: The base of your cups, offering that classic s’mores crunch and a slightly sweet, nutty flavor.
- Powdered sugar: Adds just a touch of sweetness while helping bind the crumbs together for sturdier cups.
- Butter (melted): Provides richness and helps the crusts become golden and crisp when baked.
- Marshmallows (regular size): The star gooey element that toasts up perfectly, giving the cups that heavenly, melty texture.
- Hershey’s Chocolate Bars: Classic chocolate pieces that soften slightly and top off each cup with smooth chocolatey goodness.
How to Make S’mores Cookie Cups Recipe
Step 1: Preheat and Prepare
Start by preheating your oven to 350°F. This ensures the oven is hot enough to crisp the graham cracker crust without burning. It’s important because even heat turns a loose crumbly mix into firm, golden cups that hold all the delicious fillings.
Step 2: Craft the Graham Cracker Crust
In a small bowl, combine the finely crushed graham cracker crumbs, powdered sugar, and melted butter. Mixing these ingredients thoroughly allows the butter to coat every crumb, which is essential for that perfect buttery flavor and crisp texture that serves as the foundation of your cookie cups.
Step 3: Shape the Cups
Grease your 24-cup mini muffin pan generously with non-stick spray to help the cookie cups release easily later. Then scoop the graham cracker mixture into each muffin cup and gently press it into the base and sides to form little cups. This step is fun and gives you control over how thick or thin your crusts are — thicker for a crunchier bite, or a bit thinner if you prefer more gooey fillings.
Step 4: Bake the Crusts
Place the pan in the oven and bake for about 4 minutes, until the cups turn golden brown. This quick bake locks the crumbs in place and ensures they have a satisfying crunch without being too hard. Keep an eye, so they don’t over-bake.
Step 5: Add the Marshmallow Filling
Slice each marshmallow in half to create enough for each cup. Place one half of a marshmallow into each graham cracker cup with the cut side down. This helps the marshmallow spread out as it melts and toast evenly when broiled.
Step 6: Broil the Marshmallows
Switch your oven to broil and carefully place the pan inside. Broil the cups for 1 to 2 minutes until the marshmallows begin to soften and toast to a beautiful golden color. This step is quick but crucial — a watchful eye will prevent burnt marshmallows and guarantee that perfect toasty flavor.
Step 7: Top with Chocolate and Cool
Once the marshmallows are toasted, immediately top each one with a piece of Hershey’s chocolate. The warmth will start to soften the chocolate, creating that irresistible melted effect. Let your S’mores Cookie Cups cool for about 15 minutes before gently removing them from the pan with a butter knife, so they set just right without falling apart.
How to Serve S’mores Cookie Cups Recipe
Garnishes
To elevate these cookie cups, you might sprinkle a little extra crushed graham cracker on top or even add a tiny pinch of sea salt right after broiling. The salt enhances the chocolate’s flavor and adds an exciting contrast to the sweetness of the marshmallow.
Side Dishes
These S’mores Cookie Cups pair wonderfully with a cold glass of milk or a warm cup of coffee or hot chocolate. Their rich, sweet flavors complement these beverages perfectly and make for an indulgent treat anytime.
Creative Ways to Present
Serve your S’mores Cookie Cups on a wooden board for a rustic feel, or arrange them on a colorful platter with fresh berries for a pop of color. For parties, consider placing them in cute cupcake liners to make grab-and-go desserts that look as delightful as they taste.
Make Ahead and Storage
Storing Leftovers
You can store leftover S’mores Cookie Cups covered tightly in an airtight container at room temperature. They will keep well for up to two days before the marshmallows start to lose their perfect texture, though honestly, they rarely last that long!
Freezing
If you want to make these ahead for a special occasion, freeze the baked cookie cups without marshmallows for up to a month. When ready to serve, thaw, add the marshmallows and chocolate, then quickly broil to toast and melt. This way, your cups stay fresh and crumbly.
Reheating
To reheat, pop the cookie cups in a 350°F oven for a few minutes until warmed through and then broil briefly to refresh that toasted marshmallow texture. Avoid microwaving since that can make the crust soggy.
FAQs
Can I use mini marshmallows instead of regular size?
While mini marshmallows might be tempting to use, regular size ones cut in half work best for the right proportion in these little cups. Minis may not toast evenly or hold together as nicely.
What can I substitute if I don’t have graham crackers?
If graham crackers aren’t available, you can try digestive biscuits or even crushed vanilla wafers. Just keep in mind the flavor will shift slightly but should still work well as a sweet, crunchy base.
How do I prevent marshmallows from burning under the broiler?
The key is to watch them very closely as they broil since marshmallows go from golden to burnt quickly. Keep the oven rack in the middle position and broil for only 1-2 minutes, checking frequently.
Can I make these vegan or gluten-free?
Yes! You can use vegan butter and gluten-free graham crackers to make this recipe vegan and gluten-free. Just be sure to check your chocolate and marshmallows for compliance, as some brands may contain animal products or gluten.
Why do I need to cool the cookie cups before removing them?
Allowing them to cool ensures the buttery crust firms up and holds its shape. Removing them too soon can cause the cups to break apart or crumble.
Final Thoughts
If you ever crave that classic campfire treat with a twist, the S’mores Cookie Cups Recipe is the perfect solution. They’re easy to make, wonderfully nostalgic, and endlessly delicious — whether you’re sharing with family or sneaking a few for yourself. Trust me, once you try these little pockets of gooey goodness, you’ll want to make them again and again. Go ahead and give it a shot, your taste buds will thank you!
“`
Print
S’mores Cookie Cups Recipe
- Prep Time: 10 minutes
- Cook Time: 8 minutes (4 minutes baking crust + 1-2 minutes broiling + cooling time included)
- Total Time: 23 minutes
- Yield: 24 cookie cups
- Category: Dessert
- Method: Baking
- Cuisine: American
Description
These delightful S’mores Cookie Cups offer a portable twist on the classic campfire treat, featuring a crispy graham cracker crust, toasted marshmallow, and melty chocolate, all baked to perfection in mini muffin pans. Perfect for parties or a fun dessert, they combine the beloved flavors of s’mores in an easy-to-make, bite-sized form.
Ingredients
Crust Ingredients
- 1 cup finely crushed graham cracker crumbs (about 7 whole graham crackers)
- 1/4 cup powdered sugar
- 6 tablespoons butter, melted
Toppings
- 12 regular size marshmallows, cut in half to make 24 pieces
- 2 full size Hershey’s Chocolate Bars, unwrapped and divided into 24 pieces
Instructions
- Preheat Oven: Preheat your oven to 350°F (175°C) to prepare for baking the graham cracker crusts.
- Make Crust Mixture: In a small mixing bowl, combine the finely crushed graham cracker crumbs, powdered sugar, and melted butter until well mixed.
- Prepare Muffin Pan: Grease a 24-cup mini muffin pan with non-stick cooking spray to prevent sticking. Scoop the graham cracker crust mixture into each cup and gently press the crumbs into the bottom and sides to form small, even cups.
- Bake Crusts: Bake the crusts at 350°F for 4 minutes or until they are golden brown and set.
- Add Marshmallows: Cut each marshmallow in half to create 24 pieces. Place one marshmallow half into each graham cracker cup with the cut side facing down for even melting.
- Broil Marshmallows: Set the oven to broil and place the muffin pan under the broiler for 1 to 2 minutes. Watch carefully as marshmallows toast quickly; remove when they are soft and starting to brown.
- Add Chocolate Topping and Cool: Immediately top each toasted marshmallow with one piece of Hershey’s chocolate. Let the s’mores cool in the pan for 15 minutes before carefully lifting them out with a butter knife.
Notes
- Watch marshmallows closely when broiling to prevent burning.
- Using regular sized marshmallows cut in half helps them fit perfectly in the mini muffin cups.
- Let s’mores cool slightly before removing to ensure they hold their shape.
- For easier removal, you can line the muffin pan with mini cupcake liners.

