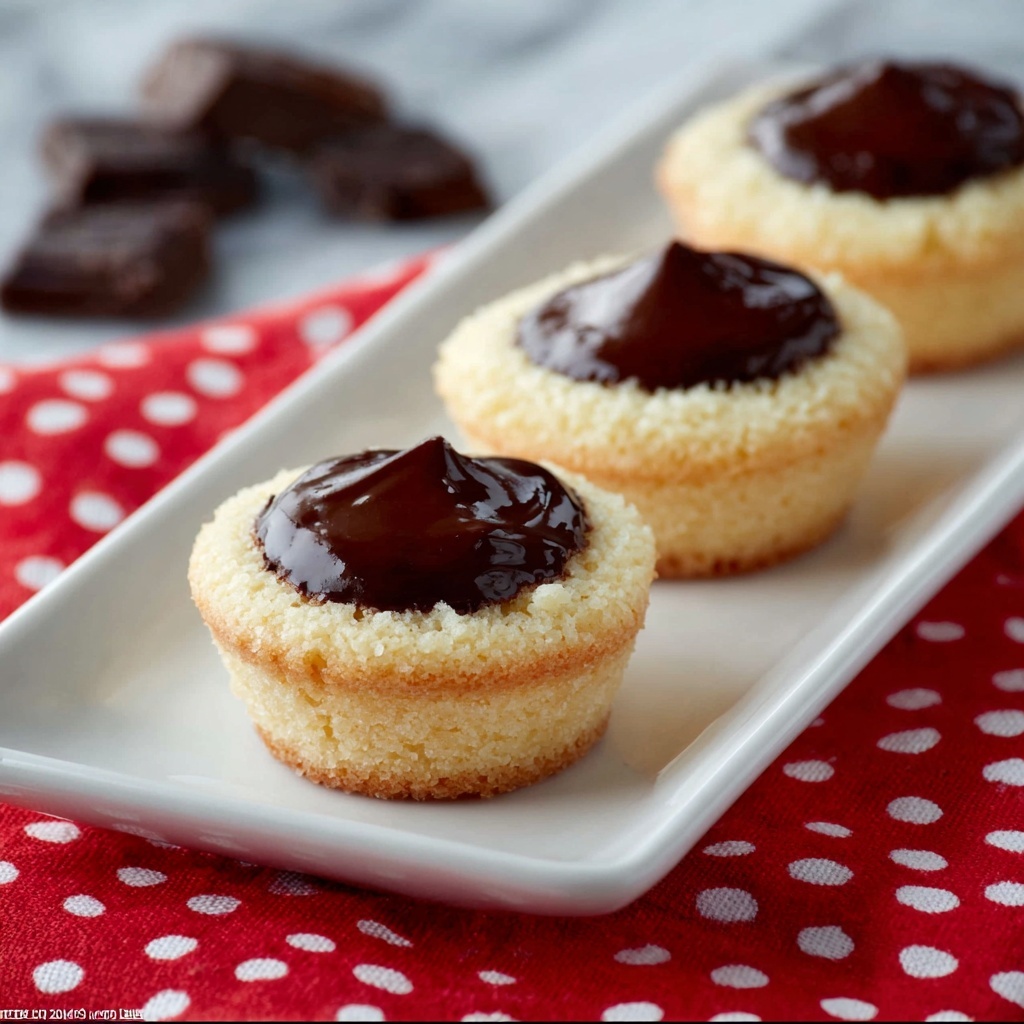
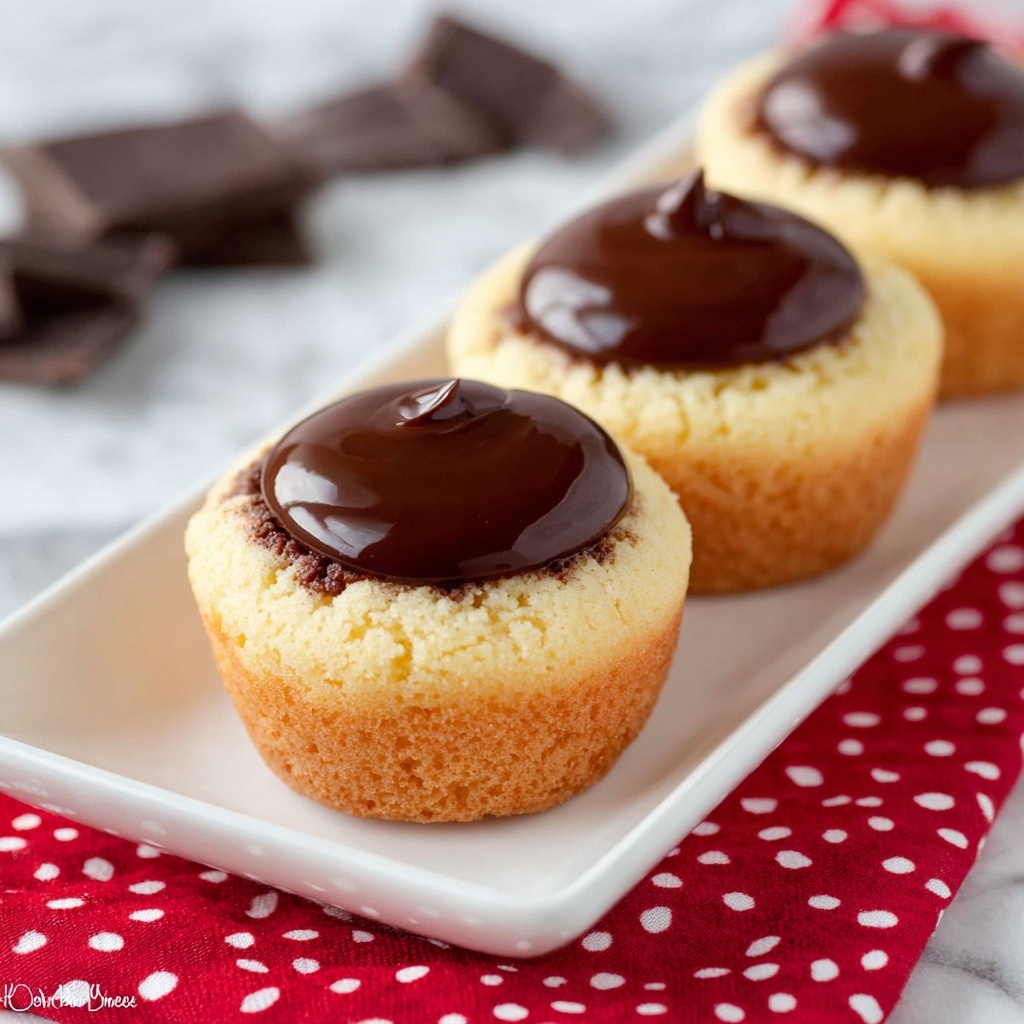
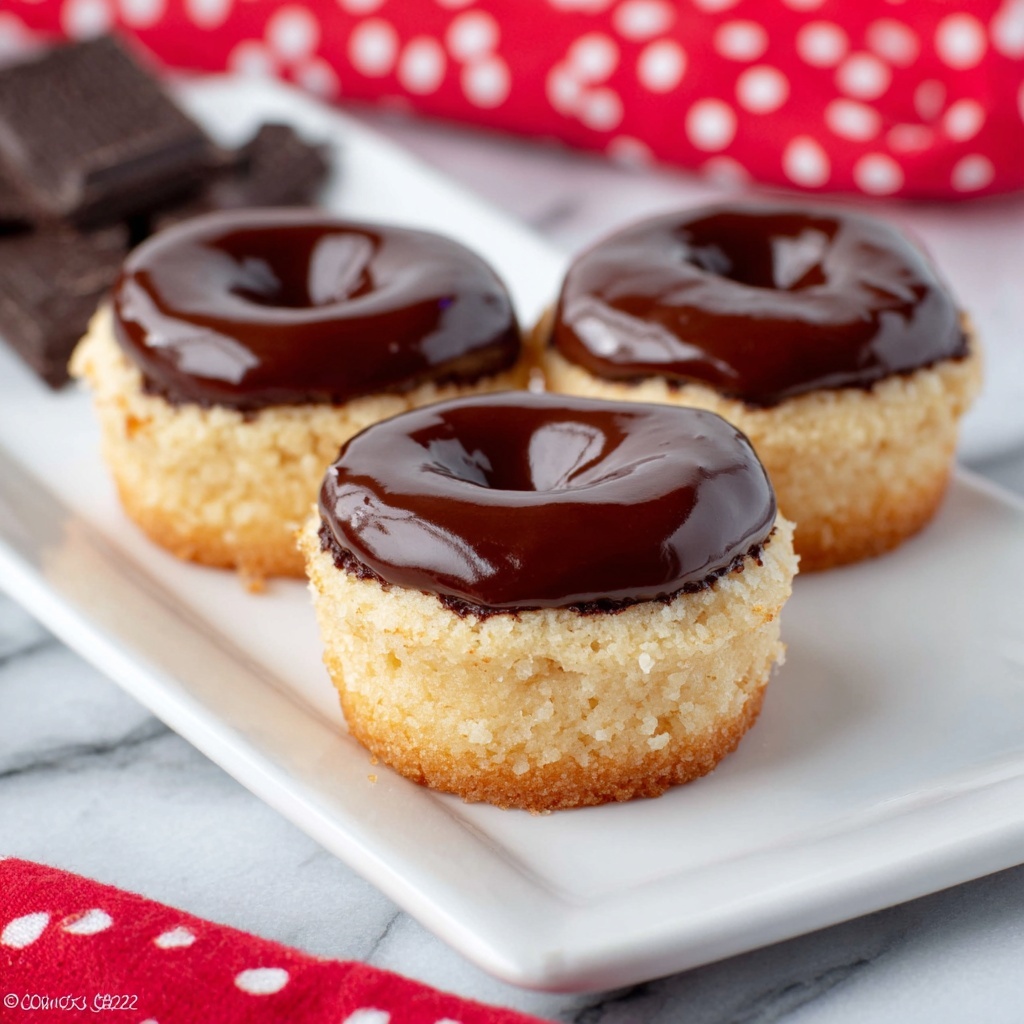
If you adore the classic Boston Cream Pie but want to enjoy it in a fun, bite-sized way, then you will absolutely fall head over heels for this Boston Cream Pie Cookie Cups Recipe. These delightful treats combine tender, golden cookie cups with a luscious vanilla cream filling and a glossy chocolate topping, capturing all the beloved flavors of the original dessert in every irresistible morsel. Perfect for parties, gatherings, or just whenever a craving strikes, this recipe is a sweet little showstopper that’s surprisingly easy to whip up and impossible to resist.
Ingredients You’ll Need
Gathering simple pantry staples and a few fresh ingredients is all you need to make these incredible cookie cups come to life. Each component plays a crucial role—the yellow cake mix provides that familiar buttery base, while the instant vanilla pudding and whipping cream create a dreamy filling that’s silky smooth, and the chocolate chips add a rich, glossy finish that ties it all together perfectly.
- Yellow cake mix: The foundation of our cookie cups, providing a soft, tender texture and classic vanilla flavor.
- Butter (softened): Adds richness and moisture, ensuring the cookie dough is soft and easy to work with.
- Eggs: Bind the dough and contribute to the structure of the cookie cups.
- Instant vanilla pudding: Creates that signature creamy filling with a smooth vanilla taste.
- Milk: Activated the pudding mix and helps achieve the perfect filling consistency.
- Heavy whipping cream (divided): Whipped to fluffy perfection, it lightens the pudding filling and creates a luscious topping when combined with chocolate.
- Semi-sweet chocolate chips: Melted and glossy, they add a decadent chocolate layer to crown each cookie cup.
How to Make Boston Cream Pie Cookie Cups Recipe
Step 1: Prepare Your Oven and Pan
Start by heating your oven to 350 degrees Fahrenheit. While it’s warming up, generously coat a mini muffin pan with non-stick spray to make sure our cookie cups come out easily after baking. This simple prep step prevents sticking and keeps each cookie cup perfectly intact.
Step 2: Make the Cookie Dough
In a large bowl, blend the yellow cake mix with softened butter and eggs using an electric mixer. This comes together into a soft dough that’s rich and tender. Resist the urge to overmix here — just enough until combined for the best texture.
Step 3: Form the Cookie Cups
Use rounded teaspoons to scoop dough into each mini muffin cup, filling them about two thirds full so there’s enough room for the dough to bake with a perfect cup shape. A uniform size helps these bake evenly and makes sure every cup has just the right balance of cookie to filling.
Step 4: Bake and Cool
Bake for 9 to 10 minutes until the cookie cups are set but still soft. Take them out and let them cool inside the pan for five minutes for easier handling—and then it’s time to get creative with their shape.
Step 5: Create the Creamy Center
Using the end of a wooden spoon or a mini tart shaper, gently press into the center of each cookie while still warm to form a deep well for our filling. Run a butter knife around the edges to loosen them and transfer to a wire rack to cool completely before filling.
Step 6: Prepare the Vanilla Pudding Filling
Mix the instant vanilla pudding with milk in a small bowl—this preps the base for our creamy center. Set it aside to let it thicken as you get ready for the whipped cream.
Step 7: Whip the Filling to Perfection
Whip 1 cup of heavy cream until stiff peaks form, then gently fold in the pudding mixture until smooth. Transfer this luscious vanilla cream to a resealable bag with one corner snipped to create a piping bag, then fill each cookie cup’s indentation generously with this dreamy mixture.
Step 8: Add the Chocolate Glaze
Heat the remaining 1/4 cup of heavy cream with semi-sweet chocolate chips in short bursts in the microwave, stirring frequently until thick and glossy. Spoon a dab of this rich chocolate ganache over each filled cookie cup, creating that iconic glossy top.
Step 9: Chill or Serve
Serve immediately for the freshest experience, or refrigerate your cookie cups for up to three days to enjoy later, allowing flavors to meld beautifully.
How to Serve Boston Cream Pie Cookie Cups Recipe
Garnishes
For that extra wow factor, sprinkle a little powdered sugar or freshly grated citrus zest over these cookie cups just before serving. A few finely chopped nuts or edible flowers on top add a pretty, gourmet touch that’s sure to impress your guests.
Side Dishes
These cookie cups shine on their own as a sweet treat, but if you’d like to pair them, try fresh fruit like sliced strawberries or raspberries to complement their creamy vanilla and chocolate notes. A scoop of vanilla ice cream alongside also creates an indulgent dessert plate.
Creative Ways to Present
For parties and celebrations, serve these Boston Cream Pie Cookie Cups Recipe treats on a tiered dessert stand or nestle them in mini colorful cupcake liners. You can even package them individually in small clear bags tied with ribbon to give as adorable edible gifts.
Make Ahead and Storage
Storing Leftovers
Keep your cookie cups refrigerated in an airtight container for up to three days. This helps maintain the freshness of the filling and keep the chocolate topping glossy and smooth.
Freezing
If you want to prepare these in advance, freeze the baked cookie cups (without the filling and chocolate) in a single layer on a tray, then transfer to a freezer-safe container. When ready, thaw completely, then add the cream filling and chocolate topping fresh before serving.
Reheating
These cookie cups are best served chilled or at room temperature, so reheating is not recommended. If you want the cookie warm, warm the baked cups before filling and chocolate topping, but keep in mind the filling should remain cool.
FAQs
Can I use homemade cake mix instead of boxed?
Absolutely! If you prefer baking your cake mix from scratch, feel free to use your favorite recipe. Just make sure the dough is firm enough to hold its shape in the mini muffin pan.
What if I don’t have mini muffin pans?
You can try using a regular muffin pan, but your cookie cups will be larger and require longer baking time. Alternatively, silicone mini molds work nicely and can help with easy release.
Can I substitute the instant pudding for homemade pastry cream?
Yes, homemade pastry cream will work beautifully here, adding an extra touch of freshness and richness to the filling, though it takes a bit more time to prepare.
How long do these Boston Cream Pie Cookie Cups Recipe last?
They stay best for up to three days refrigerated. The cookie cups may soften slightly over time, but the flavors only get better as they meld together.
Can I make this recipe dairy-free?
With a few swaps, yes! Use dairy-free butter, a non-dairy milk and cream alternative, and dairy-free chocolate chips to make a version suitable for dairy-free diets.
Final Thoughts
There’s something truly magical about transforming a beloved classic like Boston Cream Pie into these adorable cookie cups. They’re fun, flavorful, and perfect for sharing with friends or family. I can’t wait for you to try this Boston Cream Pie Cookie Cups Recipe and watch everyone fall in love with each delightful bite. Happy baking and even happier eating!
Print
Boston Cream Pie Cookie Cups Recipe
- Prep Time: 15 minutes
- Cook Time: 10 minutes
- Total Time: 25 minutes
- Yield: 36 cookie cups
- Category: Dessert
- Method: Baking
- Cuisine: American
Description
These Boston Cream Pie Cookie Cups are a delightful twist on the classic dessert, featuring soft cookie cups filled with creamy vanilla pudding and topped with rich, glossy chocolate. Perfect bite-sized treats for parties or an indulgent snack.
Ingredients
Cookie Cups
- 1 box (15.25 ounce) yellow cake mix
- 1/3 cup butter, softened
- 2 eggs
Filling
- 1 package (3.4 ounce) instant vanilla pudding mix
- 1/2 cup milk
- 1 cup heavy whipping cream (divided from 1 1/4 cup total)
Chocolate Topping
- 1/4 cup heavy whipping cream (remaining from 1 1/4 cup)
- 1/4 cup semi-sweet chocolate chips
Instructions
- Preheat Oven: Preheat your oven to 350°F (175°C) and prepare your baking tools.
- Prepare Mini Muffin Pan: Spray a mini muffin pan generously with non-stick cooking spray and set aside.
- Make Cookie Dough: In a large mixing bowl, combine yellow cake mix, softened butter, and eggs. Use an electric mixer to blend until a soft dough forms.
- Scoop Dough into Pan: Using rounded teaspoons, scoop the dough evenly into the prepared mini muffin cups, filling each about 2/3 full to allow room for rising.
- Bake Cookie Cups: Bake the cookie cups in the preheated oven for 9-10 minutes until they are set but still soft. Remove from oven and let them cool in the pan for 5 minutes.
- Create Indentations: Press the center of each warm cookie cup using the end of a wooden spoon or mini tart shaper to create a deep indentation for the cream filling. Run a butter knife around the edges to loosen them, then transfer to a wire rack to cool completely.
- Prepare Vanilla Cream Filling: In a small bowl, combine instant vanilla pudding mix and milk, mixing briefly. In a large bowl, beat 1 cup of heavy cream until stiff peaks form, then fold in the pudding mixture with the electric mixer until smooth and fully combined.
- Pipe Filling into Cookie Cups: Transfer the cream filling into a piping bag made from a gallon-size zip-top bag with a cut corner, then pipe the cream into the indentations in each cooled cookie cup.
- Make Chocolate Topping: In a small microwave-safe bowl, combine the remaining 1/4 cup heavy cream and semi-sweet chocolate chips. Microwave for 15 seconds, stir, microwave an additional 15 seconds, and stir until the mixture is thick and glossy.
- Top and Serve: Spoon a small amount of chocolate topping onto each filled cookie cup. Serve immediately or refrigerate for up to three days for best freshness.
Notes
- Do not overfill the mini muffin cups when scooping cookie dough to prevent overflowing during baking.
- Ensure the cookie cups cool completely before filling to prevent filling from melting.
- The chocolate topping can be adjusted in thickness by microwaving in short bursts and stirring thoroughly.
- Refrigerate leftovers and consume within three days for optimal flavor and texture.
- You can substitute semi-sweet chocolate chips with dark or milk chocolate chips according to preference.


