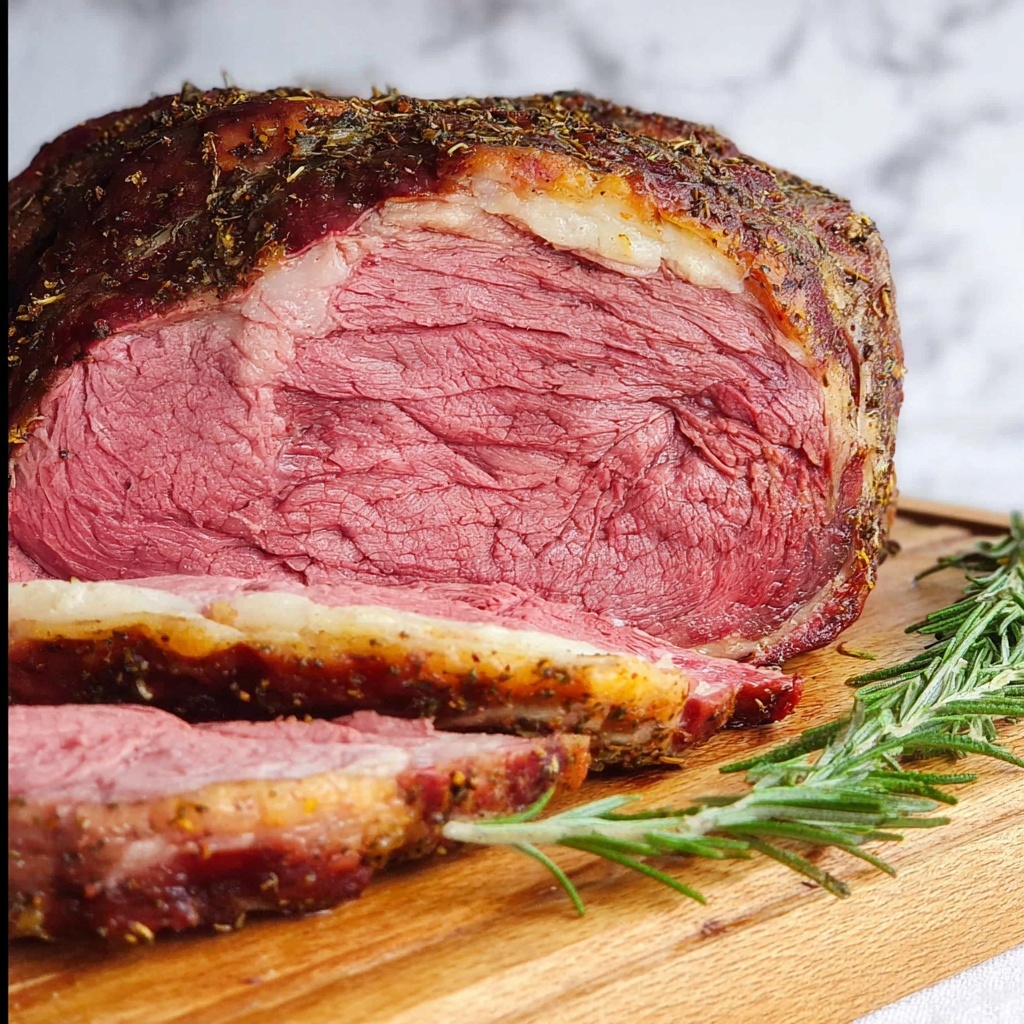
If you have ever dreamed of preparing a show-stopping centerpiece for your next feast, the Reverse Sear Prime Rib Recipe is the answer you’ve been looking for. This method brings out the most tender, juicy, and flavorful prime rib imaginable by slowly roasting the beef at a low temperature before finishing with a quick, high-heat sear for a perfect crust. It’s the ultimate way to elevate your holiday dinners or special occasions, creating a cut of meat so succulent and irresistible that everyone will be asking for seconds. Let me take you through every step to ensure your prime rib comes out flawless and unforgettable.
Ingredients You’ll Need
Getting the perfect prime rib doesn’t call for a complicated pantry, just a few essential ingredients that each play a crucial role. From the rich, juicy beef to the fresh herbs and seasoning, every component is a building block for incredible taste and a beautiful crust.
- Bone-in standing rib roast (6 pounds): The star of the show, with just the right amount of fat left for flavor and moisture.
- Kosher salt: Used for dry brining, it deeply seasons the meat and helps develop a luscious crust.
- Freshly ground black pepper: Adds a robust, aromatic bite that complements the beef’s richness.
- Unsalted butter (4 tablespoons): Softened butter adds moisture and richness; it’s also perfect for mixing with herbs.
- Fresh rosemary and/or thyme: These herbs bring an earthy, fragrant note that pairs exquisitely with prime rib.
How to Make Reverse Sear Prime Rib Recipe
Step 1: Plan Ahead and Salt the Roast
This recipe shines with a bit of planning. Ideally, salt your rib roast a full 24 hours ahead of cooking. This isn’t just about seasoning; it’s about letting the salt penetrate deeply into the meat and drying the surface for that coveted crust. Place the salted roast on a rack in the fridge, uncovered or loosely covered, allowing air to circulate around it.
Step 2: Bring to Room Temperature and Butter Mixture
About two hours before cooking, take the rib roast out of the refrigerator. Letting the beef warm up ensures even cooking. Meanwhile, soften your butter and mix it with freshly ground black pepper and chopped rosemary or thyme. Rub this savory butter all over the roast, letting those flavors meld into the meat.
Step 3: Low and Slow Roasting
Preheat your oven to a low setting between 200°F and 225°F. Place the roast fat side up on a rack set inside a roasting pan. Insert a reliable meat thermometer into the thickest part of the roast, avoiding the bone. The goal is to slowly bring the internal temperature up to your desired doneness—about 120–125°F for rare or 130°F for medium-rare—over the course of 3 to 4 hours. This slow roast gently cooks the meat evenly, locking in juices and tenderness.
Step 4: Rest Before the Final Sear
After the roast reaches your target low temperature, remove it from the oven and tent it with foil. Rest it at room temperature for 30 to 60 minutes. This crucial step allows the juices to redistribute evenly, giving you a moist bite throughout.
Step 5: The High-Heat Sear for Crust Perfection
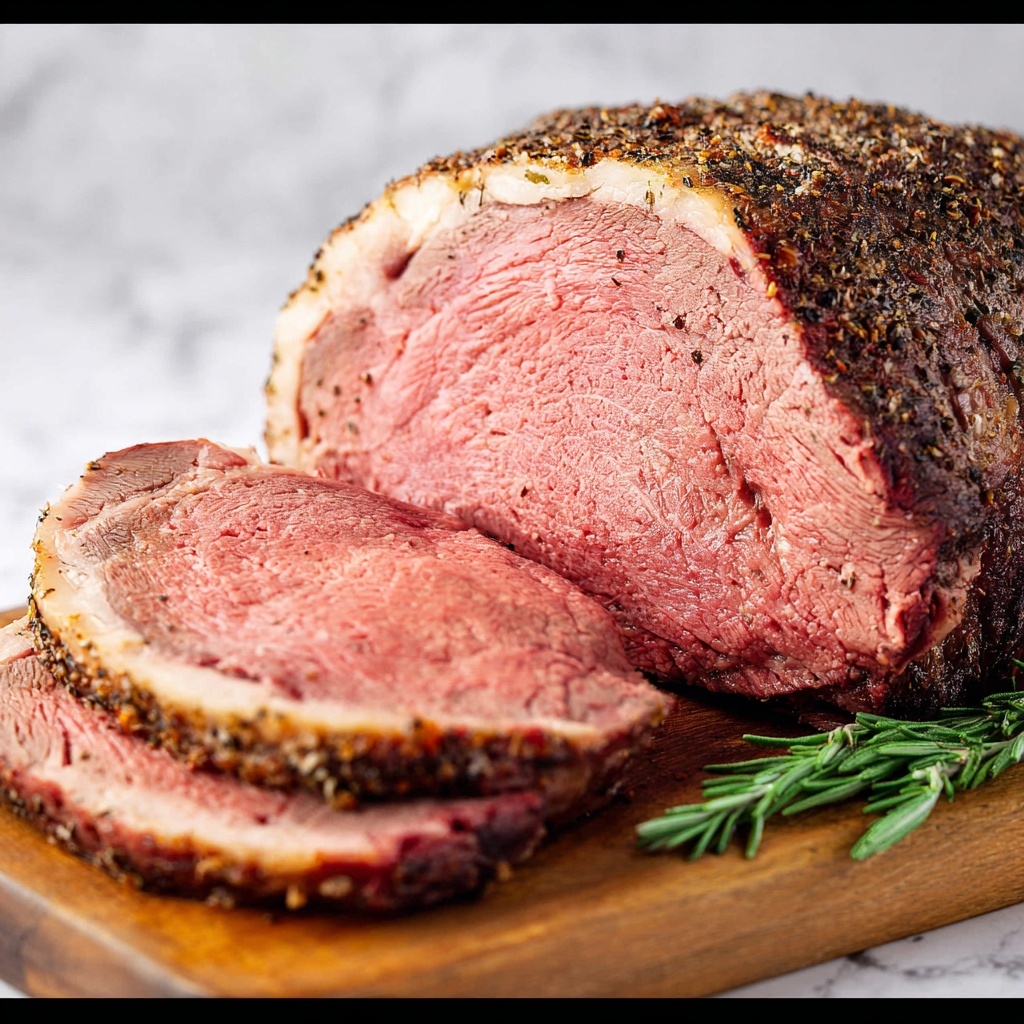
Now it’s time to crank up the heat! Increase your oven temperature to between 450°F and 500°F. The final sear is quick but transformative, developing a rich, caramelized crust in just 5 to 8 minutes. Be sure to keep a close eye—it can go from perfect to burnt quickly. If there’s excess fat caught in the pan, transferring to a clean one helps reduce smoke.
Step 6: Final Rest and Carving
Once beautifully seared, remove your prime rib and let it rest briefly for a few minutes. This short rest before slicing ensures everything settles. Then carve generously and prepare for the compliments to roll in!
How to Serve Reverse Sear Prime Rib Recipe
Garnishes
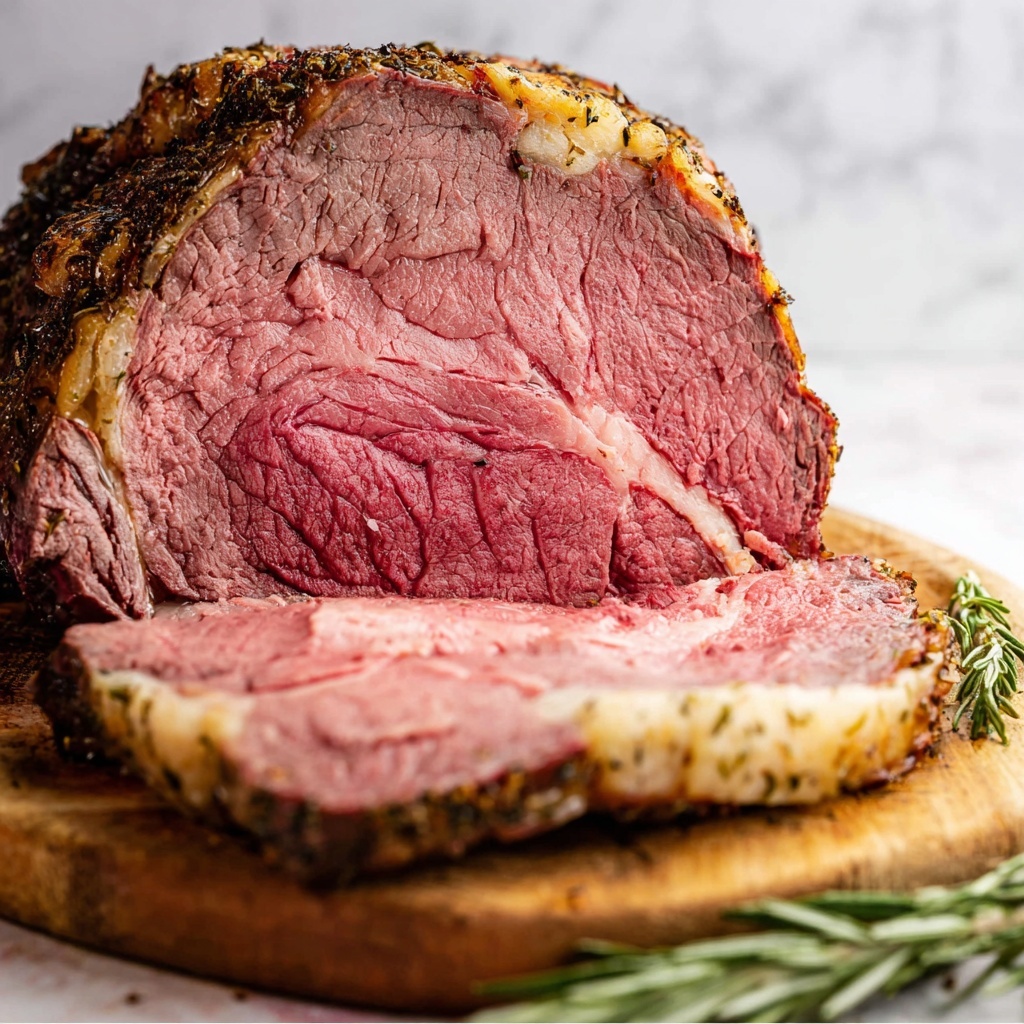
Garnishing your prime rib is an easy way to add visual appeal and a flavor boost. Fresh sprigs of rosemary or thyme placed alongside the sliced meat enhance aroma and presentation. A drizzle of pan juices or a homemade au jus can elevate the experience, adding moisture and flavor.
Side Dishes
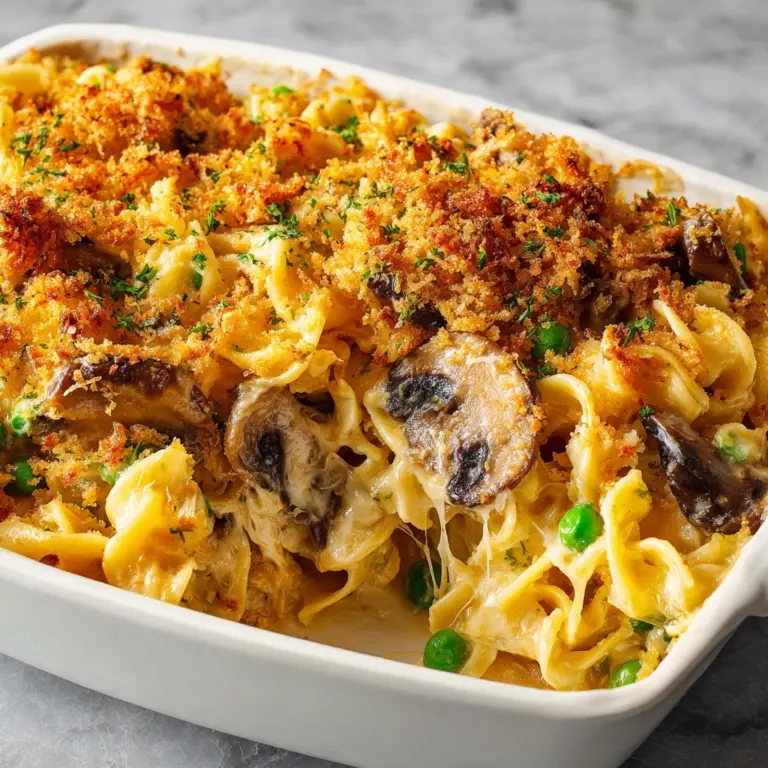
Classic pairings like creamy mashed potatoes, roasted root vegetables, or buttery Yorkshire puddings make excellent companions to the Reverse Sear Prime Rib Recipe. Bright, fresh salads or grilled asparagus also cut through the richness offering balance. Think texture and contrast when planning sides to make every bite exciting.
Creative Ways to Present
For something special, consider carving the prime rib into thick, elegant slices and arranging them fanned out on a wooden board for a rustic, inviting look. Serve with small bowls of horseradish cream or mustard on the side to offer guests flavor options. Another fun idea is to create mini sliders with the leftover slices for an unexpected delight.
Make Ahead and Storage
Storing Leftovers
Once cooled to room temperature, wrap leftover prime rib tightly in foil or place in an airtight container and refrigerate. Leftovers will stay delicious for up to 4 days, giving you plenty of time to enjoy the afterglow of your feast.
Freezing
If you want to keep your prime rib longer, freeze slices in freezer-safe bags or containers, separated by parchment paper to prevent sticking. This method keeps the meat fresh for about 2 to 3 months. Just be sure to thaw overnight in the fridge before reheating.
Reheating
Reheating prime rib gently is key to preserving tenderness. Warm slices in a 250°F oven wrapped loosely in foil until heated through, or use a low setting on the stovetop with a splash of beef broth. Avoid the microwave if possible—it can dry out the meat.
FAQs
Can I skip the 24-hour dry salting step?
You can, but the 24-hour dry salting makes a real difference in flavor and crust texture. If pressed for time, salt as early as possible—even a few hours ahead helps!
What if my oven doesn’t go as low as 200°F?
This technique relies on slow, gentle cooking. If your oven’s minimum heat is higher, aim for the lowest setting and monitor the temperature closely to avoid overcooking.
How do I know when the prime rib is done?
The best way is to use a reliable meat thermometer. Pull the roast at the temperatures specified in the recipe since the meat will continue to cook slightly during resting and searing.
What’s the difference between reverse sear and traditional roasting?
Traditional roasting starts hot and stays hot, which can cook the outside faster than the inside. The reverse sear slowly cooks the meat first, ensuring even doneness, then adds a sear for crust, resulting in a juicier and more tender roast.
Can I use boneless rib roast for this recipe?
While possible, bone-in roasts develop more flavor and retain moisture better. If you use boneless, adjust cooking times and consider an extra rest period for best results.
Final Thoughts
There is something truly special about mastering the Reverse Sear Prime Rib Recipe. It’s a labor of love that pays off with every bite—juicy, tender, and perfectly crusted prime rib that feels like a restaurant-quality feast right from your home kitchen. Trust the process, plan ahead, and get ready to impress everyone around your table. You’ll be so glad you made it!
Print
Reverse Sear Prime Rib Recipe
- Prep Time: 15 minutes (plus 24 hours dry salting time)
- Cook Time: 3 hours 30 minutes (estimated roasting plus final sear)
- Total Time: Approximately 27 hours (including 24-hour dry salting and resting times)
- Yield: 8 to 8 servings
- Category: Main Course
- Method: Baking
- Cuisine: American
Description
This Reverse Sear Prime Rib recipe offers a perfectly cooked, juicy rib roast with a flavorful crust using a two-step cooking method. It involves a low-temperature slow roast to ensure even doneness and tender texture, followed by a high-heat sear to develop a beautifully browned crust. Ideal for special occasions, this hands-off approach requires some planning ahead but delivers restaurant-quality results at home.
Ingredients
Prime Rib Roast
- 1 (6-pound) bone-in standing rib roast (fat trimmed to about 1/2 inch)
Seasonings
- Kosher salt (generously for dry salting)
- Freshly ground black pepper (to taste)
- 4 tablespoons unsalted butter (softened)
- Fresh rosemary and/or thyme (optional, for mixing with butter)
Instructions
- Before you begin (important timing notes): Read all steps carefully. Salt the roast 24 hours ahead for optimal flavor and texture. Allow about 2 hours for the roast to rest at room temperature before cooking. The low-temperature roast takes 3 to 4 hours depending on oven temperature and size. After a long rest of 30–60 minutes, the final sear takes 5–10 minutes, followed by a short rest before slicing.
- Seasoning (ideally 24 hours ahead): Generously season the roast with kosher salt on all sides. Place on a rack over a baking sheet and refrigerate loosely covered to allow the surface to dry and salt to penetrate deeply. This step is critical for flavor and crust development. If short on time, season as early as possible.
- Preparation before roasting: Remove the roast from the refrigerator about 2 hours before cooking to reach room temperature. If using butter, mix softened butter with black pepper and optional herbs, then slather evenly over the roast. If not using butter, simply season generously with black pepper.
- Prepare for roasting: Preheat your oven to a low temperature between 200°F and 225°F. Place the roast fat side up on a roasting rack inside a roasting pan or a wire rack in a rimmed baking sheet. Insert a meat thermometer into the thickest part of the roast, avoiding the bone.
- Low-temperature slow roast: Roast the meat until it reaches your desired internal temperature before searing: Rare (120–125°F), Medium-rare (130°F), Medium (135°F), or USDA minimum (145°F). The total roasting time varies but generally is about 30 minutes per pound at 225°F or 30–45 minutes per pound at 200°F. Use the thermometer to monitor doneness rather than relying on time alone.
- Resting (critical for juicy meat): Remove the roast from the oven, tent loosely with foil and let it rest at room temperature for 30 to 60 minutes to allow juices to redistribute and develop even cooking.
- High-temperature searing: Increase the oven temperature to 450–500°F. Ensure good ventilation and safety precautions due to possible smoke. If excess fat has collected, transfer the roast to a clean pan before searing. When fully heated, return the roast and sear for 5 to 8 minutes until a deep brown crust forms. Monitor closely to prevent burning.
- Final rest and serving: Remove the roast from the oven and let it rest a few minutes before carving. Slice and serve immediately for best flavor and texture.
Notes
- Salt the roast ideally 24 hours before cooking for best flavor and texture development.
- Allow the roast to come to room temperature before cooking for more even results.
- Use an accurate meat thermometer to ensure perfect doneness.
- Ventilate your kitchen well during the high-heat sear to manage smoke.
- Resting both before and after searing is crucial for juicy and tender meat.
- If pressed for time, at minimum salt as early as possible and adjust resting periods accordingly.
- This technique is flexible for selecting rare to medium doneness levels.


