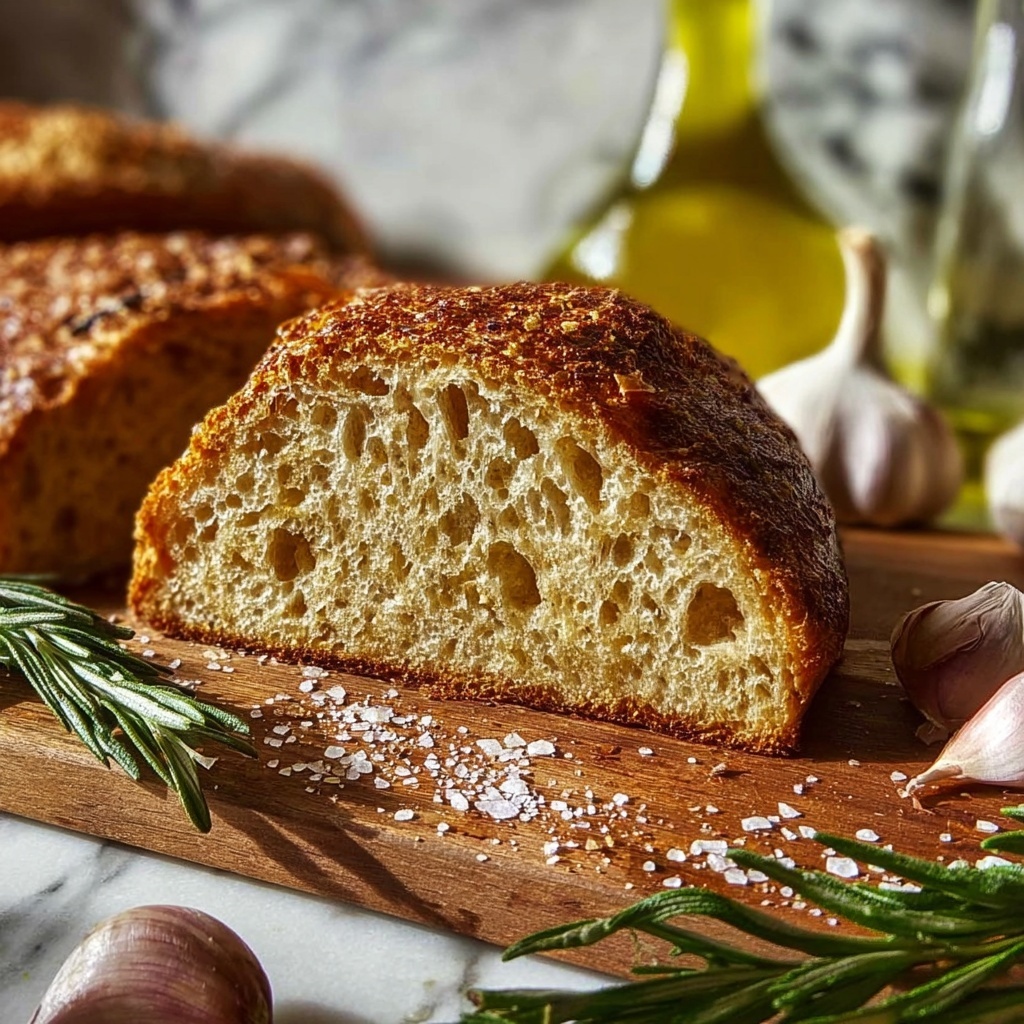
If you love the idea of filling your kitchen with the irresistible scent of fresh herbs and roasted garlic, you are going to adore this Rosemary & Roasted Garlic Artisan Bread Recipe. This bread is more than just a side; it’s a flavorful centerpiece with a perfectly crispy crust and tender, aromatic crumb bursting with the savory essence of garlic and fragrant rosemary. Whether you’re a seasoned baker or just starting, this recipe guides you through creating a rustic loaf that feels handmade and special, guaranteed to impress family and friends alike. It’s the kind of bread you’ll find yourself reaching for again and again.
Ingredients You’ll Need
The magic of this Rosemary & Roasted Garlic Artisan Bread Recipe lies in its simplicity and quality ingredients. Each one plays a vital role: from the yeast that breathes life into the dough to the fresh rosemary that infuses every bite with herbal brightness.
- 3 cups all-purpose flour: The foundation for your bread’s structure and texture.
- 1 1/4 cups warm water (about 110°F): Activates the yeast and hydrates the flour for perfect dough consistency.
- 2 teaspoons active dry yeast: The leavening agent responsible for the bread’s rise.
- 1 teaspoon salt: Enhances flavor and tightens gluten for a better crumb.
- 1 tablespoon sugar: Feeds the yeast and adds just a touch of sweetness.
- 2 tablespoons olive oil: Adds moisture and richness to the dough.
- 2 tablespoons fresh rosemary, finely chopped: Delivers that unmistakable piney, fragrant note.
- 1 head of garlic: Roasted to mellow sweetness and savory depth.
- Extra olive oil for roasting garlic: Keeps the garlic luscious and rich during roasting.
- Additional flour for dusting: Prevents sticking while kneading and shaping.
How to Make Rosemary & Roasted Garlic Artisan Bread Recipe
Step 1: Roast the Garlic to Perfection
Start by roasting the garlic, which is the soul of this recipe. Preheat your oven to 400°F and prepare the garlic by slicing off the top to expose the cloves. Drizzle generously with olive oil, wrap it tightly in foil, and roast for 30 to 35 minutes until the cloves are soft and golden. Let it cool, then squeeze out the cloves and mash them with a fork. This roasted garlic paste adds deep, mellow sweetness that elevates your bread beyond the ordinary.
Step 2: Activate the Yeast
In a large bowl, mix the warm water, sugar, and active dry yeast. Let it sit for 5 to 10 minutes until it forms a foamy layer on top. This bubbly sign means your yeast is alive and ready to work its magic, ensuring a nice rise for your artisan bread.
Step 3: Combine Wet Ingredients
Add the mashed roasted garlic, olive oil, and salt to the yeast mixture. Stir well to combine these flavorful components, creating a fragrant base for the dough.
Step 4: Incorporate the Flour Gradually
Slowly add the flour, one cup at a time, stirring until a rough, shaggy dough forms. This method helps you control the dough texture so it isn’t too sticky or too dry, setting the stage for perfect kneading.
Step 5: Knead Until Smooth and Elastic
Turn the dough onto a lightly floured surface and knead for 8 to 10 minutes. The dough should become smooth, elastic, and just a little tacky. This kneading develops the gluten network, which creates that desired airy yet chewy crumb.
Step 6: Fold in the Fresh Rosemary
During the last few minutes of kneading, sprinkle in the finely chopped rosemary and work it evenly into the dough. This ensures that every bite bursts with herbaceous flavor without overpowering the gentle garlic notes.
Step 7: First Rise in a Warm Place
Place the dough in a greased bowl, cover it with a damp cloth, and let it rise somewhere warm. After about an hour or two, it should have doubled in size. This proofing stage creates air pockets that give your bread its signature lightness.
Step 8: Shape the Loaf
Gently punch down your dough to release excess air, then shape it into the desired form, typically a rustic round loaf. Place it on a baking sheet lined with parchment paper for an easy release after baking.
Step 9: Second Rise for Full Volume
Cover the shaped dough with a clean cloth and let it rise for another 30 to 45 minutes. This final rise encourages a lighter, fluffier texture thanks to the additional fermentation time.
Step 10: Prepare for Baking
Preheat your oven to 375°F while the dough rises. Right before baking, make a few shallow slashes on the surface of your loaf using a sharp knife. These cuts allow escaping steam and add a beautiful rustic look.
Step 11: Bake to Golden Brown Perfection
Slide your loaf into the preheated oven and bake for 25 to 30 minutes until golden and crisp. You’ll know it’s done when the bread sounds hollow when tapped on the bottom, signaling the crust has developed perfectly.
Step 12: Cool Before Slicing
Once out of the oven, transfer your artisan bread to a wire rack to cool completely before slicing. This resting time helps the crumb set so each slice holds together beautifully.
How to Serve Rosemary & Roasted Garlic Artisan Bread Recipe
Garnishes
To elevate your serving experience, consider brushing some melted herb-infused butter or a drizzle of high-quality olive oil on freshly sliced bread. Sprinkle a pinch of flaky sea salt or extra fresh rosemary for an eye-catching and flavorful finish that will wow your guests.
Side Dishes
This bread pairs wonderfully with hearty soups like tomato basil or butternut squash, and it shines alongside charcuterie boards featuring cheeses, olives, and cured meats. It’s also a perfect companion to fresh salads and robust stews, soaking up sauces and juices with ease.
Creative Ways to Present
Go beyond the ordinary by hollowing out your loaf to create a bread bowl, perfect for dips or creamy soups. You can also slice the bread thickly, toast it, then top with bruschetta or herbed goat cheese for a scrumptious appetizer that highlights your Rosemary & Roasted Garlic Artisan Bread Recipe in new and delicious ways.
Make Ahead and Storage
Storing Leftovers
To keep your artisan bread fresh, store it in a paper bag or bread box at room temperature. Avoid plastic bags as they trap moisture and soften the crust. Your bread should stay fresh for 2 to 3 days this way, perfect for enjoying over several meals.
Freezing
If you want to save some for later, slice the bread and freeze it wrapped tightly in plastic wrap and aluminum foil or stored in a freezer-safe bag. This keeps the loaf’s freshness intact for up to 3 months and allows you to grab slices as needed.
Reheating
To revive the fresh-from-the-oven texture, simply toast frozen slices directly in a toaster or oven. For a whole loaf, warm it in a 350°F oven for 10 to 15 minutes. This light reheating crisps the crust and warms the crumb, making you feel like you just baked the bread again.
FAQs
Can I use dried rosemary instead of fresh?
While fresh rosemary offers the best brightness and aroma, dried rosemary can be used in a pinch. Use about half the amount since dried herbs are more concentrated, but keep in mind fresh will give a more vibrant flavor and texture.
Do I have to roast the garlic first?
Roasting the garlic mellows its sharpness and brings out a sweet, almost buttery flavor that infuses the bread beautifully. Using raw garlic will produce a much stronger, pungent taste, which might overpower the balance of flavors in this recipe.
What is the best way to knead the dough?
Knead on a lightly floured surface using the heel of your hand to push the dough away, then fold it over and turn. Repeat this rhythmic motion until the dough is smooth and elastic. Good kneading develops the gluten that gives artisan bread its perfect bite.
Can I use whole wheat flour instead of all-purpose?
Whole wheat flour can be used, but it will produce a denser loaf with a nuttier flavor. You might want to substitute only part of the all-purpose flour (for example, half whole wheat and half all-purpose) to keep the texture airy.
How do I know when the bread is fully baked?
A reliable way is to tap the bottom of the loaf — it should sound hollow if it’s fully baked. The crust should be a deep golden brown and firm to the touch, signaling that the interior is cooked through and beautifully airy.
Final Thoughts
Baking bread at home is always a rewarding experience, but this Rosemary & Roasted Garlic Artisan Bread Recipe takes it to a whole new level with its harmonious blend of flavors and rustic charm. Trust me, once you try this, your kitchen will become a haven of delicious aromas and your family or friends will keep asking for more. So grab those simple ingredients and bake your way to bread heaven—you won’t regret it!
Print
Rosemary & Roasted Garlic Artisan Bread Recipe
- Prep Time: 0h 45m
- Cook Time: 1h 0m
- Total Time: 1h 45m
- Yield: 1 medium artisan loaf (about 10-12 servings)
- Category: Bread
- Method: Baking
- Cuisine: Italian
- Diet: Vegetarian
Description
This Rosemary & Roasted Garlic Artisan Bread is a fragrant, rustic loaf perfect for artisanal sandwich making or as a flavorful accompaniment to soups and salads. Featuring roasted garlic cloves mashed into the dough and fresh chopped rosemary, this bread combines the natural sweetness of caramelized garlic with the earthy aroma of rosemary, resulting in a soft, elastic crumb and a golden crust with a subtle herbal note.
Ingredients
Dough Ingredients
- 3 cups all-purpose flour
- 1 1/4 cups warm water (about 110°F)
- 2 teaspoons active dry yeast
- 1 teaspoon salt
- 1 tablespoon sugar
- 2 tablespoons olive oil
- 2 tablespoons fresh rosemary, finely chopped
Roasted Garlic
- 1 head of garlic
- Extra olive oil for roasting garlic
Additional
- Additional flour for dusting
Instructions
- Roast the Garlic: Preheat your oven to 400°F. Slice the top off the garlic head to expose the cloves, drizzle with olive oil, wrap it tightly in aluminum foil, and roast for 30-35 minutes until the cloves are soft and golden. Let it cool, then squeeze the roasted cloves into a bowl and mash them with a fork. Set aside.
- Activate the Yeast: In a large mixing bowl, combine warm water, sugar, and active dry yeast. Allow the mixture to rest for 5-10 minutes until it becomes foamy, indicating the yeast is active.
- Mix Wet Ingredients: Add the mashed roasted garlic, olive oil, and salt to the activated yeast mixture. Stir to combine evenly.
- Add Flour: Gradually add the all-purpose flour one cup at a time, stirring continuously until a shaggy dough forms.
- Knead the Dough: Transfer the dough onto a lightly floured surface and knead for 8-10 minutes until the dough is smooth and elastic.
- Incorporate Rosemary: Sprinkle the finely chopped rosemary over the dough during the last few minutes of kneading to evenly distribute the herb.
- First Rise: Place the dough in a greased bowl, cover with a damp cloth, and let it rise in a warm place for 1-2 hours or until it doubles in size.
- Shape the Dough: Punch down the risen dough to release air bubbles. Shape it into a round loaf or your preferred shape and place it on a parchment-lined baking sheet.
- Second Rise: Cover the shaped dough with a cloth and allow it to rise for another 30-45 minutes.
- Preheat the Oven: Set your oven to 375°F while the dough completes its second rise. Before baking, make shallow slashes on the loaf’s surface to help steam escape and add an aesthetic finish.
- Bake the Bread: Bake the loaf in the preheated oven for 25-30 minutes until golden brown and producing a hollow sound when tapped on the bottom.
- Cool the Bread: Remove the bread from the oven and transfer it onto a wire rack to cool completely before slicing.
Notes
- Make sure your water is warm, not hot, to properly activate the yeast.
- Roasting garlic mellows out its flavor, giving the bread a sweet, rich garlic taste.
- Allowing the dough to rise properly is crucial for a light, airy crumb.
- Extra flour for dusting prevents the dough from sticking during kneading.
- Use a sharp knife or bread lame for making slashes on the dough surface before baking.
- Letting the bread fully cool before slicing preserves the texture and prevents gummy crumb.


