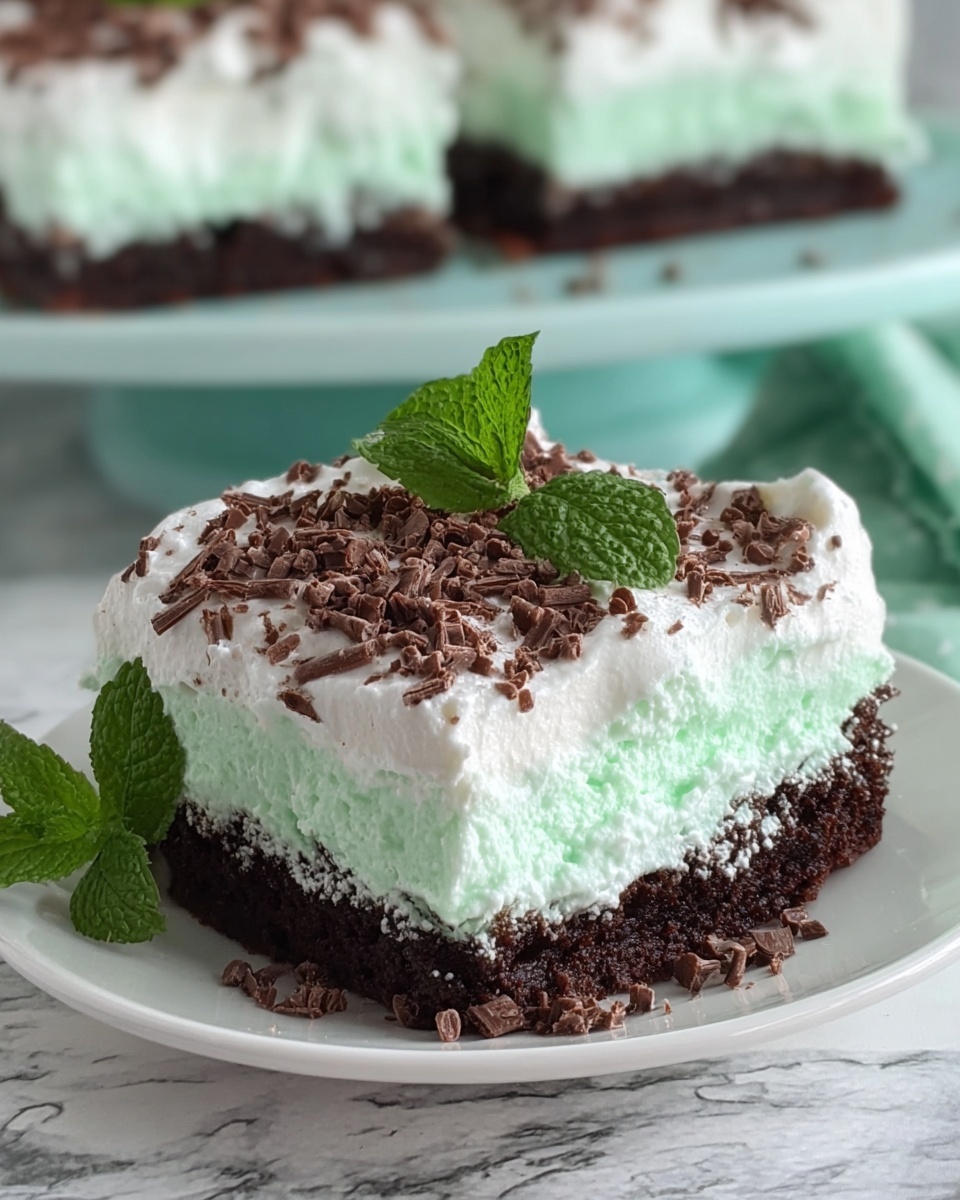
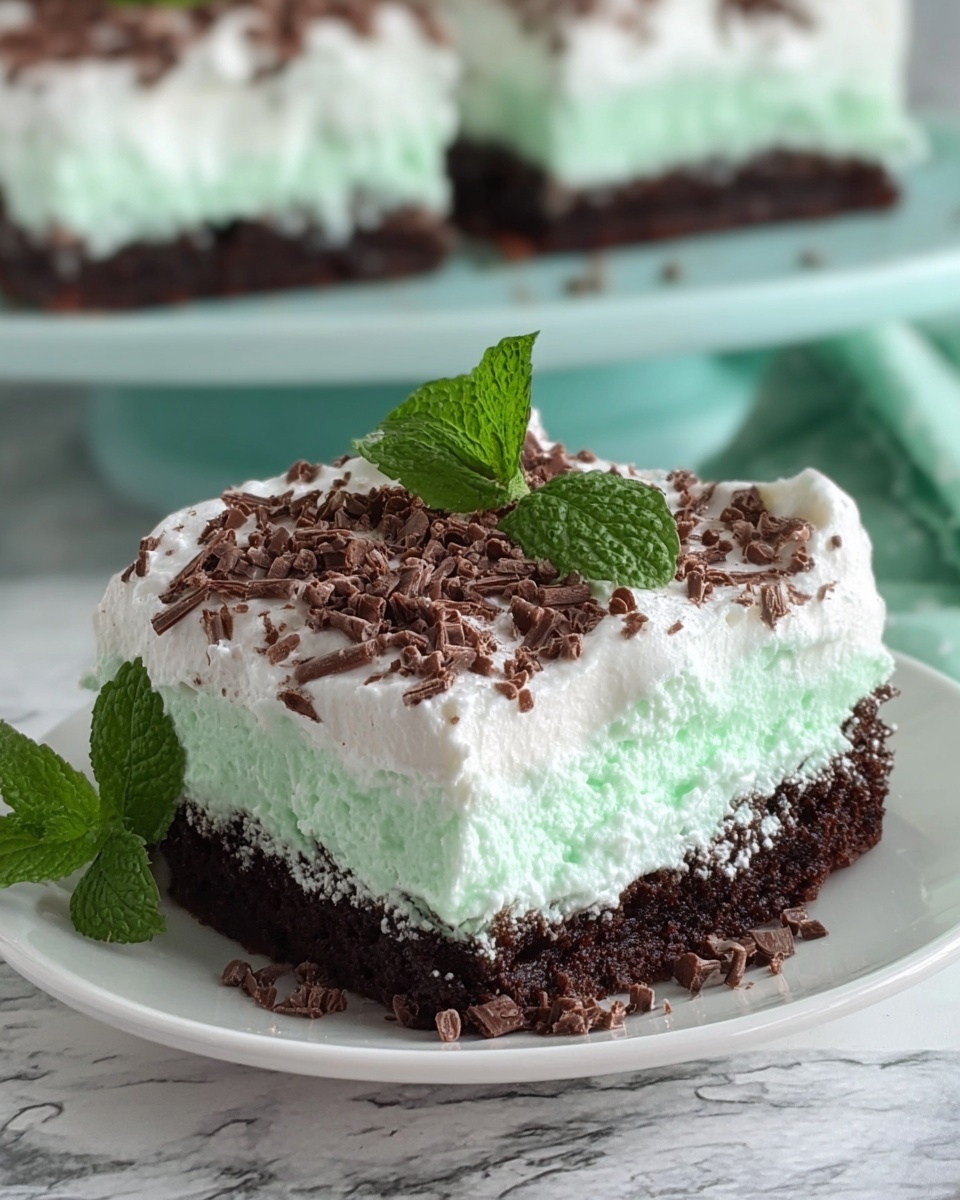
If you’re searching for a dessert that feels like a hug wrapped in chocolate and minty freshness, then look no further than this Andes Mint Poke Cake Recipe. It’s the perfect combination of rich chocolate cake, cool peppermint-infused pudding, and that iconic, crunchy Andes mint crunch that brings every bite to life. Whether you’re making it for a festive occasion or simply craving an indulgent treat, this cake is sure to become a beloved favorite, offering a fun twist on classic poke cake that’s both refreshing and decadently satisfying.

Ingredients You’ll Need
Putting together this Andes Mint Poke Cake Recipe is delightfully simple, and each ingredient plays a key role in building layers of flavor and texture. From the tender chocolate cake base to the cool, minty pudding filling, these components come together to create a dessert with depth and balance.
- Chocolate cake mix: The foundation of the cake, providing moist, rich chocolate flavor with minimal effort.
- Instant chocolate pudding mix: Adds a velvety, creamy texture and deep cocoa taste that complements the cake perfectly.
- Milk: Essential for preparing the pudding smoothly and achieving the right consistency.
- Peppermint extract: Infuses a refreshing minty aroma and flavor that pairs beautifully with chocolate.
- Cool Whip: Lightens the dessert with a fluffy, creamy topping that balances the dense layers below.
- Crushed Andes mints: These add that signature cool mint crunch and a wonderful textural contrast on top.
How to Make Andes Mint Poke Cake Recipe
Step 1: Bake the Cake
First things first — preheat your oven to 350 degrees Fahrenheit to get things warming up. Mix the chocolate cake batter as directed on the box, then pour it into a 9 by 13-inch pan. Bake just like the package instructions say until it’s perfectly tender and a toothpick comes out clean. This step builds the sturdy, chocolaty base your pudding layer will soak into.
Step 2: Cool Completely
Patience is key here. Letting the cake cool all the way down ensures the pudding mixture won’t melt into a gooey mess when poured over. This cooling phase helps the flavors meld and the texture stay just right later on.
Step 3: Prepare the Peppermint Chocolate Pudding
Whisk together the instant pudding mix, milk, and peppermint extract until you get a smooth, shiny mixture. Let it sit for about two minutes to thicken just a bit, creating that luscious consistency that will soak perfectly into the poked cake below.
Step 4: Poke the Cake
Using the handle of a wooden spoon, make holes all over the cooled cake. This step is what makes a poke cake so special — those little holes are going to absorb the pudding, keeping each bite moist, flavorful, and refreshing with every forkful.
Step 5: Pour the Pudding Over
Gently pour your peppermint chocolate pudding mixture all across the top of the cake, making sure to fill those holes evenly. Use a spatula to spread it out smoothly, ensuring every nook and cranny gets coated in that mint-chocolate goodness.
Step 6: Add the Cool Whip Layer
Spread the thawed Cool Whip over the pudding layer to create a light, airy topping. This brings a creamy contrast to the dense cake and pudding beneath, making this dessert feel perfectly balanced in every bite.
Step 7: Sprinkle Crushed Andes Mints
Now for the best part: sprinkling crushed Andes mints over the Cool Whip. These minty morsels add an undeniable crunch and that classic Andes flavor that makes this poke cake so irresistible. Feel free to add even more as a garnish for a show-stopping finish.
Step 8: Chill and Serve
Pop the cake into the refrigerator for at least two hours. This chilling time allows all the flavors to meld beautifully and the layers to set for the perfect slice. When ready, slice into generous pieces and enjoy the wonderful mix of minty refreshment and rich chocolate.
How to Serve Andes Mint Poke Cake Recipe

Garnishes
While crushed Andes mints on top are a must, consider adding a few whole mints or a light dusting of cocoa powder for extra flair. Fresh mint leaves can also elevate the look and add a pop of color that hints at the cake’s vibrant flavor.
Side Dishes
This cake is a star on its own, but if you want to pair it, think about a scoop of vanilla bean ice cream or a simple bowl of fresh berries. The contrast of warm, fruity brightness or cold creaminess balances the rich mint-chocolate flavors effortlessly.
Creative Ways to Present
Serve this Andes Mint Poke Cake Recipe in individual glass cups for a chic layered dessert presentation, or cut into small bite-sized squares for parties and potlucks. You can even use themed plates or add a drizzle of chocolate sauce on the side for an extra decadent touch.
Make Ahead and Storage
Storing Leftovers
Wrap your cake tightly with plastic wrap or keep it covered in an airtight container in the refrigerator. It stays fresh and moist for up to 4 days, perfect for enjoying leftovers without sacrificing flavor or texture.
Freezing
If you want to save some for later, this poke cake freezes well. Cover it tightly with foil and plastic wrap, then freeze for up to 2 months. Thaw it overnight in the refrigerator before serving, and it will be just as delicious.
Reheating
Because this is a chilled dessert, reheating isn’t typically recommended. Instead, let it come to a slightly warmer temperature at room temperature for about 20 minutes if it’s too cold straight out of the fridge. This softens the layers without melting the Cool Whip topping.
FAQs
Can I make this Andes Mint Poke Cake Recipe from scratch instead of using cake mix?
Absolutely! While cake mix saves time, a homemade chocolate cake recipe works wonderfully too. Just ensure it’s moist so the pudding seeps in nicely when poked.
What if I don’t have peppermint extract? Can I use something else?
Peppermint extract is key for that signature mint flavor, but if you’re out, a subtle hint of spearmint or a few drops of mint syrup can be a decent substitute, though the taste will vary slightly.
Is it necessary to use Cool Whip, or can I use whipped cream?
Cool Whip provides that light, stable layer that holds up well, but fresh whipped cream works beautifully if you prefer a richer, less sweet topping—just be mindful it might soften faster.
How do the Andes mints hold up when crushed and refrigerated on the cake?
They maintain a nice crunch and the minty chocolate flavor softens just enough to meld with the creamy topping, creating a wonderful texture contrast that’s hard to resist.
Can I make this cake gluten-free?
Yes! Use a gluten-free chocolate cake mix and ensure your pudding mix is gluten-free too. The rest of the ingredients are naturally gluten-free, making this recipe adaptable for many diets.
Final Thoughts
Making the Andes Mint Poke Cake Recipe is like inviting a fresh twist of cool mint into a classic chocolate dessert, delivering layers of flavor that are as fun to make as they are to eat. Whether it’s a family gathering, a holiday treat, or just a weekend indulgence, this cake is certain to bring joy and smiles to anyone who tries it. So go ahead, give it a whirl—your taste buds will thank you!
Print
Andes Mint Poke Cake Recipe
- Prep Time: 20 minutes
- Cook Time: 35 minutes
- Total Time: 2 hours 55 minutes
- Yield: 12 servings
- Category: Dessert
- Method: Baking
- Cuisine: American
Description
This Andes Mint Poke Cake is a luscious chocolate dessert featuring moist chocolate cake infused with peppermint-flavored chocolate pudding, topped with creamy Cool Whip and crushed Andes mints for a refreshing minty crunch. Perfect for mint and chocolate lovers seeking a festive, easy-to-make treat.
Ingredients
Cake
- 1 box chocolate cake mix (plus ingredients listed on the box)
Pudding Mixture
- 1 box (3.4 oz) instant chocolate pudding mix
- 2 cups milk
- 1/2 teaspoon peppermint extract
Topping
- 1 container (8 oz) Cool Whip, thawed
- 1 cup crushed Andes mints (plus more for garnish)
Instructions
- Bake the Cake: Preheat your oven to 350°F (175°C). Prepare the chocolate cake mix according to the package instructions. Pour the batter into a 9×13 inch pan and bake as directed on the box, usually about 30–35 minutes. Allow the cake to cool completely before moving to the next step.
- Prepare the Pudding: In a medium bowl, whisk together the instant chocolate pudding mix, milk, and peppermint extract until smooth and well combined. Let the pudding sit for approximately 2 minutes to thicken slightly.
- Poke the Cake: Using the handle of a wooden spoon or a similar tool, poke holes evenly all over the cooled cake, going about halfway through the cake without cutting all the way through.
- Assemble: Pour the prepared peppermint chocolate pudding evenly over the cake, making sure it fills all the holes to maximize flavor throughout. Then, spread the thawed Cool Whip gently over the pudding layer to create a creamy topping.
- Add Toppings: Sprinkle 1 cup of crushed Andes mints all over the Cool Whip layer, adding extra crushed mints for garnish if desired. This adds the signature refreshing mint chocolate crunch to the cake.
- Chill: Refrigerate the cake for at least 2 hours to allow the pudding to set and the flavors to meld together perfectly.
- Serve: Slice the cake into 12 servings and enjoy chilled for a delightful mint-chocolate dessert experience.
Notes
- For best results, ensure the cake is fully cooled before poking and adding the pudding layer to avoid melting the pudding.
- If Andes mints are unavailable, substitute with other mint chocolate candies.
- Thaw Cool Whip completely before spreading to achieve a smooth topping.
- Store leftovers covered in the refrigerator for up to 3 days.


