
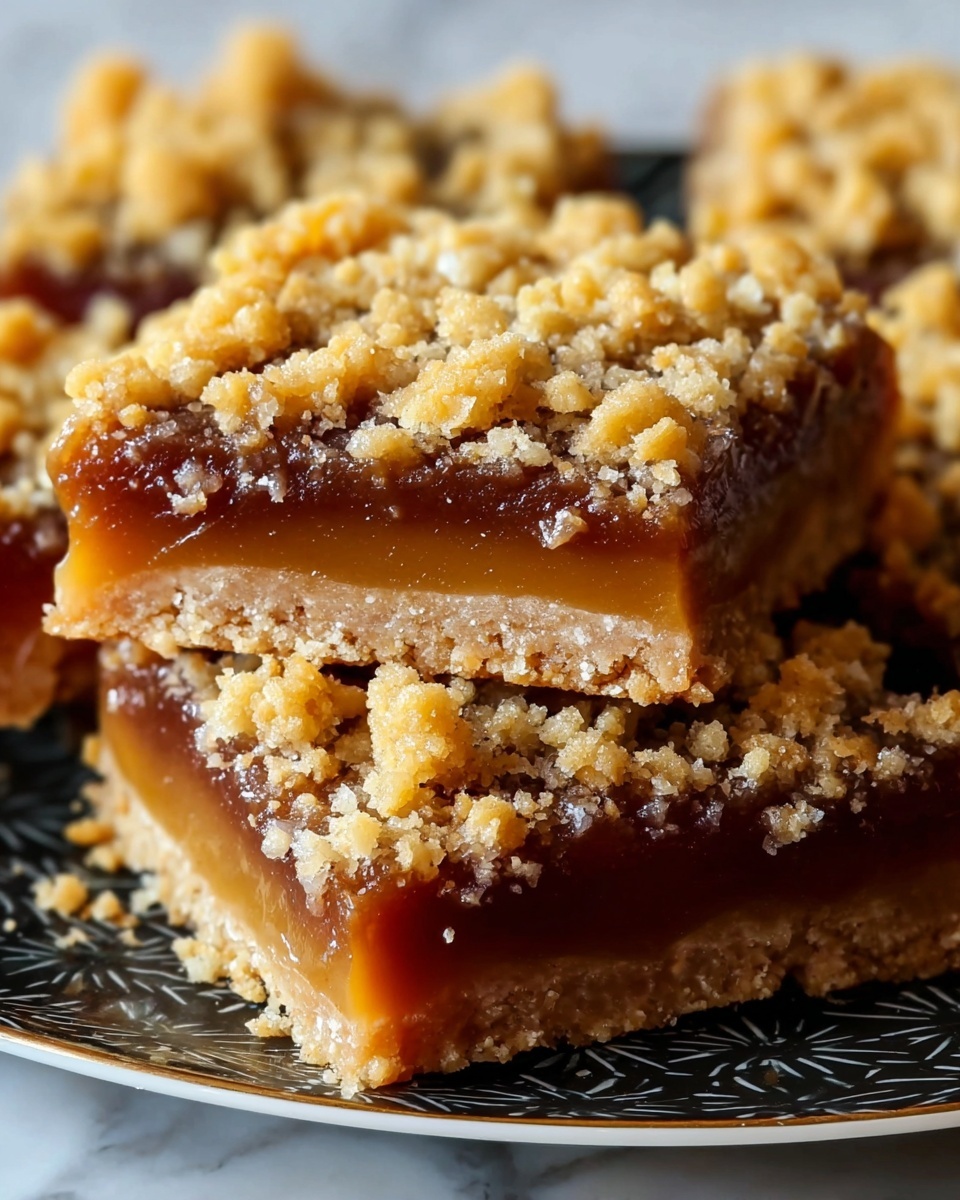
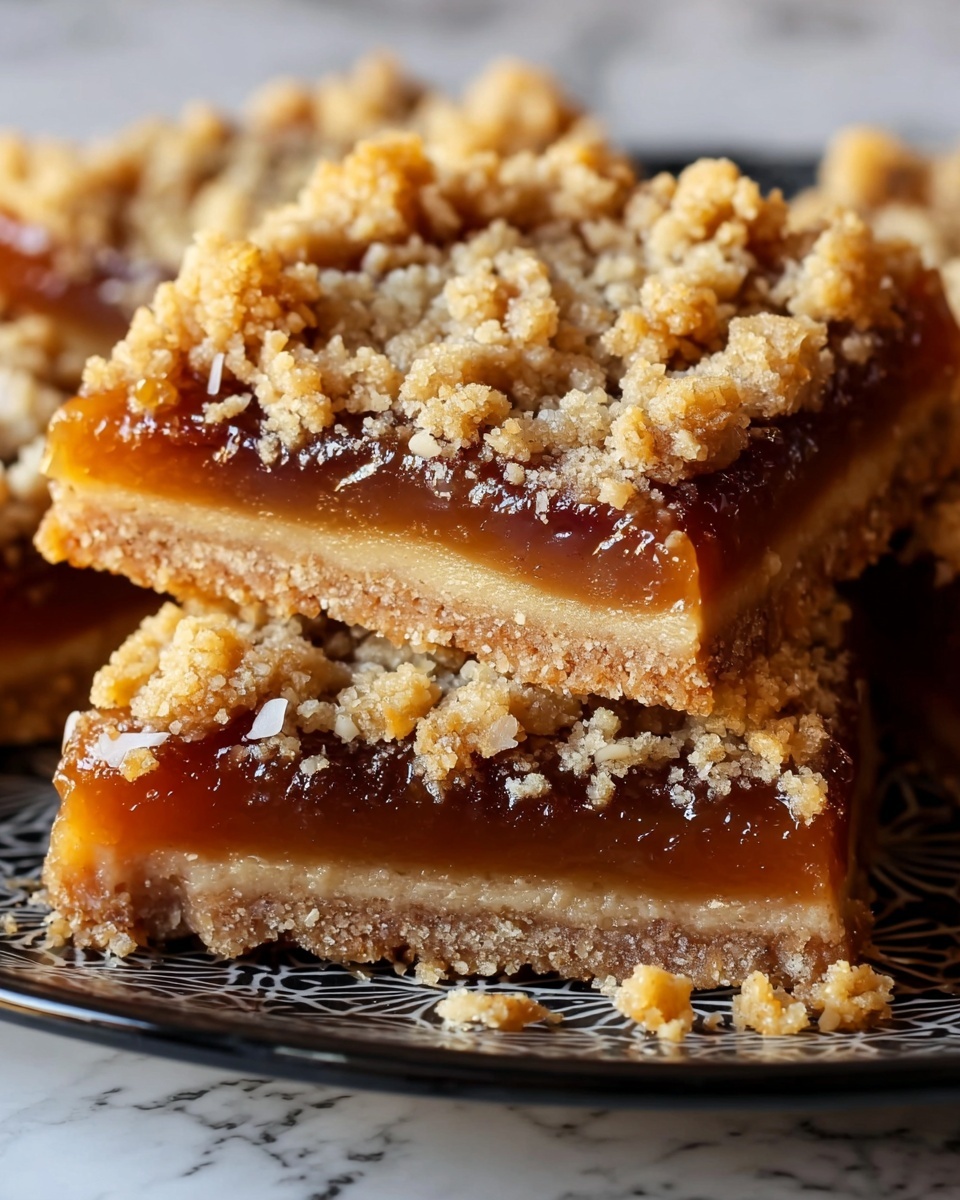
If you have a soft spot for rich, chewy, and chocolatey treats, then this Caramelitas Recipe is about to become your new obsession. Picture layers of buttery oat goodness hugging a luscious, homemade caramel center that melts perfectly with bursts of chocolate chips in every bite. It’s the kind of dessert that feels like a warm hug, and whether you’re sharing with friends or sneaking a piece for yourself, these bars never fail to deliver that perfect balance of sweet, chewy, and slightly crunchy textures.
Ingredients You’ll Need
Don’t be fooled by its impressive taste and texture—this Caramelitas Recipe relies on a handful of simple, pantry-friendly ingredients that come together beautifully. Each element plays a crucial role, from the crunchy oats adding heartiness to the silky caramel that creates that irresistible gooey middle.
- Rolled oats (1 cup): Gives the bars a hearty texture and wholesome chewiness.
- Melted butter (¾ cup): Adds richness and helps bind everything together.
- All-purpose flour (1 cup): Provides structure to the oat base and top layer.
- Brown sugar (¾ cup): Brings warmth and depth of sweetness.
- Baking soda (1 teaspoon): A little leavening for just the right softness.
- Soft caramels (about 11 oz): The star ingredient for that creamy, gooey caramel center.
- Chocolate chips (1 cup): Melts into sweet pockets throughout the bars.
- Heavy cream (½ cup): Used to melt down the caramels into a silky sauce.
How to Make Caramelitas Recipe
Step 1: Prepare Your Baking Setup
Begin by greasing an 8×8-inch baking pan so nothing sticks and the bars come out effortlessly. Preheat your oven to 350°F (175°C). Having the oven ready early sets the pace for a smooth baking process.
Step 2: Create That Luscious Caramel
In a small saucepan, combine the soft caramels and heavy cream over medium heat. Stir constantly until everything melts into a rich, velvety caramel sauce. This step is where patience pays off, as a smooth caramel is the heart of these bars.
Step 3: Mix the Oat Base
In a mixing bowl, whisk together melted butter, brown sugar, flour, rolled oats, and baking soda until fully combined. This mixture forms both the base and the topping, delivering that wonderful chew combined with a touch of crunch.
Step 4: Press and Bake the Base Layer
Press half of the oat mixture firmly into the bottom of the prepared baking pan. Make sure it’s evenly spread, as this layer will act as the sturdy foundation of your bars. Pop it into the oven and bake for 10 minutes—it will start to golden and set beautifully.
Step 5: Add Chocolate and Caramel Layers
Once the base is baked, remove the pan from the oven and sprinkle the chocolate chips evenly across the warm crust. Immediately pour the caramel sauce over the chocolate, allowing heat to slightly melt those chips for extra gooeyness.
Step 6: Top with Remaining Oat Mixture
Gently spread the remaining oat mixture over the caramel layer, pressing lightly to form a cohesive top crust. This ensures everything holds together once baked and adds a delightful texture contrast.
Step 7: Final Bake
Return the pan to the oven for about 20 minutes, until the top is golden and inviting. The aroma filling your kitchen is going to be amazing—get ready to savor that moment.
Step 8: Cool and Cut
Let your caramelitas cool completely in the pan before slicing them into squares. Cooling allows the layers to set nicely, so your bars hold their shape and are less messy to eat.
How to Serve Caramelitas Recipe
Garnishes
To elevate presentation, a light dusting of powdered sugar or a drizzle of melted chocolate enhances the visual appeal without overwhelming flavors. You can even sprinkle a pinch of flaky sea salt on top for a lovely sweet-salty contrast that pairs wonderfully with the caramel.
Side Dishes
Caramelitas are perfect alongside a scoop of vanilla ice cream, a dollop of whipped cream, or a cup of your favorite coffee or tea. These simple accompaniments balance the richness of the bars and make every bite even more indulgent.
Creative Ways to Present
Try layering caramelitas in a glass dessert parfait with alternating layers of whipped cream and fresh berries for a stunning visual treat. Alternatively, slightly warm a single bar and serve it with a hot fudge drizzle and chopped nuts for a decadent dessert experience.
Make Ahead and Storage
Storing Leftovers
Store any leftover caramelitas in an airtight container at room temperature for up to four days. Keeping them at room temp ensures the caramel stays soft and the top layer maintains its pleasant chewiness.
Freezing
If you want to keep these bars longer, wrap individual squares tightly in plastic wrap and place them in a freezer-safe container or bag. They freeze beautifully for up to three months and thaw quickly at room temperature.
Reheating
To enjoy caramelitas fresh from the freezer, microwave wrapped squares for about 20 seconds or until slightly warm. This helps revive the gooey caramel and melts the chocolate chips back to their irresistible state.
FAQs
Can I use quick oats instead of rolled oats?
Quick oats can be used but will alter the texture slightly, resulting in bars that are less chewy and a bit softer. Rolled oats provide the best classic chew and texture for caramelitas.
What if I don’t have soft caramels? Can I make my own caramel?
You can definitely whip up a homemade caramel sauce using sugar, butter, and cream if you don’t have soft caramels. Just ensure it’s thick and pourable to mimic the store-bought caramel layer.
Can I substitute chocolate chips with another type of chocolate?
Absolutely! Chopped chocolate bars, white chocolate chips, or even butterscotch chips can work wonderfully, adding a unique twist to your caramelitas.
Is it necessary to pre-bake the oat base before adding the caramel?
Pre-baking the base ensures it sets firmly and prevents it from becoming soggy once the caramel is added. It’s a crucial step for that perfect texture contrast in the bars.
How long will caramelitas last once baked?
Stored properly in an airtight container, caramelitas should stay delicious for up to four days at room temperature. Beyond that, freezing is your best bet to maintain freshness.
Final Thoughts
There’s something truly comforting about a well-made Caramelitas Recipe, and once you try this version, it’s bound to become a staple in your dessert rotation. Its perfect blend of chewy oats, creamy caramel, and melty chocolate chips feels like a treat handcrafted just for you. I can’t wait for you to make these, share them, and enjoy every sweet, gooey bite together!
Print
Caramelitas Recipe
- Prep Time: 15 minutes
- Cook Time: 30 minutes
- Total Time: 45 minutes
- Yield: 9 servings
- Category: Dessert
- Method: Baking
- Cuisine: American
Description
These Caramelitas are delightful layered bars featuring a buttery oat crust, a luscious caramel and chocolate center, and a golden oat topping. Perfect as a sweet treat for any occasion, they combine the chewy texture of oats with the rich flavors of caramel and chocolate in every bite.
Ingredients
Oat Base and Topping
- 1 cup rolled oats
- ¾ cup melted butter
- 1 cup all-purpose flour
- ¾ cup brown sugar
- 1 teaspoon baking soda
Caramel Layer
- 1 bag of soft caramels (around 11 oz)
- ½ cup heavy cream
- 1 cup chocolate chips
Instructions
- Prepare the Baking Pan: Grease an 8×8-inch baking pan thoroughly to prevent sticking and preheat your oven to 350°F (175°C) to ensure it reaches the right temperature for baking.
- Make the Caramel: In a small saucepan over medium heat, combine the soft caramels and heavy cream. Stir continuously until the caramels have fully melted and the mixture is smooth. Once done, remove from heat and set aside.
- Make the Oat Mixture: In a separate large bowl, mix the melted butter, brown sugar, all-purpose flour, rolled oats, and baking soda together until all ingredients are well combined and form a cohesive mixture.
- Press the Base: Take half of the oat mixture and firmly press it into the bottom of the prepared baking dish, spreading it evenly to form the base layer.
- Bake the Crust: Place the pan in the preheated oven and bake the oat crust for 10 minutes until it is slightly set. Remove from the oven, then evenly sprinkle the chocolate chips over the warm crust. Pour the prepared caramel mixture over the chocolate chips carefully.
- Add the Top Layer: Spread the remaining oat mixture over the caramel layer evenly, pressing gently to ensure it sticks and forms a nice top layer.
- Bake the Bars: Return the pan to the oven and bake for an additional 20 minutes, or until the top layer turns golden brown and the bars are cooked through.
- Cool and Serve: Once baked, remove the pan from the oven and allow the bars to cool completely to set properly before cutting into squares and serving.
Notes
- Use an 8×8-inch baking pan for the best thickness and even baking.
- Press the oat mixture firmly to help the bars hold together well.
- Allow the bars to cool fully to ensure clean cutting and better texture.
- Store leftover bars in an airtight container at room temperature for up to 3 days or refrigerate for up to a week.
- For a variation, consider using milk or dark chocolate chips according to preference.
