
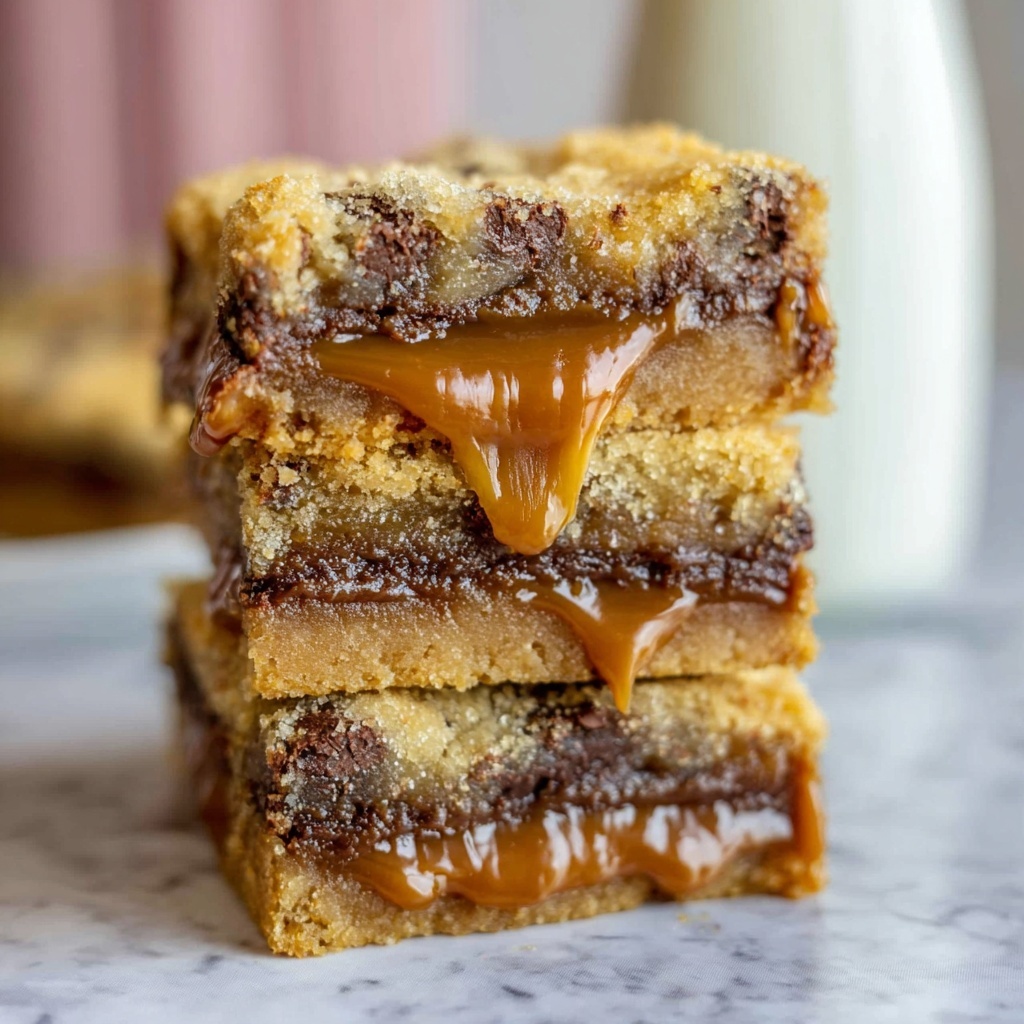
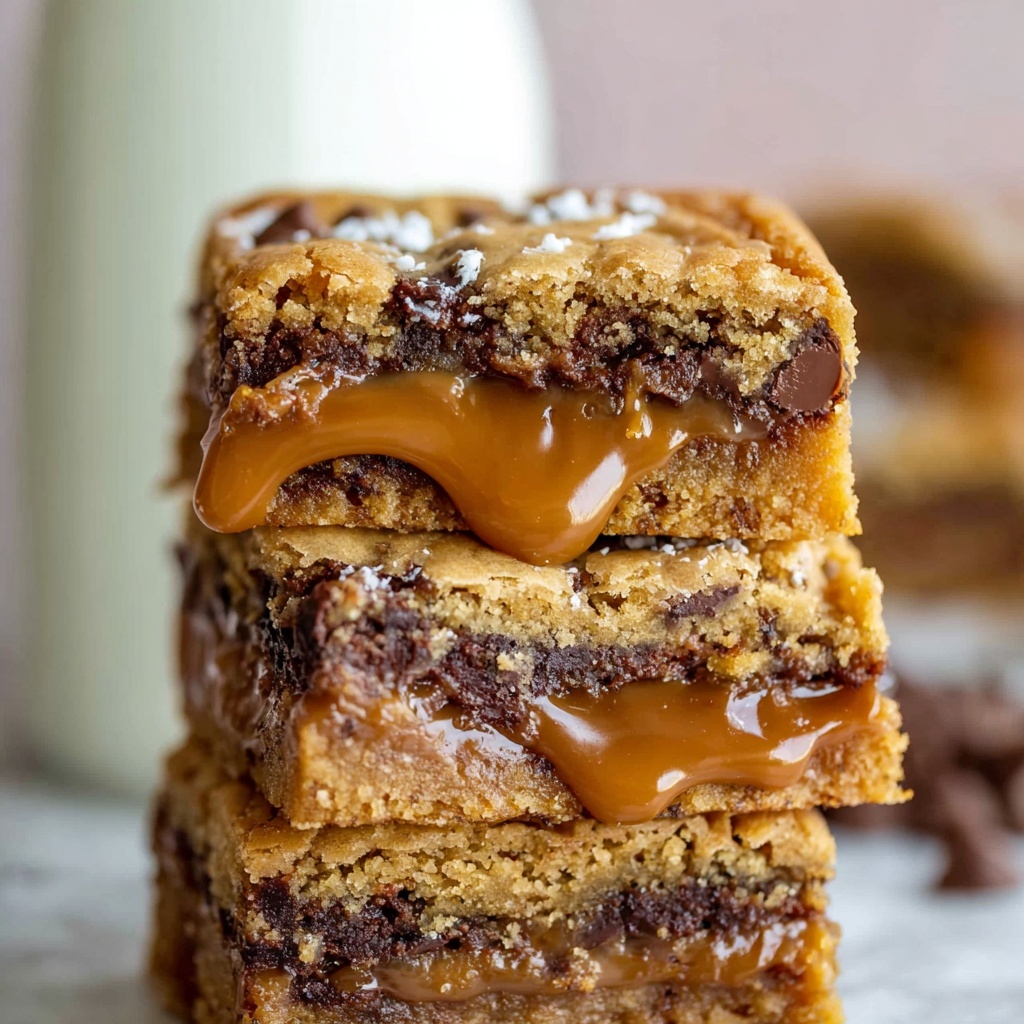
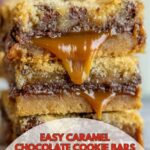
If you’re on the hunt for a treat that’s both chewy and gooey with rich layers of chocolate and caramel, this Carmelita Bars Recipe is exactly what you need. Imagine a buttery cookie crust baked to golden perfection, a luscious caramel layer draped over it, and then topped with more cookie dough that crisps just right. These bars bring the nostalgic comfort of a classic caramel chocolate combination with an easy-to-follow recipe that feels like a warm hug in every bite. Whether you’re sharing at a family gathering or sneaking one for yourself, Carmelita Bars are bound to become a new favorite indulgence.
Ingredients You’ll Need
Gathering simple pantry staples is all it takes to make these irresistible Carmelita Bars Recipe come to life. Each ingredient plays a crucial role—from the butter creating that tender crumb, to the chocolate chips for melty pockets of sweetness, and the caramel that adds that signature gooey texture.
- Butter (12 tablespoons, softened): This rich fat forms the base of your cookie dough, making it tender and flavorful.
- White sugar (1/3 cup + 3 tablespoons): Adds crispness and balances the caramel’s sweetness.
- Brown sugar (3/4 cup): Brings moisture and a subtle molasses flavor to deepen the bars’ taste.
- Egg + 1 egg yolk: Binds the dough and enriches the texture.
- Vanilla (1 1/2 teaspoons): Enhances all the sweet flavors beautifully.
- Flour (2 1/4 cups, spooned and leveled): The structure of your cookie layers starts here.
- Baking soda (3/4 teaspoon): Helps the dough rise slightly, keeping it tender.
- Salt (3/4 teaspoon): Balances the sweetness and highlights flavors.
- Semi-sweet chocolate chips (1 cup): The melty chocolate pockets that make Carmelita bars so addictive.
- Caramels (1 11-oz package or caramel bits): The luscious star of the show, melted over the cookie base.
- Sweetened condensed milk (1/3 cup): Works with the caramels to create that deeply creamy, gooey middle layer.
How to Make Carmelita Bars Recipe
Step 1: Prepare Your Dough
First things first, you have two options here. You can grab a package of refrigerated cookie dough for convenience or whip up your own from scratch using the ingredients above. You definitely don’t need to do both!
Step 2: Mix Your Homemade Dough
If you decide to make your own dough, start by beating the softened butter until fluffy. Add both white and brown sugars and keep beating until light and airy. Now mix in the whole egg, plus the extra yolk, and vanilla extract for that hint of warmth. Slowly add the flour, baking soda, and salt, stirring just until almost combined. Finally, fold in the chocolate chips gently to ensure melty goodness throughout.
Step 3: Get Your Oven Ready
Set your oven temperature to 350 degrees Fahrenheit and line a 9×13-inch pan with foil or parchment paper. Spray the lining lightly with nonstick spray so your bars come out easily after baking.
Step 4: Press in Your Cookie Dough Base
Divide your dough into two halves. Take one half and use your hands to press it evenly and thinly across the bottom of your pan—it might feel a bit fragile, but that’s okay! This will bake into the chewy cookie foundation for your Carmelita Bars Recipe.
Step 5: Bake the Base Layer
Bake the dough in the oven for about 10 minutes or until you notice the edges turning golden. Keep the oven on for the next steps to come.
Step 6: Prepare the Caramel Layer
While the base is baking, combine the caramel pieces and sweetened condensed milk in a microwave-safe bowl. Heat in 30-second bursts, stirring well each time, until mostly smooth with just a few stubborn lumps. Don’t overheat or burn the caramel—you want it perfectly melty and luscious.
Step 7: Spread the Gooey Caramel
Pour the warm caramel mixture evenly over your baked cookie base. Use a spatula to spread it carefully so every corner is decadently coated.
Step 8: Add the Top Cookie Layer
If you’re working with pre-made dough, slice the remaining dough into strips or chunks and place them over the caramel, pinching them together so it forms a mostly solid top layer. For homemade dough, flatten small pieces as thin as you can and place them gently on top of the caramel, trying to cover it as completely as possible without worrying about every tiny peek of caramel that shows through.
Step 9: Final Baking
Return the pan to the oven and bake for 15-17 minutes more. When the top layer is golden brown and the center no longer jiggles, your Carmelita Bars are ready to come out and cool.
Step 10: Let Them Cool
Be patient here! Cooling completely helps the caramel set and makes cutting much neater. If you can’t resist, you’ll get a messy but totally divine caramel overflow, which is a guilty pleasure of its own.
How to Serve Carmelita Bars Recipe
Garnishes
To elevate your Carmelita Bars, try sprinkling flaky sea salt over the top just after baking to add a lovely contrast to the sweet caramel and chocolate. For an extra festive touch, a drizzle of melted dark chocolate or a dusting of powdered sugar works beautifully.
Side Dishes
These bars pair wonderfully with a scoop of vanilla ice cream or a dollop of whipped cream to boost that creamy experience. A hot cup of coffee or warm chai adds warmth and balances out the bars’ decadent sweetness perfectly.
Creative Ways to Present
Cut your Carmelita Bars Recipe into perfect squares for a classic approach, or go rustic by slicing them into uneven rustic pieces for an inviting, homemade look. For parties, arrange them on a decorative platter lined with parchment and garnish with fresh berries to brighten presentation and flavor.
Make Ahead and Storage
Storing Leftovers
Store your Carmelita Bars at room temperature in an airtight container for up to 3 days. If you want to keep them fresh longer, refrigeration is a smart choice, especially in warmer climates, as it keeps the caramel firm and prevents melting.
Freezing
For longer storage, wrap individual bars tightly in plastic wrap and place them in a freezer-safe container or bag. They freeze well for up to 2 months, making it easy to enjoy sweetness whenever the craving hits.
Reheating
To enjoy these bars warm, simply microwave a slice for 10-15 seconds. This softens the caramel and chocolate, reviving that freshly baked experience. Just be cautious not to overheat and make the caramel too runny.
FAQs
Can I use different types of chocolate chips in this Carmelita Bars Recipe?
Absolutely! Semi-sweet chocolate chips are classic, but feel free to experiment with milk chocolate, dark chocolate, or even white chocolate chips. Just keep in mind that different chocolates will slightly change the sweetness and flavor intensity.
What’s the best way to melt the caramels without burning them?
Heating in short, 30-second intervals in the microwave and stirring well between each burst is the safest method. This helps you avoid overheating and gives you control over the caramel’s consistency.
Can I substitute caramel bits for the caramel pieces?
Yes, caramel bits are a great shortcut and work beautifully in this recipe. Just make sure to melt them gently with the sweetened condensed milk for that perfect gooey layer.
Is it necessary to let the Carmelita Bars cool completely before cutting?
While impatience is understandable, letting the bars cool fully ensures the caramel sets properly, making slicing much cleaner and less messy.
How long do Carmelita Bars stay fresh once baked?
If stored in an airtight container at room temperature, they’ll stay delicious up to 3 days. Refrigerating can extend freshness up to a week, and freezing keeps them good for about 2 months.
Final Thoughts
There’s something so special about the combination of buttery cookie dough, melty chocolate, and rich caramel, and this Carmelita Bars Recipe captures that magic beautifully. It’s a dessert that’s as fun to make as it is to eat, perfect for any occasion where you want to impress or simply treat yourself. I can’t wait for you to bake a batch and discover how quickly these bars become a beloved staple in your sweet repertoire!
Print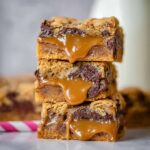
Carmelita Bars Recipe
- Prep Time: 10 minutes
- Cook Time: 25 minutes
- Total Time: 35 minutes (plus cooling time)
- Yield: 16 bars
- Category: Dessert
- Method: Baking
- Cuisine: American
Description
Deliciously rich and gooey Carmelita Bars featuring a buttery cookie base layered with melted caramel and chocolate chips. These bars are easy to make with a homemade dough or pre-made cookie dough and perfect for satisfying a sweet tooth with a chewy, chocolatey caramel treat.
Ingredients
Cookie Base
- 12 tablespoons butter, softened (1 & 1/2 sticks)
- 1/3 cup + 3 tablespoons white sugar
- 3/4 cup brown sugar
- 1 egg + 1 egg yolk
- 1 & 1/2 teaspoons vanilla extract
- 2 & 1/4 cups all-purpose flour (spooned and leveled)
- 3/4 teaspoon baking soda
- 3/4 teaspoon salt
- 1 cup semi-sweet chocolate chips
Carmel Layer
- 1 (11-oz) package caramels or caramel bits
- 1/3 cup sweetened condensed milk
Instructions
- Prepare the Dough: To make your own dough, beat softened butter in a bowl or stand mixer until fluffy. Add white and brown sugar and beat until fluffy. Incorporate the egg, egg yolk, and vanilla extract, mixing well. Add flour, baking soda, and salt; stir until almost combined, then fold in chocolate chips until just combined.
- Preheat Oven and Prepare Pan: Preheat your oven to 350°F (175°C). Line a 9×13 inch baking pan with foil or parchment paper and spray with nonstick spray.
- Form Bottom Layer: Divide the cookie dough in half. Using your hands, spread and flatten half of the dough evenly at the bottom of the prepared pan into a thin layer.
- Bake Base Layer: Bake the cookie dough layer at 350°F for about 10 minutes or until the top is golden. Remove pan from the oven but keep oven on.
- Prepare Caramel Topping: In a microwave-safe bowl, combine caramels and sweetened condensed milk. Heat in 30-second intervals, stirring each time until mostly melted with a few lumps remaining. Remove and stir until smooth to avoid burning.
- Layer Caramel: Pour the melted caramel mixture evenly over the baked cookie layer and spread gently.
- Add Top Cookie Layer: If using pre-made dough, cut the remaining dough into slices and place them over the caramel layer, pinching between slices to form one cohesive cookie layer. If using homemade dough, flatten small chunks of dough with your hands and place them over the caramel layer until it is mostly covered. Some caramel peeking through is acceptable.
- Final Bake: Bake the assembled bars again at 350°F for 15 to 17 minutes, or until the top is golden brown and the center is set (not wiggly).
- Cool Completely: Allow the Carmelita bars to cool completely before cutting to ensure the caramel sets and avoids a messy oozing. Cooling can take about 1-2 hours at room temperature.
- Store: Store cooled Carmelita bars at room temperature or in the refrigerator to keep fresh.
Notes
- You can use pre-made refrigerated cookie dough as a shortcut instead of making the dough from scratch.
- Do not overheat the caramel mixture in the microwave to prevent burning; stir well between intervals.
- Cover the caramel layer with dough to prevent excessive caramel leakage during baking.
- Cooling completely is important for clean bars and to avoid sticky mess.
- Storage can be at room temperature or refrigerated depending on preference for texture.
