If you’re craving that perfect balance of tender, juicy meat with irresistibly crackling skin, this Crispy Skin Duck Breast Recipe is exactly what you need in your kitchen repertoire. It’s deceptively simple but delivers restaurant-quality results, where every bite bursts with rich flavors and the skin’s crunch is the star. Whether you’re cooking for a cozy night in or impressing guests, this method ensures your duck breast comes out perfectly cooked, beautifully textured, and packed with flavor every time.
Ingredients You’ll Need
Gathering the right ingredients is half the fun and all the magic behind this recipe. Each component, from the seasoning to the duck itself, plays a vital role in creating that crave-worthy texture and flavor combo you want in a Crispy Skin Duck Breast Recipe.
- 1 duck breast (boneless, skin on): The star of the dish, providing rich flavor and that much-loved crispy skin.
- 1/8 tsp cooking salt / kosher salt: Enhances the natural flavors while helping to dry out the skin for crispiness.
- Pinch of white pepper (or finely ground black pepper): Adds a subtle warmth and spice, complementing the duck without overpowering.
How to Make Crispy Skin Duck Breast Recipe
Step 1: Preheat the Oven
Start by preheating your oven to 180°C/350°F (160°C fan-forced). Preparing your oven ahead ensures a smooth transition when it’s time to finish the duck, helping you lock in juices while keeping the skin perfectly crispy.
Step 2: Season and Score the Duck
Sprinkle half of the salt and pepper on the flesh side of your duck breast. Turning it over, use a sharp knife to gently score the skin diagonally 5 or 6 times. Remember: cut just through the skin without piercing the flesh or cutting to the edge – this helps release fat and guarantees optimum crispiness. Pat the skin dry with paper towels, then sprinkle the remaining salt and pepper evenly. This step is crucial because dry skin is the secret to getting that golden, crunchy texture.
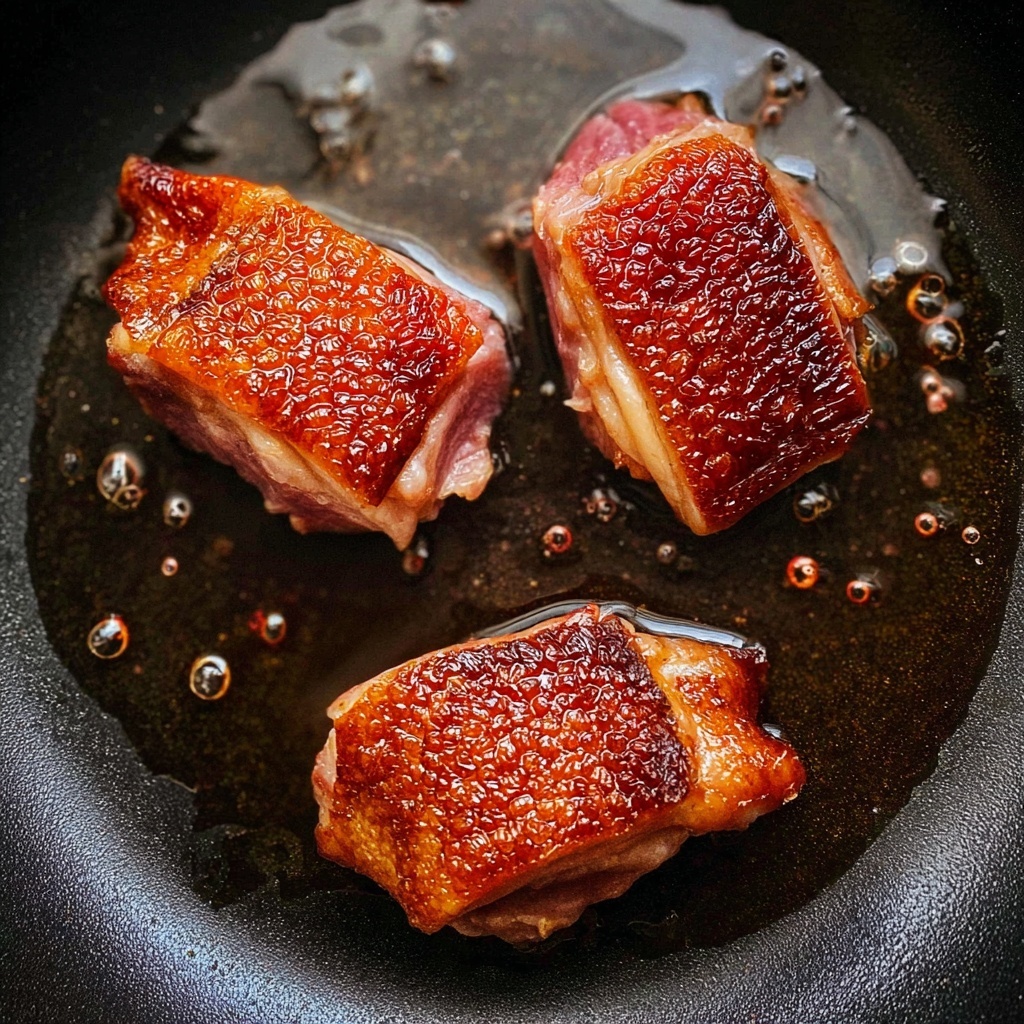
Step 3: Place Duck Skin Side Down in a Cold Pan
Here’s the trick: don’t turn on the heat just yet. Place the duck breast, skin side down, into an oven-proof pan with no oil. Let it rest cold; this allows the fat under the skin to slowly render out. To ensure the skin stays flat against the pan for even crisping, place a second pan on top to lightly press the duck.
Step 4: Cook Skin Side on Medium-Low Heat
Now turn your stove to medium-low and cook the duck for about 10 minutes. You’ll see the skin turn a stunning golden brown as the fat melts away—this is the moment when crispy skin develops while the meat cooks gently in its own flavorful fat. Patience here rewards you with unparalleled texture.
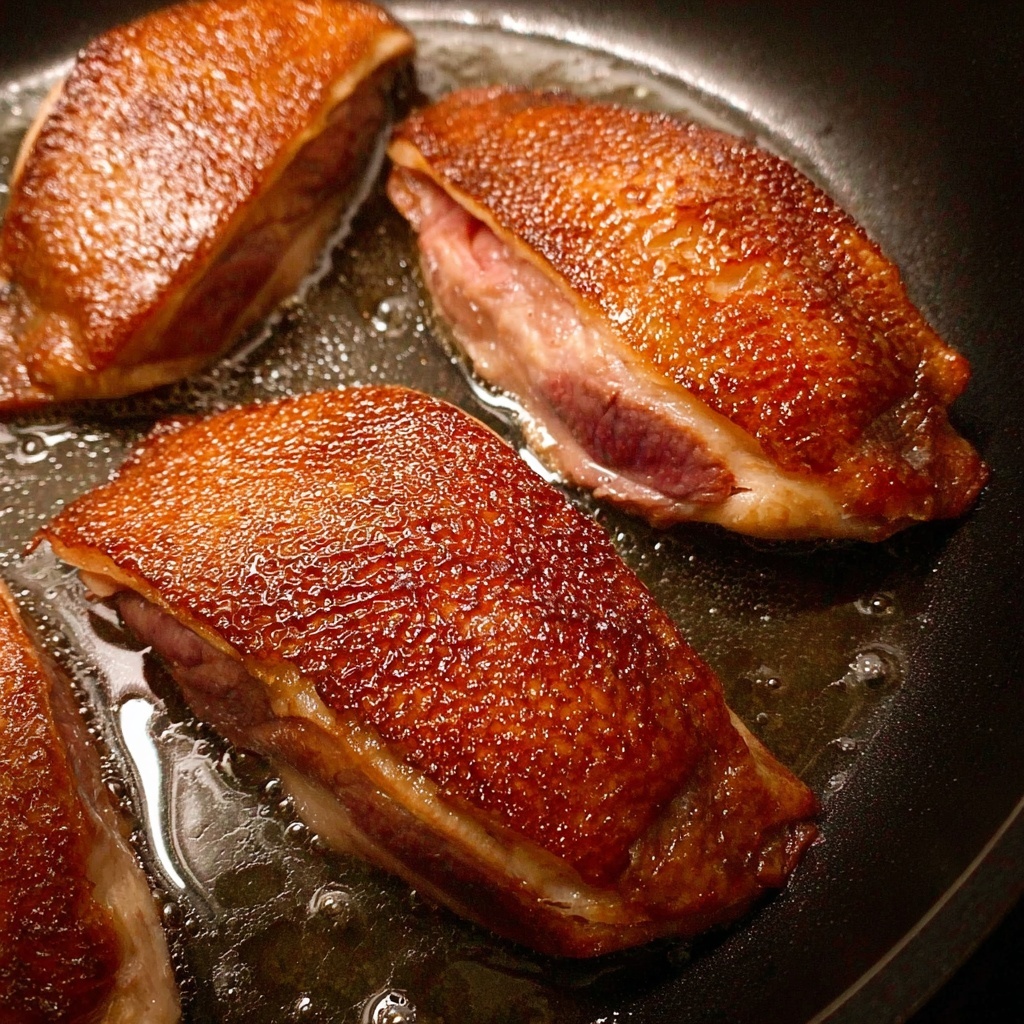
Step 5: Finish in the Oven
Flip the duck breast to flesh side down and sear for one minute to lock in flavors. Then transfer the entire pan to your preheated oven. Roast for 6 minutes if you prefer your duck medium rare (about 54°C/130°F internal temp), or 8 minutes for medium (about 60°C/140°F), which is my favorite doneness for juiciness and tenderness.
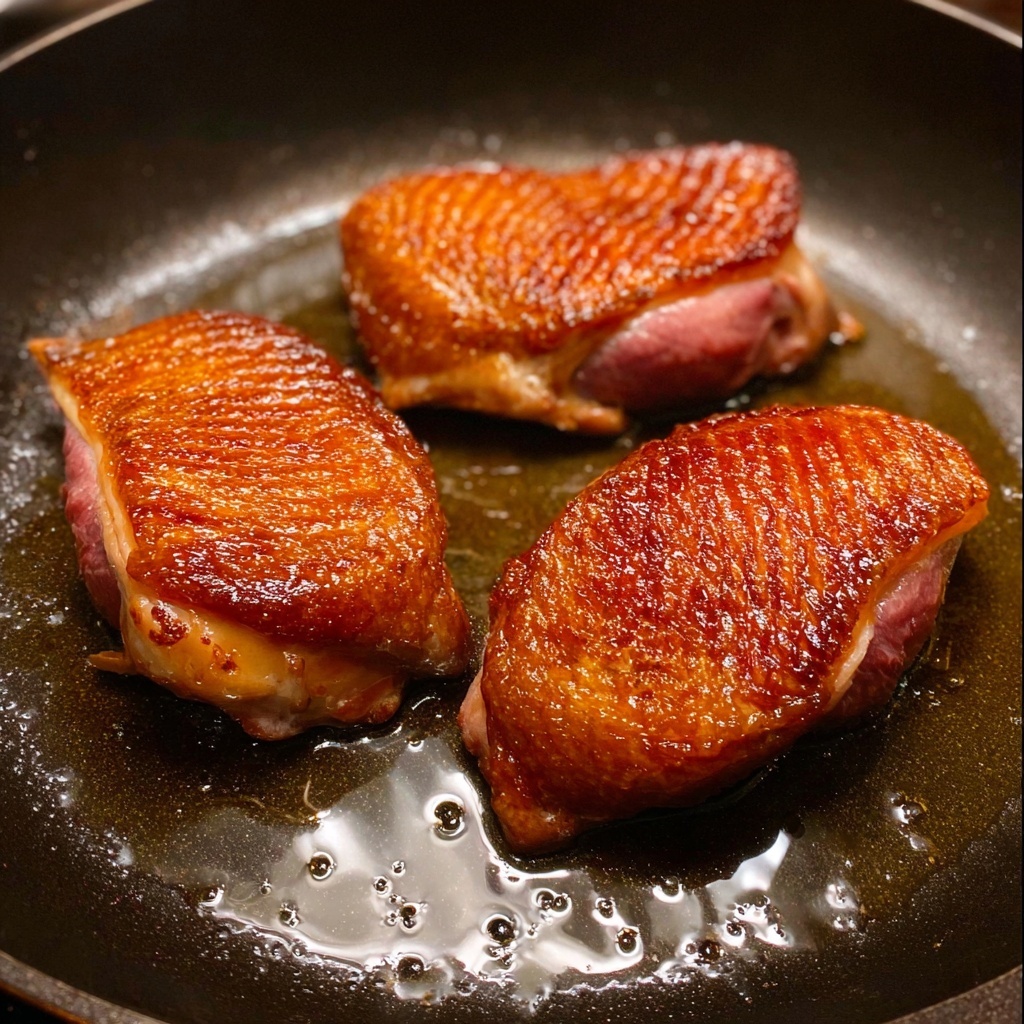
Step 6: Rest and Serve
Once the duck is out of the oven, let it rest for 5 minutes on a rack or plate. Resting allows the juices to redistribute, ensuring each slice is succulent, not dry. Serve your duck breast whole or sliced to showcase the beautiful, crispy skin and tender meat underneath.
How to Serve Crispy Skin Duck Breast Recipe
Garnishes
A simple garnish can elevate your duck breast. Fresh herbs like thyme or parsley add a pop of green and aromatic freshness, while a drizzle of balsamic reduction or a few pomegranate seeds introduce tangy sweetness that pairs beautifully with rich duck.
Side Dishes
This duck breast loves company! Think roasted baby potatoes or creamy mashed parsnips to complement the richness. A side of sautéed greens like spinach or Swiss chard brings balance and color to your plate, while a beetroot salad offers earthiness and a splash of vibrancy.
Creative Ways to Present
Make the visual experience as exciting as the taste: slice the duck breast thinly and fan it out on a serving platter. Alternatively, place slices atop a bed of quinoa or wild rice with scattered seeds or nuts for crunch. For a more casual vibe, serve with crusty bread and a tangy mustard sauce for dipping.
Make Ahead and Storage
Storing Leftovers
If you have any leftover duck breast, wrap it tightly in foil or place it in an airtight container and refrigerate for up to 2 days. Keeping the skin crisp is challenging, but proper storage preserves the duck’s flavor and texture well enough for a delicious next-day meal.
Freezing
Freezing cooked duck breast isn’t ideal for crispy skin since the texture softens upon thawing. However, if you must, slice and wrap portions tightly in plastic wrap and foil, then freeze for up to 1 month. Thaw overnight in the fridge before reheating.
Reheating
To reheat while maintaining as much crispiness as possible, warm the duck in a low oven (around 150°C/300°F) on a wire rack so air circulates beneath. Avoid the microwave if you want to keep the skin from turning soggy.
FAQs
Can I use duck legs instead of breast for this recipe?
While duck legs are delicious, this recipe specifically highlights the crispy skin on duck breast, which renders fat differently. Legs require longer cooking and a different technique to achieve that perfect crisp.
Why do I need to score the skin?
Scoring helps the fat underneath the skin render out more evenly and quickly, which is key for achieving that beautiful crispiness without burning the skin or leaving it greasy.
Is it necessary to dry the skin before cooking?
Absolutely. Moisture on the skin can steam the duck rather than crisp it, so patting it dry ensures the skin fries up golden and crunchy.
Can I prepare this recipe in advance?
You can score and season the duck breast a few hours ahead to let the flavors develop, but for best texture, cook it fresh just before serving.
What do I do if the skin isn’t crispy enough?
If your skin isn’t as crispy as you like, try cooking longer on low heat to render more fat, or finish it briefly under the grill for an extra crunch, keeping an eye so it doesn’t burn.
Final Thoughts
Now that you’ve got the step-by-step inside scoop on the Crispy Skin Duck Breast Recipe, it’s time to embrace this gorgeous dish in your own kitchen. It’s a simple yet impressive way to treat yourself or loved ones to something special. Trust me, once you nail that crisp skin and tender meat combo, this recipe will become a fast favorite. Happy cooking and enjoy every sumptuous bite!
Print
Crispy Skin Duck Breast Recipe
- Prep Time: 2 minutes
- Cook Time: 20 minutes
- Total Time: 22 minutes
- Yield: 1 duck breast serving
- Category: Main Course
- Method: Stovetop
- Cuisine: French
Description
This recipe guides you through cooking a perfectly crispy skin duck breast with tender, juicy meat. Using a combination of stovetop pan cooking and oven finishing ensures a golden, crackling skin and succulent interior, with detailed tips for scoring and seasoning to maximize flavor and texture.
Ingredients
Duck Breast
- 1 duck breast, boneless, skin on
- 1/8 tsp cooking salt or kosher salt
- Pinch white pepper (or finely ground black pepper as substitute)
Instructions
- Preheat the Oven: Set your oven to 180°C/350°F (160°C fan-forced) to prepare for finishing the duck breast after stovetop cooking.
- Score and Season: Sprinkle half of the salt and pepper onto the flesh side of the duck breast. Using a sharp knife, make 5 or 6 diagonal cuts on the skin side only, being careful not to pierce the flesh or cut through the skin to the edges. Pat the skin dry thoroughly with paper towels, then sprinkle the remaining salt and pepper evenly over the skin.
- Place in Cold Pan Without Oil: Use an oven-proof pan and place the duck breast skin-side down while the pan is still cold. Do not add any oil as the skin will render its own fat. Lightly weigh down the duck with another pan to keep the skin flat and in contact with the pan surface.
- Cook Skin Side on Stove: Turn the heat to medium low and cook for about 10 minutes. During this time, the skin will render fat and become golden and crispy. Avoid moving the duck to ensure even crisping.
- Flip and Oven Finish: Flip the duck breast to the flesh side and cook for 1 minute on the stovetop. Then transfer the pan directly to the preheated oven. Cook for 6 minutes for medium rare (internal temp 54°C/130°F) or 8 minutes for medium (60°C/140°F), according to your preference.
- Rest Before Serving: Remove the pan from the oven and transfer the duck breast to a rack or plate. Let it rest for 5 minutes to allow juices to redistribute. Serve the breast whole or slice it as desired.
Notes
- Note 1: Ensure the duck breast is boneless with skin on to achieve the best crispiness and even cooking.
- Note 2: Scoring the skin helps fat render evenly and prevents the skin from shrinking during cooking.
- Note 3: Using a cold pan and no added oil allows the duck to cook slowly in its own fat, minimizing splatter and promoting crispiness.
- Note 4: Cooking at medium low heat is essential for gradual fat render and crisp skin without burning.


