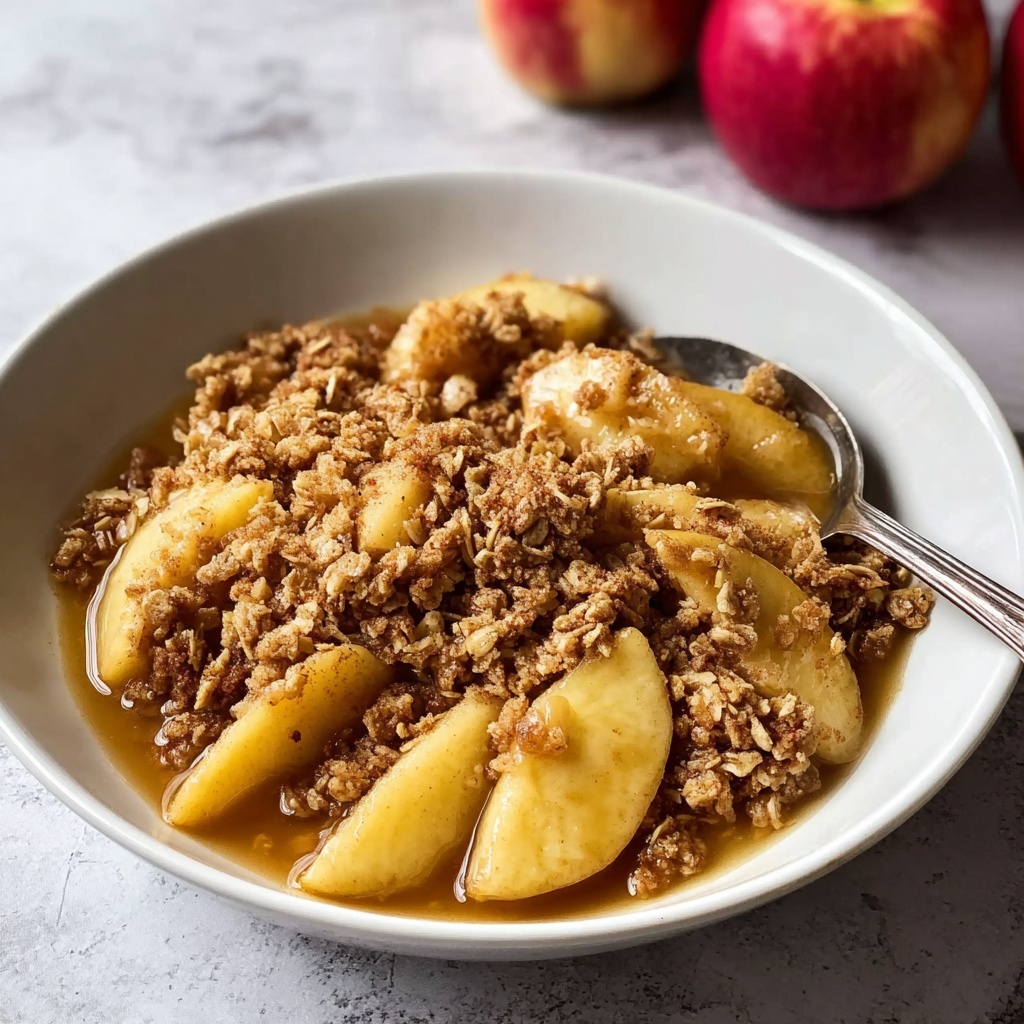
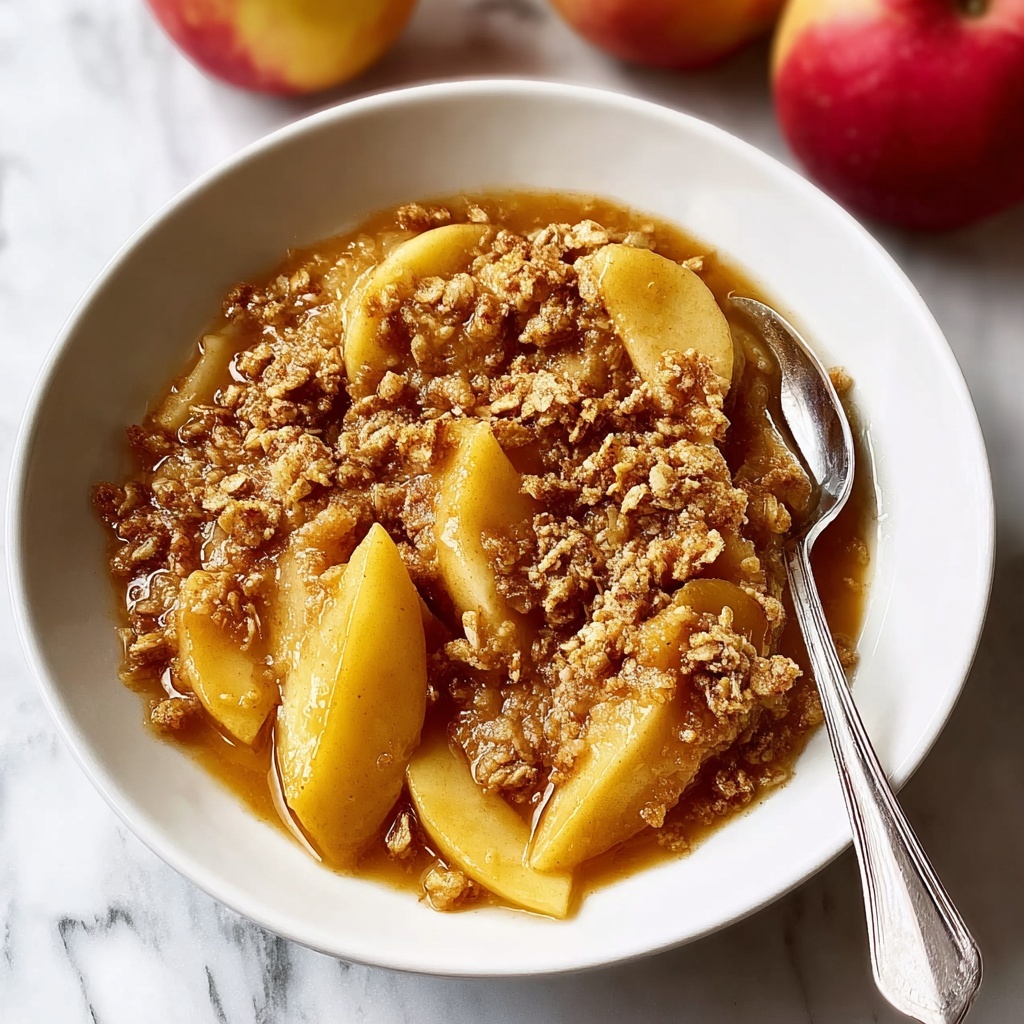
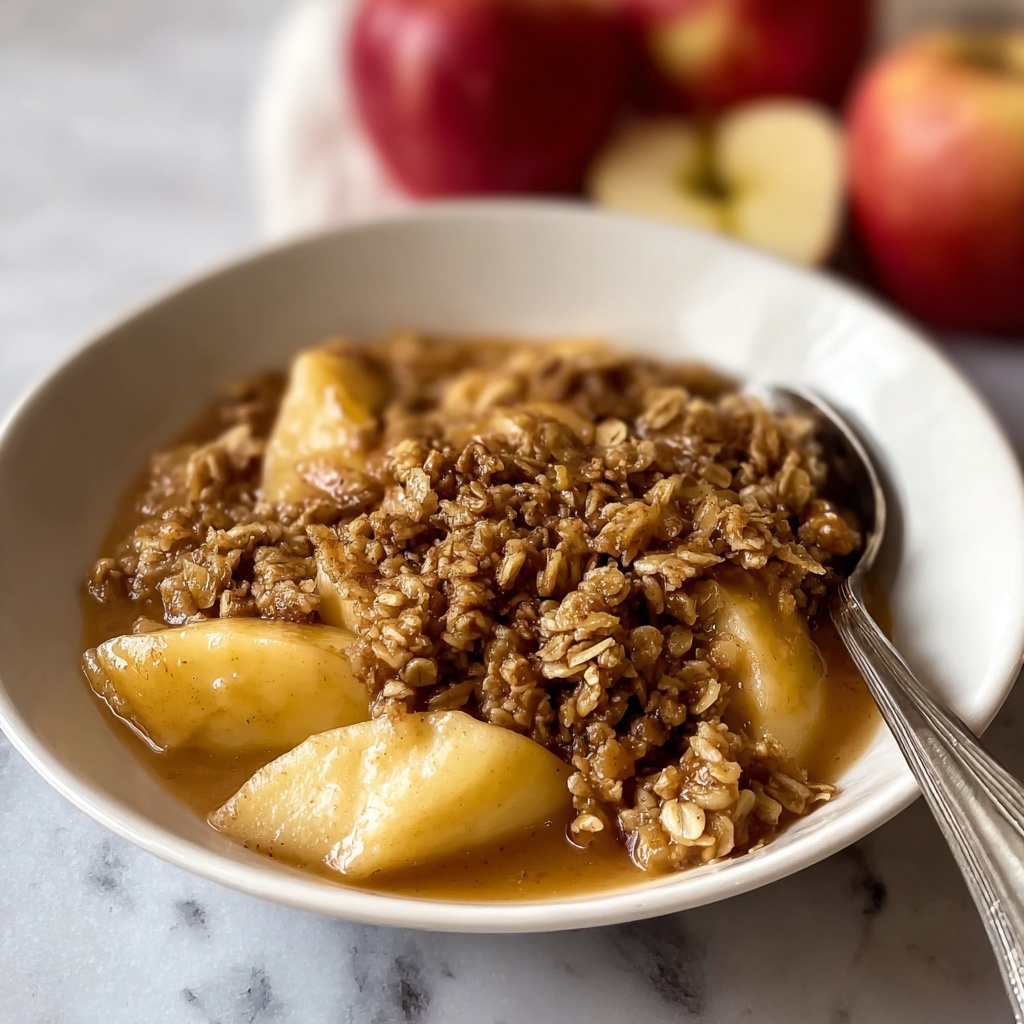
If you’re craving a dessert that feels like a warm hug on a chilly day, this Crunchy Apple Crisp Recipe is exactly what you need. It brings together tender, cinnamon-kissed apples with a delightfully crunchy oat and brown sugar topping that’s simply irresistible. The balance between soft fruit and golden crumble creates a cozy, comforting treat that’s easy to make and will quickly become a staple in your dessert rotation. Whether it’s a family gathering or a quiet night in, this apple crisp delivers pure joy in every bite.
Ingredients You’ll Need
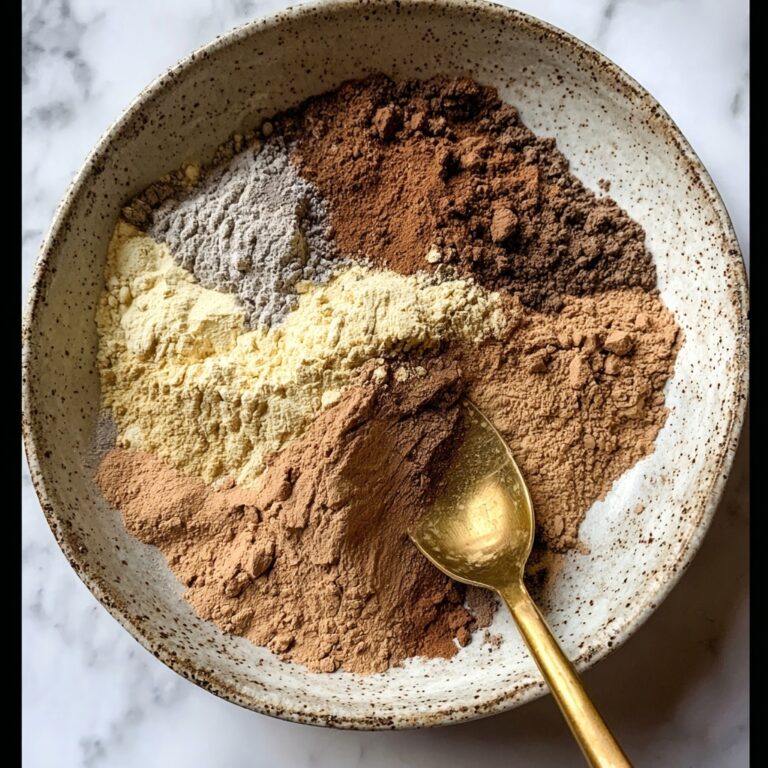
Gathering simple, wholesome ingredients is key to unlocking the magic of this dessert. Each one plays a special role, from the tartness of the apples to the buttery crunch on top, creating a perfect harmony that’s as delicious as it is approachable.
- 6 medium-sized apples: Peeled, cored, and sliced for that tender, juicy base you’ll love.
- 1 tablespoon lemon juice: Adds a bright, fresh touch that keeps the apple slices vibrant and flavorful.
- 1/2 cup granulated sugar: Sweetens the fruit nicely without overpowering the natural apple flavor.
- 1/4 cup all-purpose flour: Helps thicken the fruit mixture, so it’s perfectly saucy.
- 1 teaspoon ground cinnamon: Brings that classic cozy spice that pairs perfectly with apples.
- 1/4 teaspoon ground nutmeg: Adds a warm, subtle depth to the filling.
- 1 cup rolled oats: The star of the topping, providing unbeatable crunch and texture.
- 1/2 cup packed brown sugar: Imparts a rich, caramel-like sweetness to the crisp topping.
- 1/3 cup all-purpose flour: Combines with oats and butter to create that crumbly texture everyone loves.
- 1/3 cup butter, softened: Binds the topping and adds a luxurious richness.
- 1/2 cup chopped walnuts (optional): For a nutty crunch that complements the oats beautifully.
How to Make Crunchy Apple Crisp Recipe
Step 1: Prepare Your Oven and Apples
Start by preheating your oven to 350°F (175°C) so it’s ready to bake when your layers are assembled. Meanwhile, toss your peeled, cored, and sliced apples in lemon juice; this keeps them from browning and adds a refreshing zing that brightens every bite.
Step 2: Mix the Spiced Sugar Coating
In a separate bowl, combine granulated sugar, flour, cinnamon, and nutmeg—a simple mixture that will envelop each apple slice with warm, sweet spice. Toss the apples gently in this blend until they’re evenly coated, making sure every slice will be bursting with flavor as it bakes.
Step 3: Arrange the Apples in the Baking Dish
Transfer the perfectly spiced apples to a 9×13 inch baking dish, spreading them into an even layer. This creates a foundation for your crunchy apple crisp and ensures every spoonful is packed with tender fruit.
Step 4: Create the Crumbly Topping
In another bowl, mix rolled oats, brown sugar, flour, and softened butter together. Use a fork or your fingers to combine them until you get that beautiful crumbly texture that promises to crisp up nicely in the oven. If you’re a fan of nuts, mix in chopped walnuts for an added crunch and flavor boost.
Step 5: Assemble and Bake
Sprinkle the oat crumble evenly over the apple layer, covering every inch with that buttery, sweet topping. Pop the dish into your preheated oven and bake for about 45 minutes, until the topping turns a gorgeous golden brown and the apples are tender when pierced.
Step 6: Let It Cool Slightly Before Serving
Once baked, give your crunchy apple crisp a few minutes to cool so the juices thicken and the flavors marry beautifully. This step also makes serving easier and keeps everything neat on the plate.
How to Serve Crunchy Apple Crisp Recipe
Garnishes
The simplest garnishes often make the biggest impact. A scoop of vanilla ice cream melting over the warm crisp is classic and heavenly, while a dollop of whipped cream adds an airy touch that complements the dense crumble. You can even sprinkle a pinch of cinnamon on top for an extra hint of spice and eye-catching presentation.
Side Dishes
Apple crisp pairs famously well with a piping hot cup of coffee or spiced tea, turning any simple dessert moment into a cozy ritual. For a more indulgent experience, serve alongside hot caramel sauce or a drizzle of maple syrup; these additions amplify the dessert’s warmth and sweetness.
Creative Ways to Present
If you’re looking to impress guests, try serving your Crunchy Apple Crisp Recipe in individual ramekins or mason jars. Layer some crisp topping on the bottom and alternate with apple layers for a rustic parfait effect. You can also fold in a few dried cranberries or raisins into the filling for a surprise burst of tangy sweetness that adds visual and flavor contrast.
Make Ahead and Storage
Storing Leftovers
Leftover apple crisp keeps beautifully in the refrigerator, covered tightly with foil or plastic wrap. It stays fresh for up to 4 days, giving you plenty of opportunities to reheat and enjoy that delightful crunch and warm apple filling again without any loss in flavor or texture.
Freezing
This recipe freezes wonderfully, making it a perfect ahead-of-time treat. Simply wrap the baked crisp in foil, then place it in an airtight container or freezer bag. It will keep its freshness for up to 3 months, ready to thaw and bake or reheat straight from frozen.
Reheating
For the best texture, reheat your apple crisp in an oven at 325°F (160°C) until warmed through and the topping regains its crispness—usually about 15-20 minutes. Avoid microwaving if you want to keep that irresistible crunch, but if time is tight, a quick zap will still be delicious and comforting.
FAQs
Can I use different types of apples in this recipe?
Absolutely! Mixing tart apples like Granny Smith with sweeter ones such as Honeycrisp or Fuji can add depth and balance to your apple crisp’s flavor. Just keep the total quantity the same for consistent results.
Is it possible to make this recipe gluten-free?
Yes, you can substitute the all-purpose flour for a gluten-free blend. Make sure to use certified gluten-free oats as well. This way, you’ll still get that wonderful texture and flavor without gluten.
Can I omit the walnuts or replace them with another nut?
Sure! Walnuts add great crunch and flavor, but if you have allergies or preferences, try pecans or almonds instead, or leave nuts out entirely for a nut-free version without sacrificing the crispiness.
How can I make the topping extra crispy?
Using cold, softened butter cut into small pieces and mixing lightly helps the topping stay crumbly yet crisp during baking. Also, make sure not to overcrowd the baking dish so the heat circulates well for even browning.
Can I prepare this dessert in advance?
Definitely! Assemble your apple crisp and keep it covered in the fridge for up to a day before baking. This convenience makes it easy to serve fresh, warm dessert with minimal kitchen time when you’re ready.
Final Thoughts
There’s something wonderfully comforting about baking a Crunchy Apple Crisp Recipe from scratch, filling your kitchen with sweet, spiced aromas and the promise of a delicious reward. It’s easy to make, full of texture, and incredibly satisfying—a perfect dessert for sharing with family and friends or indulging in your own quiet moment. Give it a try and watch how this classic treat becomes one of your all-time favorites.
Print
Crunchy Apple Crisp Recipe
- Prep Time: 0h 15m
- Cook Time: 0h 45m
- Total Time: 1h 0m
- Yield: 8 servings
- Category: Dessert
- Method: Baking
- Cuisine: American
Description
This Crunchy Apple Crisp is a classic dessert featuring tender, cinnamon-spiced apples topped with a buttery oat and walnut crumble. Baked to golden perfection, this comforting treat is perfect served warm with vanilla ice cream or whipped cream.
Ingredients
Apple Mixture
- 6 medium-sized apples, peeled, cored, and sliced
- 1 tablespoon lemon juice
- 1/2 cup granulated sugar
- 1/4 cup all-purpose flour
- 1 teaspoon ground cinnamon
- 1/4 teaspoon ground nutmeg
Topping
- 1 cup rolled oats
- 1/2 cup packed brown sugar
- 1/3 cup all-purpose flour
- 1/3 cup butter, softened
- 1/2 cup chopped walnuts (optional)
Instructions
- Preheat the oven: Set your oven to 350°F (175°C) to ensure it reaches the correct temperature for baking the crisp.
- Prepare the apples: In a large bowl, toss the peeled, cored, and sliced apples with lemon juice to prevent browning and add brightness to the flavor.
- Mix the apple coating: Combine granulated sugar, 1/4 cup flour, cinnamon, and nutmeg in a separate small bowl. Sprinkle this mixture over the apples and toss until they are evenly coated.
- Arrange apples in baking dish: Transfer the coated apple slices evenly into a 9×13 inch baking dish, spreading them out in a single layer.
- Prepare the topping: In another bowl, combine rolled oats, brown sugar, 1/3 cup flour, and softened butter. Use a fork or your fingers to mix until crumbly.
- Add walnuts: Stir in the chopped walnuts into the oat mixture if desired, to add crunch and flavor.
- Top the apples: Evenly sprinkle the oat and walnut crumble over the apples in the baking dish.
- Bake the crisp: Place the dish in the oven and bake for about 45 minutes, or until the topping is golden brown and the apples are tender when pierced with a fork.
- Cool and serve: Let the apple crisp cool slightly before serving. Enjoy it warm with a scoop of vanilla ice cream or a dollop of whipped cream for extra indulgence.
Notes
- Use tart apple varieties such as Granny Smith for the best balance of flavor and texture.
- For a nut-free version, omit the walnuts altogether.
- Make sure the butter is softened for easier mixing and a better crumb texture.
- Serve warm for the best taste and texture experience.
- Leftovers can be stored in the refrigerator for up to 3 days and reheated before serving.


