
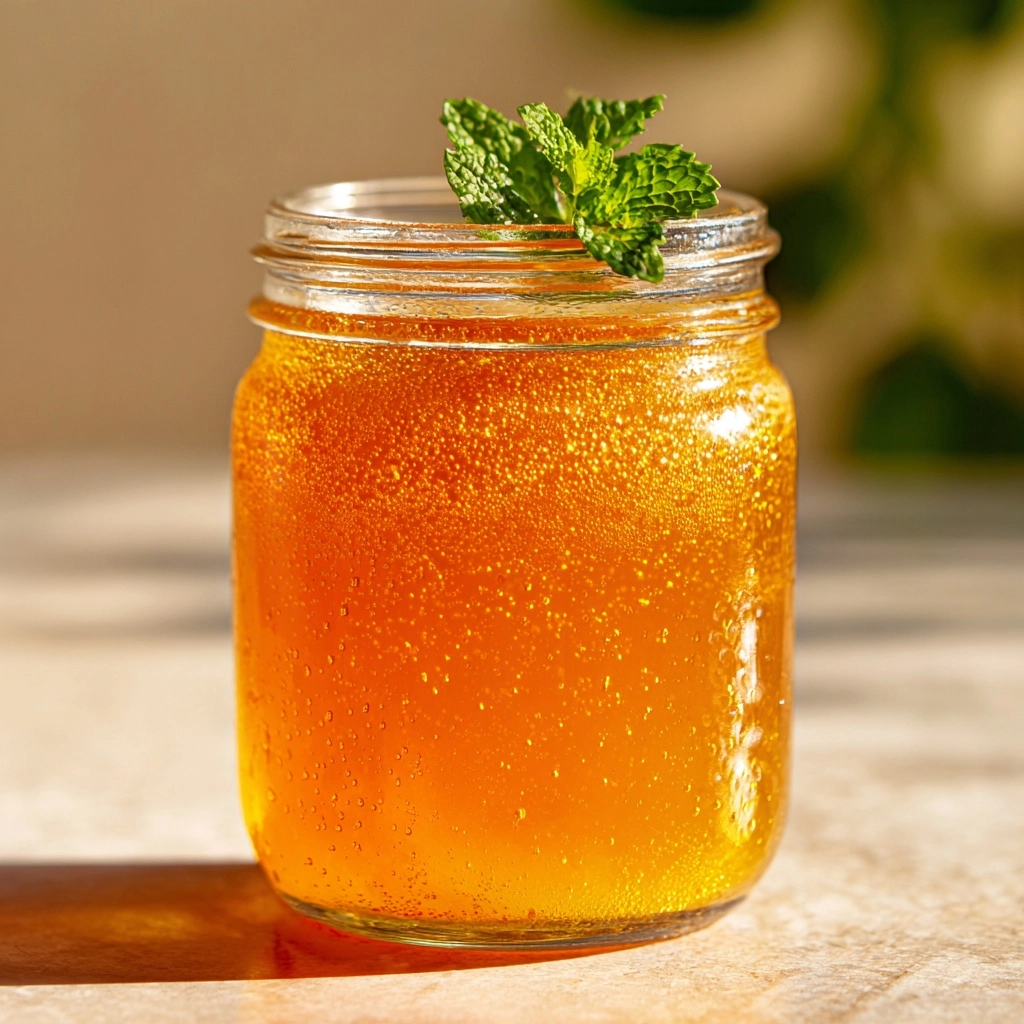
If you’ve ever wished you could capture the creamy, dreamy, orange-vanilla nostalgia of a classic ice cream truck treat and spread it on your morning toast, your dreams are about to come true. Dreamsicle Jelly is a delightful homemade preserve that beautifully combines fresh orange, vanilla, and a hint of lemon—transforming everyday breakfasts, desserts, or even baked treats into something unforgettable. Whether you’re a canning pro or a curious beginner, this recipe will quickly become one of your favorite kitchen adventures.

Ingredients You’ll Need
-
Jelly:
- 2 cups orange juice (preferably fresh)
- 1 cup granulated sugar
- 1 tablespoon orange zest
- 1 tablespoon lemon juice
- 1 (3 oz) package orange gelatin (Jell-O)
- 1 teaspoon vanilla extract
- 1 (1.75 oz) package powdered fruit pectin
- 1/2 cup water
How to Make Dreamsicle Jelly
Step 1: Prep Your Ingredients and Equipment
Wash your oranges, zest them, and juice enough to make two cups of fresh orange juice. Gather all ingredients before you start—this recipe comes together quickly! Make sure your jars are clean and sterilized, ready for filling as soon as the jelly is finished cooking.
Step 2: Combine, Stir, and Sprinkle
In a medium saucepan, combine the orange juice, orange zest, lemon juice, and water. Gradually sprinkle the powdered fruit pectin over the mixture and whisk it in to avoid clumping. This gives your Dreamsicle Jelly its signature, spoonable consistency.
Step 3: Bring to a Boil
Set the pan over medium-high heat and stir constantly until it comes to a full rolling boil. Don’t walk away at this stage—constant stirring is essential to dissolve the pectin and prevent scorching.
Step 4: Add Sugar and Gelatin
Pour in the granulated sugar, stirring briskly until it’s completely dissolved. Once everything is combined and returned to a boil, keep it at a fierce bubble for exactly one minute. Remove the pan from the heat and immediately add the orange gelatin and vanilla extract. Stir until you have a glossy, lump-free jelly that fills your kitchen with the most amazing aroma.
Step 5: Jar and Process
Skim off any foam from the surface if you need to and carefully ladle the hot Dreamsicle Jelly into your sterilized jars, leaving a bit of space at the top. Wipe the rims, cap them with lids and rings, then either let the jars cool for refrigerator storage or process them in a boiling water bath for five minutes for long-lasting pantry magic.
How to Serve Dreamsicle Jelly
Garnishes
Give your Dreamsicle Jelly a flourish with a few elegant garnishes! Try a twist of orange peel on top of your toast, a tiny dollop of whipped cream, or even a sprinkle of crushed vanilla wafers. Each little detail amplifies that creamsicle effect and adds fun, visual interest to your plate.
Side Dishes
This jelly shines on a warm, buttered English muffin, thickly sliced sourdough toast, or homemade biscuits. It also pairs wonderfully with classic breakfast staples like pancakes, waffles, or even a slice of pound cake for an afternoon treat.
Creative Ways to Present
Take your Dreamsicle Jelly beyond the breakfast table! Swirl it into yogurt parfaits, layer it as a surprise filling in cupcakes, or drizzle it over vanilla ice cream for a showstopping dessert. For homemade gifts, tie up a jar with ribbon and tuck in a handwritten label—everybody loves an unexpected treat like this.
Make Ahead and Storage
Storing Leftovers
Any leftover Dreamsicle Jelly will keep beautifully in the refrigerator for up to three weeks. Store it in a tightly sealed container or jar to maintain that fresh, citrusy flavor and prevent any moisture loss or flavor absorption from neighboring foods.
Freezing
If you want to stock up for future cravings, Dreamsicle Jelly also freezes well! Simply allow the jelly to cool completely in freezer-safe containers (leaving a little room at the top for expansion) and freeze for up to six months. Thaw overnight in the refrigerator when you’re ready for another taste of summer.
Reheating
Dreamsicle Jelly is best enjoyed straight from the fridge, but if you’ve frozen a batch or need to soften it up, just leave it out at room temperature for a bit or, if you’re in a hurry, scoop some into a microwave-safe bowl and heat in very short bursts—stirring often—until it’s silky and spreadable again.
FAQs
What makes Dreamsicle Jelly different from regular orange jelly?
Dreamsicle Jelly sets itself apart with an irresistible blend of orange and vanilla flavors, mimicking those beloved frozen treats you remember from childhood. The addition of orange gelatin and vanilla not only boosts color and richness, but also creates a distinctly creamy, crave-worthy taste you won’t find in standard orange jelly recipes.
Can I use bottled orange juice instead of fresh?
While bottled orange juice will work in a pinch, using freshly squeezed juice will give your Dreamsicle Jelly a brighter flavor and more vibrant aroma, making a noticeable difference in the final result. If you must use bottled, be sure to choose one with no added sweeteners or preservatives for the purest flavor.
Is it necessary to process the jars in a boiling water bath?
If you plan to keep your jelly stored at room temperature, processing the jars in a boiling water bath for five minutes is a must—it guarantees safety and long shelf life. For short-term use (within three weeks), you can skip this step and keep refrigerated instead.
Can I add extra ingredients for a twist?
Absolutely! A tablespoon of sweetened condensed milk stirred in at the end creates an even creamier, nostalgic flavor profile. You can also experiment with blood orange juice or a splash of orange liqueur for a fun grown-up version. Just remember, small tweaks work best to retain that dreamy consistency.
Is this recipe gluten-free?
Yes! Dreamsicle Jelly is naturally gluten-free, making it a safe and delightful option for family members or guests with dietary restrictions. Always double check your ingredient labels to be sure, especially with gelatin or pectin brands.
Final Thoughts
Don’t let this recipe be one of those “someday” kitchen dreams—make a batch of Dreamsicle Jelly soon and let every spoonful transport you back to joyful summer days. Whether you spread it, swirl it, or gift it, you’ll soon find yourself making a second (and third) batch for everyone who tastes it. Give it a try—you’ll fall in love at the very first bite!
Print
Dreamsicle Jelly Recipe
- Prep Time: 10 minutes
- Cook Time: 15 minutes
- Total Time: 25 minutes
- Yield: About 4 half-pint jars
- Category: Condiment
- Method: Stovetop
- Cuisine: American
- Diet: Non-Vegetarian
Description
Indulge in the delightful citrusy-sweet flavor of Dreamsicle Jelly, a homemade treat bursting with orange and vanilla essence. Perfect for spreading on toast or using as a cake filling.
Ingredients
Jelly:
- 2 cups orange juice (preferably fresh)
- 1 cup granulated sugar
- 1 tablespoon orange zest
- 1 tablespoon lemon juice
- 1 (3 oz) package orange gelatin (Jell-O)
- 1 teaspoon vanilla extract
- 1 (1.75 oz) package powdered fruit pectin
- 1/2 cup water
Instructions
- Prepare Jelly Mixture: In a medium saucepan, combine orange juice, orange zest, lemon juice, and water. Sprinkle powdered pectin over the mixture and stir well. Bring to a boil.
- Add Sugar: Stir in granulated sugar until dissolved, then return to a boil and cook for 1 minute.
- Incorporate Gelatin: Remove from heat, add orange gelatin and vanilla extract, stirring until smooth. Skim off any foam.
- Jar and Store: Ladle hot jelly into sterilized jars, leaving headspace. Process in a water bath or refrigerate for short-term use.
Notes
- For a creamier taste, mix in 1 tablespoon of sweetened condensed milk post-cooking.
- Enjoy this jelly on toast, muffins, or as a cake filling.
Nutrition
- Serving Size: 1 tablespoon
- Calories: 35
- Sugar: 8g
- Sodium: 2mg
- Fat: 0g
- Saturated Fat: 0g
- Unsaturated Fat: 0g
- Trans Fat: 0g
- Carbohydrates: 9g
- Fiber: 0g
- Protein: 0g
- Cholesterol: 0mg


