
“`html
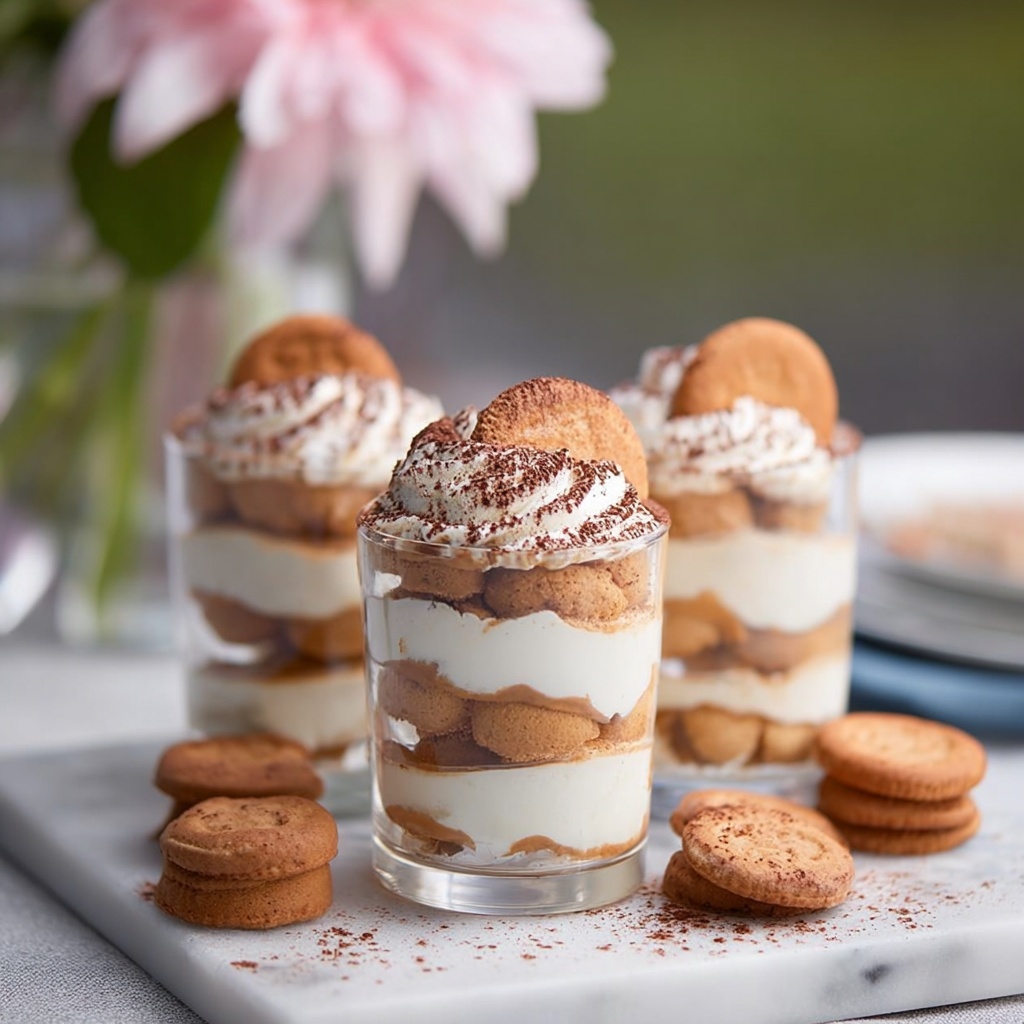
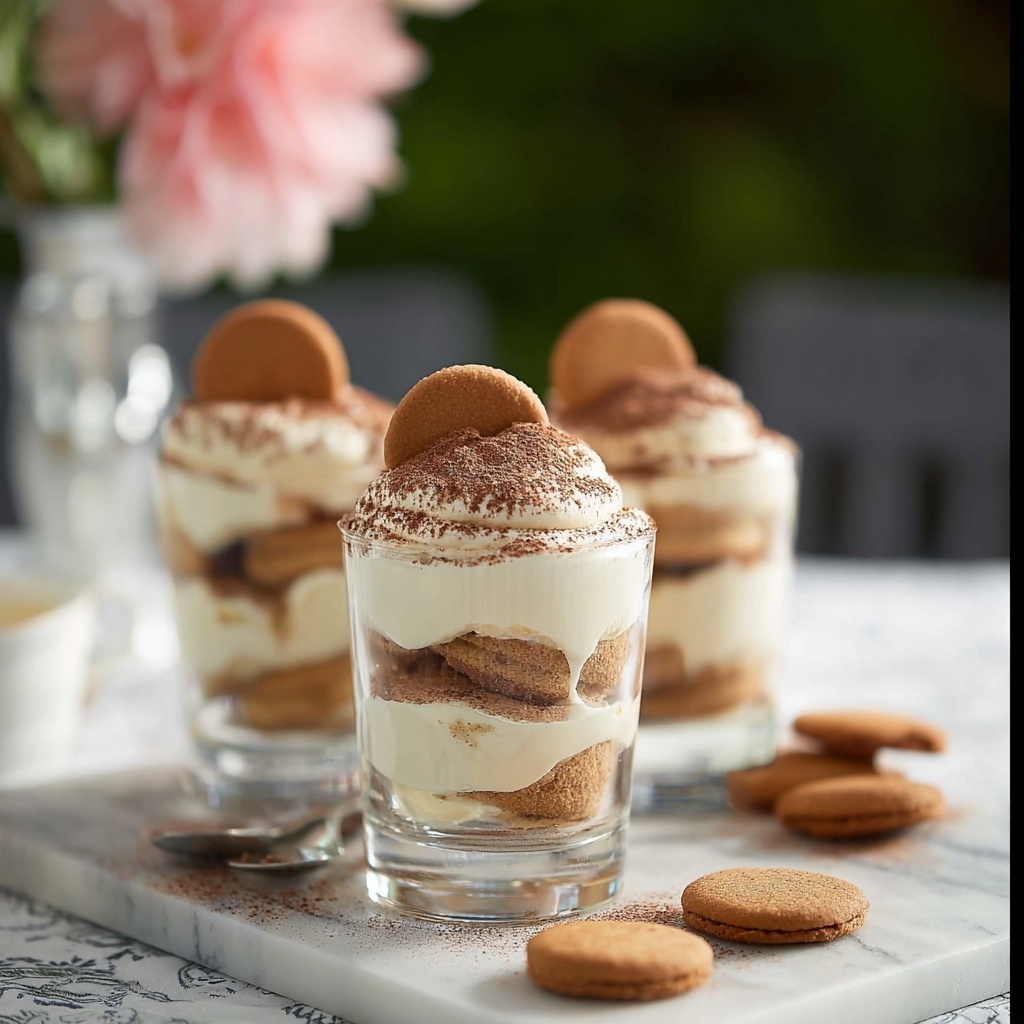
If you’re craving a dessert that feels elegant yet comes together in a snap, this Easy Tiramisu Cups Recipe is your new best friend. Layers of luscious mascarpone cream, coffee-soaked Nilla wafers, and a dusting of cocoa powder create a little cup of heaven that’s perfect for impressing guests or just treating yourself. It’s basically the classic tiramisu experience, but without the fuss of slicing and slicing, making it simple, fun, and absolutely delicious.
Ingredients You’ll Need
These ingredients are straightforward but crucial, each bringing its signature magic to the dish—creamy mascarpone for richness, light sugar for sweetness, coffee for a bold kick, and delicate wafers that soak it all up like a dream.
- Mascarpone cheese (16 ounces): This creamy cheese is the heart of your tiramisu cups and makes the texture irresistibly smooth.
- Granulated sugar (⅓ cup): Just enough sweetness to balance the coffee and cocoa.
- 2% milk (¼ cup): Added for achieving that perfect, fluffy cream consistency.
- Unsweetened cocoa powder (¼ cup): Provides a slightly bitter contrast and gorgeous chocolate color on top.
- Nabisco Nilla Wafers (36 wafers): These bring that classic cookie crunch and absorb the coffee beautifully.
- Strongly brewed coffee (½ cup): The espresso’s spark that ties all flavors together with a lovely bitterness.
How to Make Easy Tiramisu Cups Recipe
Step 1: Whip Up the Mascarpone Cream
Start by placing your mascarpone cheese, sugar, and milk into the bowl of a stand mixer with a whisk attachment. Beat these ingredients until the mixture becomes fluffy and light. If the cream feels too thick, add more milk a tablespoon at a time to reach that perfect, dreamy consistency you’ll want in every bite. Set this luscious cream aside for now.
Step 2: Layer the First Cream Base
Using a piping bag or a Ziplock bag with a small corner snipped off, pipe a layer of mascarpone cream into the bottom of four small glass cups. This creates a smooth, creamy foundation to build on and is already too good to skip.
Step 3: Dust with Cocoa Powder
Gently sift a small amount of unsweetened cocoa powder over the cream layer. This not only adds a beautiful contrast but also a subtle bitterness that balances the sweetness.
Step 4: Coffee-Soak Your Nilla Wafers
Quickly dip three Nilla wafers per cup into the strongly brewed coffee. The goal is to soak just enough so the wafers absorb a rich coffee flavor but don’t become mushy. Then, place these coffee-soaked wafers on top of the cocoa layer in each cup. This step will reward you with incredible texture and flavor.
Step 5: Repeat the Layers
Pipe another layer of mascarpone cream on top of the wafers, then sift another dusting of cocoa powder. Add another three coffee-dipped wafers per cup, followed by the final creamy layer and a cocoa sprinkle. Think of these layers as a delicious little tower of flavors.
Step 6: Final Touches and Serve
Finish with a generous dusting of cocoa powder and adorn each cup with one whole Nilla wafer for that charming, inviting look. Now, it’s time to dig in and enjoy the delightful harmony of flavors in your Easy Tiramisu Cups Recipe.
How to Serve Easy Tiramisu Cups Recipe
Garnishes
To elevate the presentation even further, sprinkle a few chocolate shavings or a light dusting of cinnamon over the cocoa powder. Fresh mint leaves also add a pop of color and a refreshing hint that perfectly complements the richness.
Side Dishes
These cups shine so brightly on their own, but if you want to pair them, serve alongside a scoop of vanilla bean ice cream or fresh berries. The tartness of raspberries or strawberries cuts through the creamy layers for a balanced finish.
Creative Ways to Present
If you want to impress, try layering this dessert in clear mini mason jars or even martini glasses. Adding a small spoon tied with a ribbon to each cup makes it feel special and gift-worthy. You can even create a tiramisu cup bar, letting guests add their own garnishes for a fun party twist.
Make Ahead and Storage
Storing Leftovers
Leftover Easy Tiramisu Cups Recipe can be covered tightly and refrigerated for up to 2 days. The flavors will meld beautifully, making the dessert even more indulgent the next day.
Freezing
While freezing isn’t ideal since the delicate mascarpone may separate, you can freeze the assembled cups for up to 1 week if necessary. Thaw overnight in the refrigerator before serving, then give a gentle stir or fresh garnishing to refresh the texture and look.
Reheating
Since this is a no-bake, chilled dessert, reheating is not recommended. It’s best enjoyed cold or at room temperature after resting in the fridge for a few hours.
FAQs
Can I use espresso instead of coffee?
Absolutely! Espresso gives an even more intense coffee flavor, which pairs wonderfully with the creamy mascarpone. Just make sure it’s cooled before dipping the wafers.
What if I don’t have Nilla Wafers? Can I use something else?
You can substitute ladyfinger cookies or even thin biscotti. Just be mindful of soaking time, as some cookies absorb liquid faster than others.
Is it possible to make this recipe dairy-free?
For a dairy-free version, you could experiment with dairy-free cream cheese alternatives and non-dairy milk, but mascarpone’s unique creaminess might be hard to replicate perfectly.
How long should I chill the cups before serving?
While you can serve these cups immediately, chilling them for at least 1 hour lets the flavors meld and the texture firm up, improving the overall experience.
Can I prepare the components separately ahead of time?
Yes! You can whip the mascarpone cream and brew the coffee ahead, then assemble the cups just before serving to keep the wafers crisp and fresh.
Final Thoughts
I can’t recommend this Easy Tiramisu Cups Recipe enough if you want a dessert that feels both impressive and effortless. It’s perfect for those moments when you want to wow without the wait. So grab your ingredients, invite a friend over, and treat yourselves to these creamy, coffee-kissed delights!
“`
Print
Easy Tiramisu Cups Recipe
- Prep Time: 5 minutes
- Cook Time: 2 minutes
- Total Time: 7 minutes
- Yield: 8 servings
- Category: Dessert
- Method: No-Cook
- Cuisine: Italian
- Diet: Vegetarian
Description
These Easy Tiramisu Cups are a delightful and quick twist on the classic Italian dessert, perfect for individual servings. With layers of creamy mascarpone, coffee-soaked Nilla wafers, and a dusting of cocoa, this no-bake recipe combines rich flavors and simple preparation for a delicious treat any time.
Ingredients
Cheese Mixture
- 16 ounces mascarpone cheese (454 grams)
- ⅓ cup granulated sugar (67 grams)
- ¼ cup 2% milk (57 grams)
Other Ingredients
- ¼ cup unsweetened cocoa powder (21 grams)
- 36 Nabisco Nilla Wafers (135 grams)
- ½ cup strongly brewed coffee (114 grams)
Instructions
- Prepare the mascarpone mixture: In the bowl of a stand mixer fitted with the whisk attachment, beat together the mascarpone cheese, sugar, and milk until fluffy. If the mixture is too thick, add more milk a tablespoon at a time until it reaches a creamy consistency. Set aside.
- Pipe the bottom layer: Using a piping bag or a Ziplock bag with the corner cut off, pipe a layer of the mascarpone mixture into the bottom of 4 small glass cups.
- Add cocoa powder: Use a fine mesh sieve to lightly sprinkle a dash of cocoa powder over the mascarpone layer in each cup.
- Layer the coffee-soaked wafers: Quickly dip the Nilla wafers into the strongly brewed coffee to soak, then layer 3 wafers at a time into each cup on top of the cocoa powder.
- Repeat layering: Add another layer of the mascarpone cream, then dust with more cocoa powder. Repeat this layering one more time, building three layers of cream and wafers in each cup.
- Finish and garnish: Top the final layer with a dusting of cocoa powder and place a Nilla wafer on top as a garnish. Serve immediately or chill before enjoying.
Notes
- Use strongly brewed coffee for the best flavor contrast in the dessert.
- For a thinner cream mixture, add milk gradually until desired consistency is achieved.
- To make piping easier, chill the mascarpone mixture slightly before using.
- Chill the tiramisu cups for 30 minutes to an hour for a firmer texture before serving if time allows.
- Make sure not to soak the wafers too long to avoid sogginess.


