
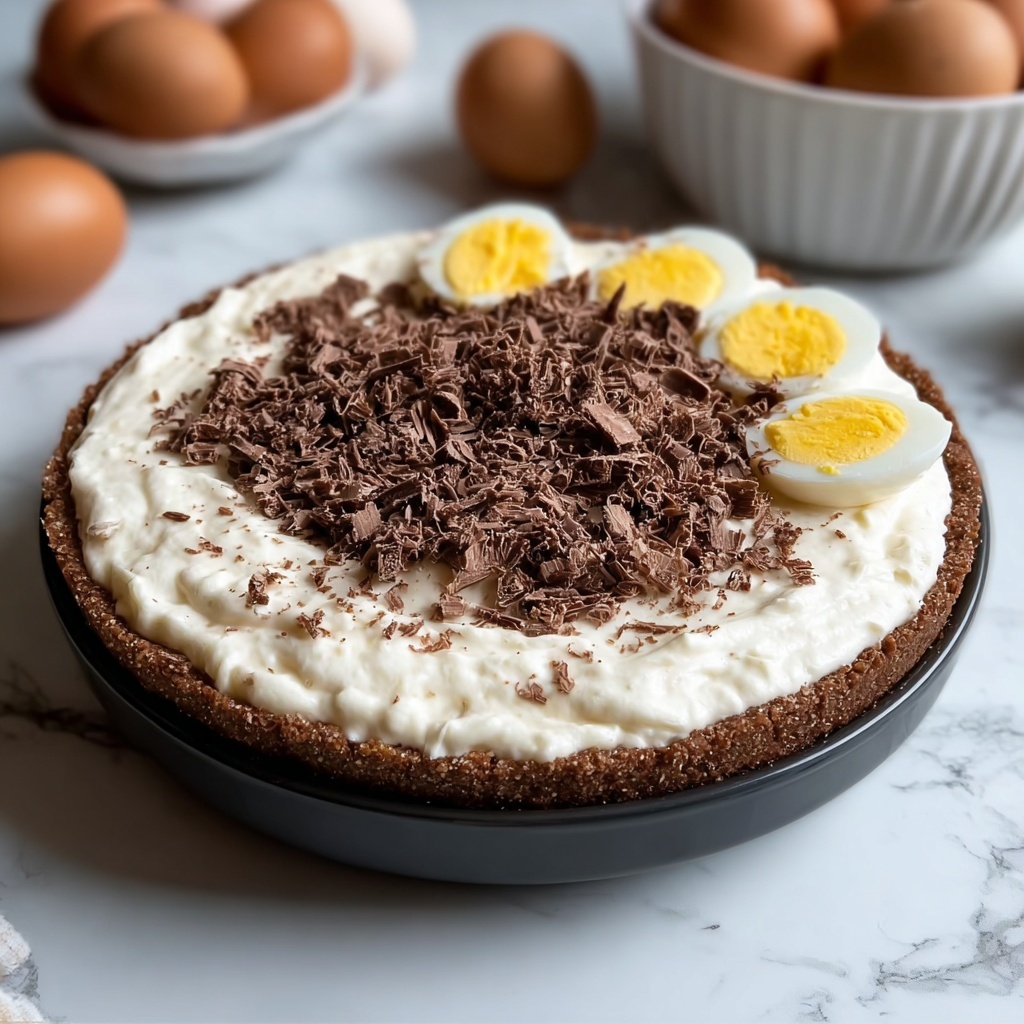
If you have a sweet tooth and love something creamy yet delightfully crunchy, you’re in for a treat with this No Bake Mini Egg Cheesecake Recipe. It’s the ultimate fuss-free dessert that combines a buttery biscuit base with a luxuriously smooth cream cheese filling studded with colorful, crunchy Mini Eggs. Perfect for Easter or any celebration, this dessert requires no oven time and delivers indulgence in every bite. Trust me, once you try this No Bake Mini Egg Cheesecake Recipe, it will quickly become a beloved favorite to make again and again!
Ingredients You’ll Need
This No Bake Mini Egg Cheesecake Recipe is wonderfully simple, relying on a handful of key ingredients that work harmoniously to create flavor, texture, and visual appeal. Each component plays an essential role, from the crisp biscuit base to the airy, creamy filling packed with bursts of candy crunch.
- Digestive biscuits, 1 1/2 cups, crushed: Provides a sturdy and buttery base with just the right crunch.
- Unsalted butter, 1/4 cup, melted: Binds the biscuit crumbs perfectly, adding rich flavor.
- Cream cheese, 500 g, softened: The heart of the cheesecake, creamy and smooth for the perfect texture.
- Icing sugar, 1/2 cup: Sweetens the filling evenly without overpowering.
- Vanilla extract, 1 teaspoon: Adds a subtle, warm flavor that enhances all the other ingredients.
- Double cream, 1 cup: Whipped to soft peaks, it lightens the filling, giving it a fluffy, melt-in-your-mouth quality.
- Mini Eggs, 200 g, crushed: Bursting with colorful crunch, these make the cheesecake extra fun and festive.
How to Make No Bake Mini Egg Cheesecake Recipe
Step 1: Prepare Your Base
Start by gathering all your ingredients so everything is within easy reach. Place crushed digestive biscuits in a large bowl, then pour in melted unsalted butter. Mix well, ensuring every crumb is coated. Press this mixture firmly into the base of your chosen tin for a compact crust, then chill it in the fridge until it sets, about 30 minutes. This forms the perfect crunchy foundation for your cheesecake.
Step 2: Mix the Cream Cheese Filling
While the base chills, get your cream cheese ready. Beat it until smooth and creamy using an electric mixer or whisk. Add in the icing sugar and vanilla extract, blending until fully combined. In a separate bowl, whip your double cream to soft peaks, then gently fold it into the cream cheese mixture to keep the filling light and airy. Finally, fold in the crushed Mini Eggs, which add a wonderful surprise of crunch and color throughout the cheesecake.
Step 3: Assemble the Cheesecake
Take the chilled biscuit base out of the fridge and spoon the cheesecake filling on top. Smooth it out evenly with a spatula for a clean, polished look. Return the assembled cheesecake to the fridge and let it set for at least four hours—overnight is even better—to achieve that luxurious, sliceable texture that makes each portion a dream to enjoy.
Step 4: Serve and Enjoy
Once set, carefully remove your cheesecake from the tin. For an extra touch, sprinkle some crushed Mini Eggs over the top for decoration. This colorful topping not only looks gorgeous but adds another delightful crunch with every bite. Now your No Bake Mini Egg Cheesecake Recipe is ready to wow friends and family alike!
How to Serve No Bake Mini Egg Cheesecake Recipe

Garnishes
A handful of crushed Mini Eggs on top is a simple way to brighten this dessert and highlight the candy surprise inside. For a touch of elegance, you can also add a dollop of whipped cream or scatter some finely chopped dark chocolate to balance the sweetness.
Side Dishes
This mini cheesecake pairs beautifully with fresh berries, which add freshness and a pop of tartness against the creamy richness. Alternatively, serving it alongside a scoop of vanilla ice cream makes for a decadent double dessert experience.
Creative Ways to Present
Present each cheesecake in individual mini tart tins or ramekins for charming single servings. For a playful twist, try layering the cheesecake filling and biscuit base in clear glasses or jars, creating a delightful visual parfait effect that will wow your guests.
Make Ahead and Storage
Storing Leftovers
Store any leftover No Bake Mini Egg Cheesecake in an airtight container in the refrigerator. It will keep wonderfully for up to three days, allowing the flavors to meld even more beautifully with time.
Freezing
You can freeze this cheesecake by wrapping it tightly with plastic wrap and then foil. Freeze for up to one month. Thaw overnight in the fridge before serving to maintain its perfect creamy texture.
Reheating
This cheesecake is best enjoyed cold, so reheating isn’t recommended. Instead, simply let chilled or thawed portions come to room temperature for 10–15 minutes to soften slightly before serving.
FAQs
Can I use other types of biscuits for the base?
Absolutely! While digestive biscuits provide an ideal buttery crunch, you can experiment with graham crackers or shortbread for different flavors and textures.
Is it possible to make this cheesecake vegan?
This recipe relies on cream cheese and double cream, so for a vegan version, try using plant-based cream cheese and coconut cream, but note the texture and taste will vary slightly.
Do the Mini Eggs melt into the filling?
The Mini Eggs remain crunchy because they are folded into the airy filling just before assembly, preserving their delightful candy shell texture.
Can I make this recipe in one large cheesecake tin?
Definitely! The ingredients and method scale perfectly for a larger cheesecake tin, just ensure the base is evenly pressed and allow sufficient chilling time.
What if I don’t have double cream?
You can substitute with heavy whipping cream, which whips to soft peaks and provides the same light, fluffy texture the recipe needs.
Final Thoughts
This No Bake Mini Egg Cheesecake Recipe is pure joy in dessert form—easy to prepare, colorful, and irresistibly tasty. It’s an excellent choice when you want to impress without fuss, and the combination of creamy filling with crunchy candy eggs is unbeatable. I encourage you to give this recipe a try soon; once you do, it’s sure to become a treasured go-to for celebrations and cozy afternoons alike!
Print
No Bake Mini Egg Cheesecake Recipe
- Prep Time: 0h 20m
- Cook Time: 0h 0m
- Total Time: 4h 20m
- Yield: 8 servings
- Category: Dessert
- Method: No-Cook
- Cuisine: British
Description
This No Bake Mini Egg Cheesecake is a delightful, easy-to-make dessert featuring a buttery digestive biscuit base topped with a creamy, smooth cheesecake filling studded with crunchy crushed Mini Eggs. Perfect for Easter or any chocolate lover, this recipe requires no baking and sets beautifully in the fridge, offering a rich and indulgent treat with classic festive flavors.
Ingredients
Base
- 1 1/2 cups digestive biscuits, crushed
- 1/4 cup unsalted butter, melted
Filling
- 500 g cream cheese, softened
- 1/2 cup icing sugar
- 1 teaspoon vanilla extract
- 1 cup double cream
- 200 g Mini Eggs, crushed
Instructions
- Gather Ingredients: To begin, gather all the ingredients: digestive biscuits, unsalted butter, cream cheese, icing sugar, vanilla extract, double cream, and Mini Eggs.
- Crush Biscuits: Place the digestive biscuits into a large bowl and use a rolling pin or a food processor to crush them until fine crumbs form.
- Melt Butter: In a separate small bowl, melt the unsalted butter either in the microwave or over the stove until fully liquid.
- Combine Butter and Biscuits: Pour the melted butter over the crushed biscuits and mix thoroughly until all crumbs are evenly coated with butter.
- Form Base: Press the biscuit mixture firmly into the base of a tart tin or mini cheesecake tins, smoothing it into an even, compact layer.
- Chill Base: Place the tin in the refrigerator and chill the base for at least 30 minutes to set properly.
- Prepare Cheesecake Filling: While the base is chilling, place the softened cream cheese into a large mixing bowl and beat it with an electric mixer or hand whisk until smooth and creamy.
- Add Sugar and Vanilla: Add the icing sugar to the cream cheese and continue mixing until fully combined, then pour in the vanilla extract and mix thoroughly.
- Whip Cream: In a separate bowl, whip the double cream until soft peaks form, ensuring it is light and airy.
- Fold Cream into Filling: Gently fold the whipped cream into the cream cheese mixture, taking care to maintain the airy texture.
- Add Mini Eggs: Fold the crushed Mini Eggs gently into the cheesecake mixture to evenly distribute the crunchy chocolate pieces.
- Assemble Cheesecake: Remove the chilled biscuit base from the fridge and spoon the cheesecake filling over it, smoothing the top with a spatula for an even finish.
- Set Cheesecake: Return the cheesecake to the fridge and allow it to set for at least 4 hours, preferably overnight for best results.
- Serve: Once set, carefully remove the cheesecake from the tin, decorate with extra crushed Mini Eggs if desired, slice, and serve.
Notes
- Ensure the cream cheese is fully softened for a smooth cheesecake filling free of lumps.
- Melt the butter gently to avoid burning and ensure even coating of biscuit crumbs.
- For a firmer base, chill longer or press the biscuit mix firmly to compact it well.
- Whip the cream to soft peaks only; overwhipping can cause the filling to become grainy.
- Gently folding whipped cream and crushed Mini Eggs into the mixture preserves texture and prevents deflation.
- This cheesecake is best served chilled and consumed within 2-3 days for optimal freshness.
- Mini Eggs can be replaced with other small chocolate candy for variation.


