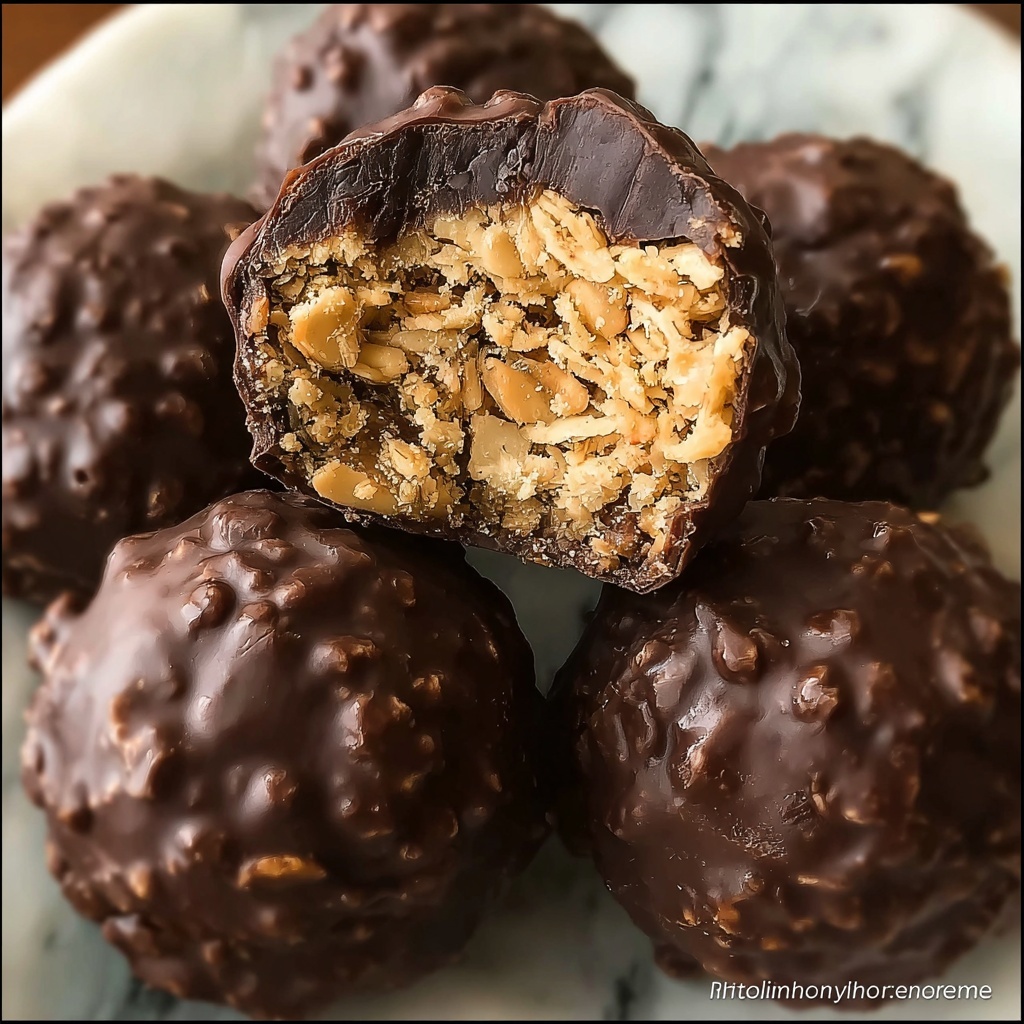
If you’re looking for a nostalgic, crunchy, and utterly delicious treat, you have to try this Peanut Butter Rice Krispies Balls with Chocolate Coating Recipe. It combines creamy peanut butter with the irresistible snap of Rice Krispies cereal all wrapped up in a glossy, rich chocolate shell. These little bites of joy are perfect for satisfying any sweet craving, impressing guests at a party, or simply indulging in a nostalgic snack that everyone will love.
Ingredients You’ll Need
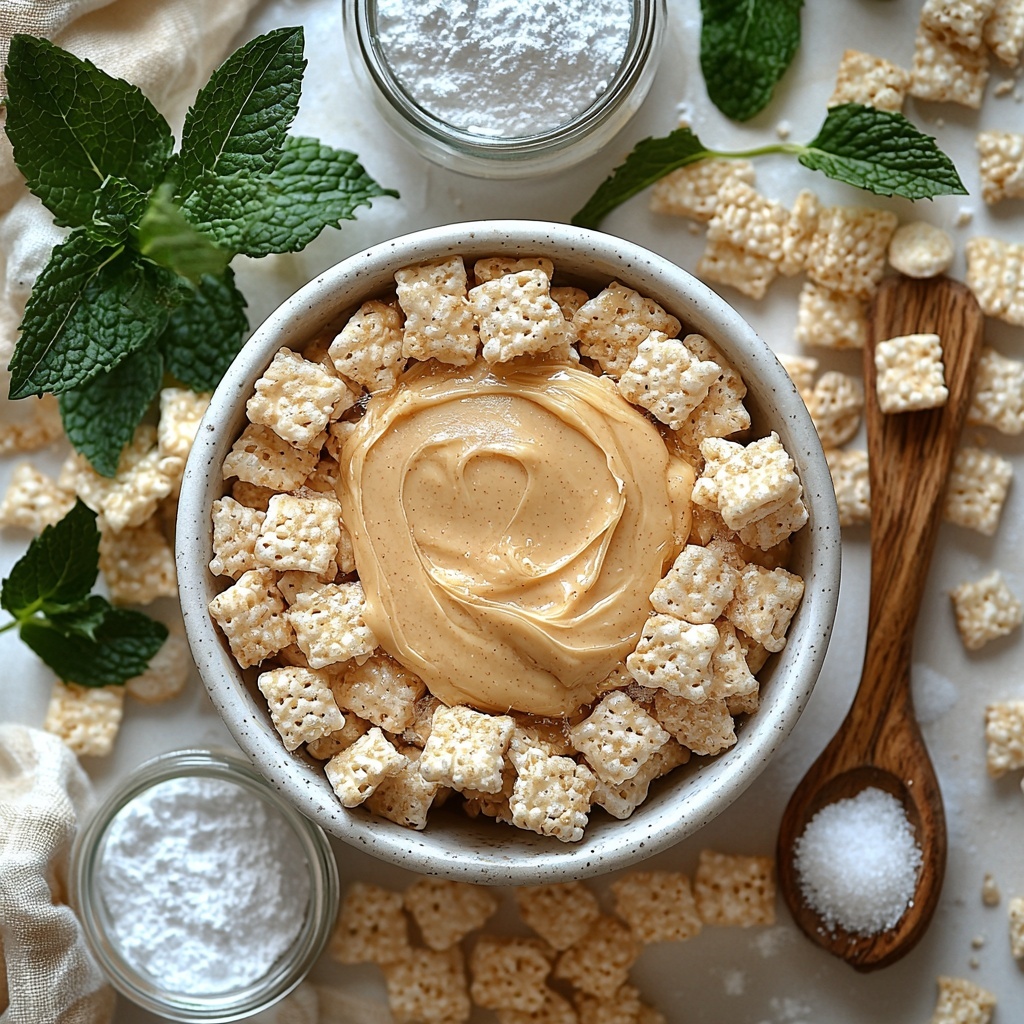
With just a handful of simple ingredients, this recipe proves that you don’t need a long grocery list to create something truly special. Each ingredient plays a key role—smooth peanut butter for creaminess, crispy Rice Krispies for texture, sweet powdered sugar for balance, and luscious chocolate for the perfect finishing touch.
- 1 cup creamy no-stir peanut butter: Provides a smooth, rich base that binds the mixture together with irresistible flavor.
- 3 tablespoons salted butter (melted): Adds a silky texture and a touch of saltiness that enhances the peanut butter’s nuttiness.
- 1 cup powdered sugar: Sweetens the mixture without any graininess, creating a dough-like consistency.
- 2 ½ cups Rice Krispies cereal: Brings the signature crunch that keeps each bite exciting and light.
- 12 oz semi-sweet chocolate chips (or melting wafers): Forms a smooth, glossy coating that perfectly complements the peanut butter center.
How to Make Peanut Butter Rice Krispies Balls with Chocolate Coating Recipe
Step 1: Blend the Peanut Butter and Butter
Start by stirring together the creamy peanut butter and melted salted butter in a mixing bowl until the mixture is completely smooth. This step ensures a rich, buttery base that will hold your Rice Krispies together perfectly.
Step 2: Fold in the Rice Krispies
Gently fold the Rice Krispies cereal into the peanut butter mixture. The goal here is to coat the cereal evenly without crushing it, keeping that unmistakable crunch intact.
Step 3: Add the Powdered Sugar
Next, sprinkle in the powdered sugar and mix until the entire mixture resembles a firm, dough-like consistency. This helps everything bind together but keeps the balls tender and easy to shape.
Step 4: Chill the Mixture
Pop the mixture into the refrigerator for at least 30 minutes. Chilling makes it much easier to roll the balls without sticking to your hands and helps firm up the texture.
Step 5: Shape the Balls
Once chilled, scoop equal portions onto a lined baking sheet. Roll each portion between your hands until smooth and round. You’ll have about 24 perfectly sized Peanut Butter Rice Krispies Balls with Chocolate Coating Recipe bites.
Step 6: Melt the Chocolate
Melt your semi-sweet chocolate chips or melting wafers in a microwave-safe bowl, heating in short bursts and stirring often until glossy and smooth. This luscious chocolate will be your coating.
Step 7: Dip the Balls in Chocolate
Using a fork or dipping tool, coat each peanut butter ball thoroughly in the melted chocolate. Make sure the chocolate covers every inch for that beautiful, shiny finish.
Step 8: Chill Until Firm
Return the chocolate-covered balls to the lined baking sheet and chill again until the chocolate sets up firm. This step locks in the flavors and keeps the Peanut Butter Rice Krispies Balls with Chocolate Coating Recipe perfectly bite-sized and delicious.
How to Serve Peanut Butter Rice Krispies Balls with Chocolate Coating Recipe
Garnishes
If you want to add a special touch when serving, sprinkle chopped peanuts or a light dusting of sea salt on the freshly dipped chocolate before chilling. This little garnish not only looks stunning but adds an extra crunch to complement the soft peanut butter and crispy cereal.
Side Dishes
These treats are fantastic on their own, but they pair beautifully with a tall glass of milk, a cup of strong coffee, or even a scoop of vanilla ice cream if you’re looking for a more indulgent dessert spread. Their sweet and savory balance can enhance many casual get-together menus.
Creative Ways to Present
For an eye-catching presentation, arrange your Peanut Butter Rice Krispies Balls with Chocolate Coating Recipe in mini paper cups or on a tiered dessert stand. Wrapping each ball lightly in colored parchment or festive cellophane makes them perfect for gift-giving or party favors, too.
Make Ahead and Storage
Storing Leftovers
You can store leftover Peanut Butter Rice Krispies Balls with Chocolate Coating Recipe in an airtight container in the refrigerator for up to one week. Keeping them chilled preserves the chocolate coating’s glossy finish and keeps the texture just right.
Freezing
For longer storage, freeze the balls on a baking sheet until solid, then transfer to a freezer-safe container or bag. They freeze beautifully for up to three months and can be enjoyed straight from the freezer or thawed in the fridge overnight.
Reheating
Since these treats are best enjoyed cold, there’s no need to reheat them. If you do want to soften the chocolate a bit, just let them sit at room temperature for 10–15 minutes before serving.
FAQs
Can I use crunchy peanut butter instead of creamy?
Yes! Crunchy peanut butter will add an extra layer of texture to the balls, making them even more interesting with bits of peanuts inside. Just be sure to blend it well with the butter to keep everything cohesive.
What if I don’t have Rice Krispies cereal?
If you can’t find Rice Krispies, any similar puffed rice cereal will work fine. Just keep in mind that the texture might vary slightly depending on the crispness and size of the cereal.
Is it possible to use a different type of chocolate?
Absolutely. While semi-sweet chocolate is a classic choice, you can experiment with milk chocolate for a sweeter touch or dark chocolate for more intensity. White chocolate could work too, though it will change the flavor profile significantly.
How do I make the chocolate coating smooth and shiny?
Melting chocolate slowly in short bursts and stirring in between helps achieve that glossy finish. Using melting wafers designed for coating can also make the process easier and the results more professional-looking.
Can these balls be made nut-free?
To make a nut-free version, you’d need to substitute the peanut butter with a seed butter like sunflower seed butter. The texture may alter slightly but you’ll still get a delicious, crunchy treat with the Rice Krispies and chocolate.
Final Thoughts
There’s truly something magical about the Peanut Butter Rice Krispies Balls with Chocolate Coating Recipe—it brings together simple ingredients into a bite-sized delight that’s both nostalgic and elegant. Whether you’re making them for a casual snack, a party, or just to satisfy a sweet tooth, I promise these treats will bring a smile to everyone’s face. Give it a try, and I bet you’ll find yourself reaching for these irresistible balls again and again!
Print
Peanut Butter Rice Krispies Balls with Chocolate Coating Recipe
- Prep Time: 20 minutes
- Cook Time: 0 minutes
- Total Time: 50 minutes
- Yield: Approximately 24 peanut butter balls
- Category: Dessert
- Method: No-Cook
- Cuisine: American
Description
Delightfully crunchy and creamy Peanut Butter Balls coated in rich chocolate and crispy Rice Krispies make for a perfect no-bake treat. These bite-sized snacks combine the smoothness of peanut butter with the satisfying crunch of cereal, all enveloped in a luscious chocolate shell—ideal for parties, holidays, or anytime indulgence.
Ingredients
Peanut Butter Mixture
- 1 cup creamy no-stir peanut butter
- 3 tablespoons salted butter, melted
- 1 cup powdered sugar
- 2 ½ cups Rice Krispies cereal
Chocolate Coating
- 12 oz semi-sweet chocolate chips or chocolate melting wafers
Instructions
- Combine Peanut Butter and Butter: In a mixing bowl, stir together the creamy peanut butter and melted salted butter until the mixture is smooth and homogenous, ensuring an even base for the balls.
- Incorporate Rice Krispies: Gently fold in the Rice Krispies cereal, mixing carefully to evenly distribute the cereal without crushing it, preserving the crunch.
- Add Powdered Sugar: Sprinkle in the powdered sugar and mix thoroughly until the mixture develops a dough-like consistency that holds together well for molding.
- Chill the Mixture: Place the peanut butter dough into the refrigerator for at least 30 minutes to firm up, which facilitates easier shaping of the balls.
- Shape the Balls: Using a spoon or small scoop, portion out equal amounts onto a lined baking sheet and roll each into a smooth, compact ball by hand.
- Melt the Chocolate: In a microwave-safe bowl, melt the chocolate chips in short bursts, stirring frequently until the chocolate is fully smooth and melted without overheating.
- Dip and Coat: Carefully dip each peanut butter ball into the melted chocolate, ensuring an even coating all around. Place the coated balls back onto the lined baking sheet.
- Final Chill: Refrigerate the chocolate-coated peanut butter balls until the chocolate hardens and sets, making them ready to serve.
Notes
- Use no-stir peanut butter to simplify preparation and ensure consistent texture.
- Chilling the mixture and finished balls is key to maintaining shape and firmness.
- Chocolate melting wafers can be used as an alternative to chocolate chips for a smoother coating.
- Store peanut butter balls in an airtight container in the refrigerator for up to one week.
- For added flavor, consider sprinkling a pinch of sea salt on the chocolate before it sets.

