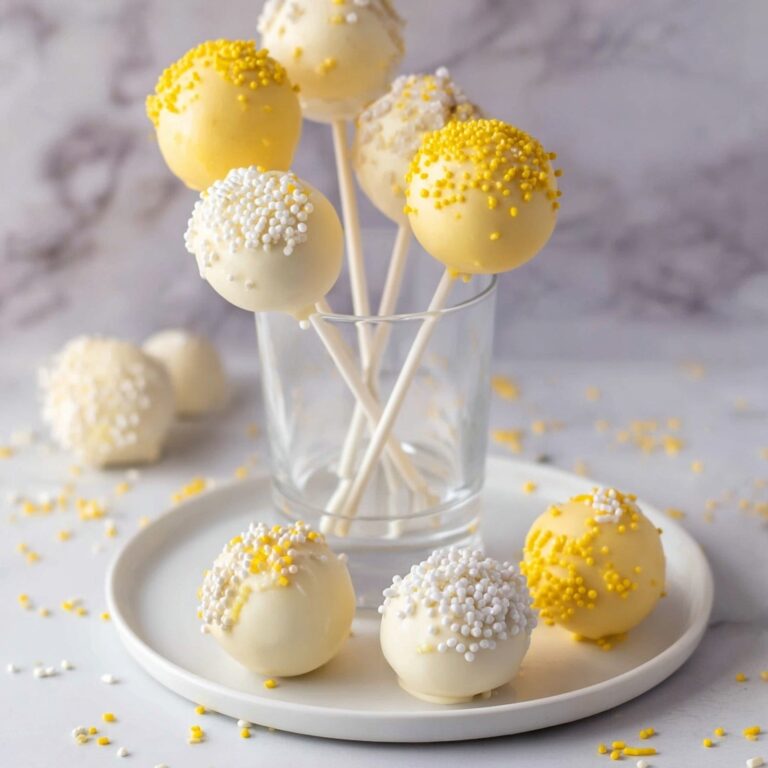
If there’s ever a dessert destined to spread a little magic, it’s these Romantic Cake Pops. A show-stopping blend of red velvet cake, creamy frosting, and dazzling candy coating, each bite delivers the perfect balance of tangy, velvety richness and playful sweetness. Whether gifting to your sweetheart, celebrating with friends, or treating yourself to a little luxury, this recipe comes together with remarkably simple steps—and the end results look like you’ve spent all day in the kitchen. These are bite-sized bundles of love that will make any day (and every table!) feel extra special.

Ingredients You’ll Need
The beauty of Romantic Cake Pops lies in their simplicity. Each ingredient is carefully chosen for maximum impact, from the vivid color of red velvet to the dreamy texture of frosting. Here’s everything you need, along with tips to make each component shine:
- Red velvet cake mix: Brings a rich, cocoa-infused flavor and that universally adored ruby hue; use your favorite brand or make your own for extra flair.
- Eggs, oil, and water (as required by your cake mix): Crucial for transforming the mix into a tender, moist cake worthy of these pops.
- Cream cheese frosting (store-bought or homemade): Adds tanginess and binds everything together into a luscious, rollable dough.
- White chocolate or pink, red, and white candy melts: For a crisp, sweet outer shell that can be customized to suit your mood or celebration.
- Heart-shaped sprinkles or edible glitter: Instantly ups the charm factor—have fun mixing and matching for your own signature look.
- Lollipop sticks: The secret to serving these treats as the most adorable pops-on-a-stick; look for sturdy, food-safe sticks at craft stores or online.
How to Make Romantic Cake Pops
Step 1: Bake the Red Velvet Cake
Start by preparing the red velvet cake according to your package directions, or whip up a homemade version if you’re feeling ambitious. Let the cake cool completely—this is essential so things don’t turn into a gooey mess later! Once cooled, you’ll have the foundation for romantic cake pops that taste homemade, even if they start from a mix.
Step 2: Crumble and Mix
Break the cooled cake into fine crumbs using your hands or a fork, aiming for an even, fluffy texture. Add the cream cheese frosting to the bowl, then mix until you get a dough-like consistency. The mixture should hold together when pressed, with just the right amount of moisture—add the frosting a bit at a time to avoid over-saturating.
Step 3: Shape and Chill
Scoop out tablespoon-sized portions and roll them into 1-inch balls between your palms. Place the balls on a parchment-lined baking sheet, spacing them apart. Pop the tray into the freezer for 15–20 minutes, just until the balls are firm but not frozen solid—this helps them hold their shape for dipping.
Step 4: Dip and Decorate
Melt your chocolate or candy melts as directed on the package, stirring until smooth. Dip the tip of each lollipop stick into the melted chocolate, then insert it halfway into a cake ball—this creates a secure hold. Working one at a time, dip each pop into the melted chocolate, turning to coat evenly. Tap off any excess, then immediately shower with heart-shaped sprinkles or edible glitter before the coating sets.
Step 5: Set and Enjoy
Arrange the decorated pops upright in a styrofoam block or a special cake pop stand. Allow the coating to set at room temperature, or for quicker results, place them in the fridge. Once firm, your Romantic Cake Pops are ready to inspire smiles and satisfy sweet cravings!
How to Serve Romantic Cake Pops

Garnishes
A finishing touch can make all the difference: try a dusting of edible gold or silver glitter for an extra sparkle, or drizzle with contrasting chocolate for a modern look. You can even tuck a tiny sugar flower or fondant heart on the top of each pop to echo the romantic theme. Each pop becomes utterly irresistible with just a little extra flourish.
Side Dishes
Pair these pops with a glass of chilled prosecco, a cappuccino, or a sweet berry coulis for dipping. They’re also lovely alongside fresh strawberries or a platter of mixed berries for a refreshing color and flavor contrast. On a dessert table, these cake pops are a natural centerpiece among cookies, chocolates, or cream-filled pastries.
Creative Ways to Present
Transform your presentation into an event by displaying Romantic Cake Pops in decorative jars filled with colored sand, beans, or sugar. Wrap individual pops in cellophane and tie with ribbon for party favors or gifts. For a dramatic touch, cluster pops in a heart-shaped arrangement for Valentine’s Day, anniversaries, or even proposals—talk about a sweet surprise!
Make Ahead and Storage
Storing Leftovers
To keep your Romantic Cake Pops fresh and moist, store them in an airtight container in the refrigerator. They retain their best texture and flavor for up to 5 days, making them perfect for prepping ahead for parties, gifting, or those spontaneous sweet cravings.
Freezing
Want to make a batch in advance or save some for later? Freeze undecorated cake balls in a single layer, then transfer to a zip-top bag or airtight container for up to 2 months. When you’re ready, let them thaw in the fridge, then dip and decorate fresh for maximum eye appeal.
Reheating
Since Romantic Cake Pops are best enjoyed chilled or at room temperature, there’s no need to reheat them. If they’ve been stored in the fridge, simply let them sit at room temperature for about 10–15 minutes to soften the coating slightly before serving.
FAQs
Can I use a homemade cake and frosting for these cake pops?
Absolutely! Homemade red velvet cake and fresh cream cheese frosting deliver an even richer, more personal flavor. Just be sure your cake has fully cooled before crumbling to achieve the perfect texture.
How do I prevent my cake pops from falling off the sticks?
Dip the lollipop stick tip in melted chocolate before inserting into each cake ball—this sets like edible glue. Chilling the pops before dipping also helps them hold together during the decorating stage.
What’s the best way to get a smooth chocolate coating?
Use good-quality melting chocolate or candy melts, heat carefully as directed, and let any excess chocolate drip off by gently tapping the stick. Swirl or roll while slowly rotating for an even layer that looks truly professional.
Can I customize the decorations for different occasions?
Absolutely! Colorful melts, a variety of sprinkles, or themed toppers let you transform Romantic Cake Pops for birthdays, weddings, holidays, or any festive gathering—just follow your imagination.
Are Romantic Cake Pops gluten-free or vegetarian?
These pops are vegetarian by default. To make gluten-free cake pops, simply use a gluten-free cake mix and double-check that your candy melts and sprinkles are safe for your dietary needs.
Final Thoughts
If you’re searching for a treat that’s equal parts playful and swoon-worthy, Romantic Cake Pops are your answer. They’re as much fun to make as they are delightful to eat, and always bring a sense of celebration to the table. Gather a few ingredients, share with loved ones, and let every pop be a sweet reminder that a little bit of love (and cake!) goes a long way.
Print
Romantic Cake Pops Recipe
- Prep Time: 30 minutes
- Cook Time: 30 minutes
- Total Time: 1 hour
- Yield: 30–40 cake pops
- Category: Dessert
- Method: No-Bake (after baking the cake)
- Cuisine: American
- Diet: Vegetarian
Description
Indulge in these delightful Romantic Cake Pops made with red velvet cake, cream cheese frosting, and coated in white chocolate. These charming treats are perfect for Valentine’s Day or any special occasion.
Ingredients
For the Cake Pops:
- 1 box red velvet cake mix (plus ingredients listed on box)
- 1 can (16 oz) cream cheese frosting
- 12 oz white chocolate or candy melts (pink, red, or white)
- Heart-shaped sprinkles or edible glitter
- 30–40 lollipop sticks
Instructions
- Bake the Red Velvet Cake: Prepare the red velvet cake according to the package instructions and let it cool completely.
- Prepare the Cake Mixture: Crumble the cooled cake into fine crumbs in a large bowl. Add the cream cheese frosting and mix until dough-like.
- Shape the Cake Balls: Roll the mixture into 1-inch balls and place them on a parchment-lined baking sheet. Chill in the freezer until firm.
- Coat the Cake Balls: Melt the chocolate or candy melts and dip the tip of a lollipop stick into the melted chocolate. Insert the stick into a cake ball. Dip the cake pop fully into the melted chocolate and decorate with sprinkles.
- Set the Cake Pops: Place the cake pops upright to set in a styrofoam block or cake pop stand. Let them firm up at room temperature or in the fridge.
Notes
- You can use homemade red velvet cake and cream cheese frosting for a personalized touch.
- Enhance the flavor with a splash of vanilla or almond extract.
- For a gluten-free option, use a gluten-free cake mix.
- Store the cake pops in an airtight container in the fridge for up to 5 days.
Nutrition
- Serving Size: 1 cake pop
- Calories: 150
- Sugar: 12g
- Sodium: 110mg
- Fat: 7g
- Saturated Fat: 3.5g
- Unsaturated Fat: 2.5g
- Trans Fat: 0g
- Carbohydrates: 19g
- Fiber: 0.5g
- Protein: 1g
- Cholesterol: 10mg

