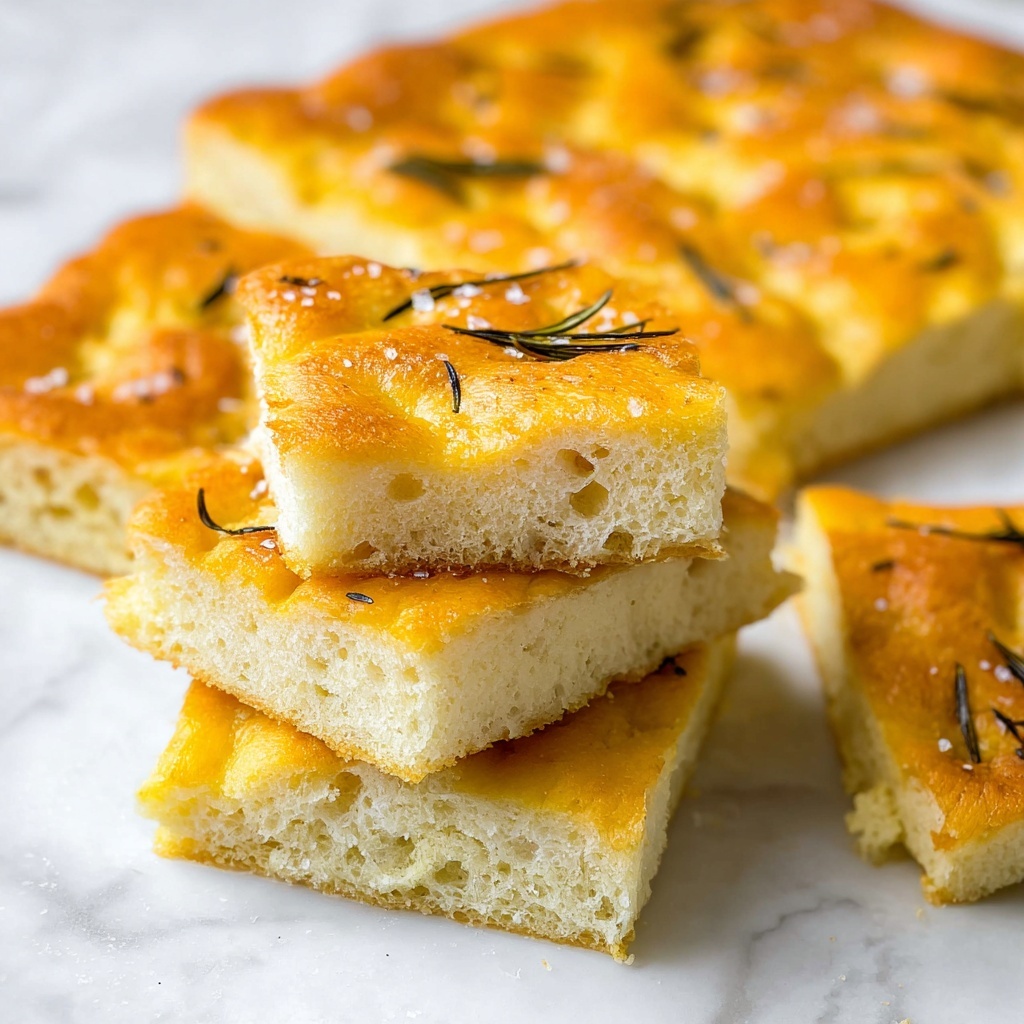
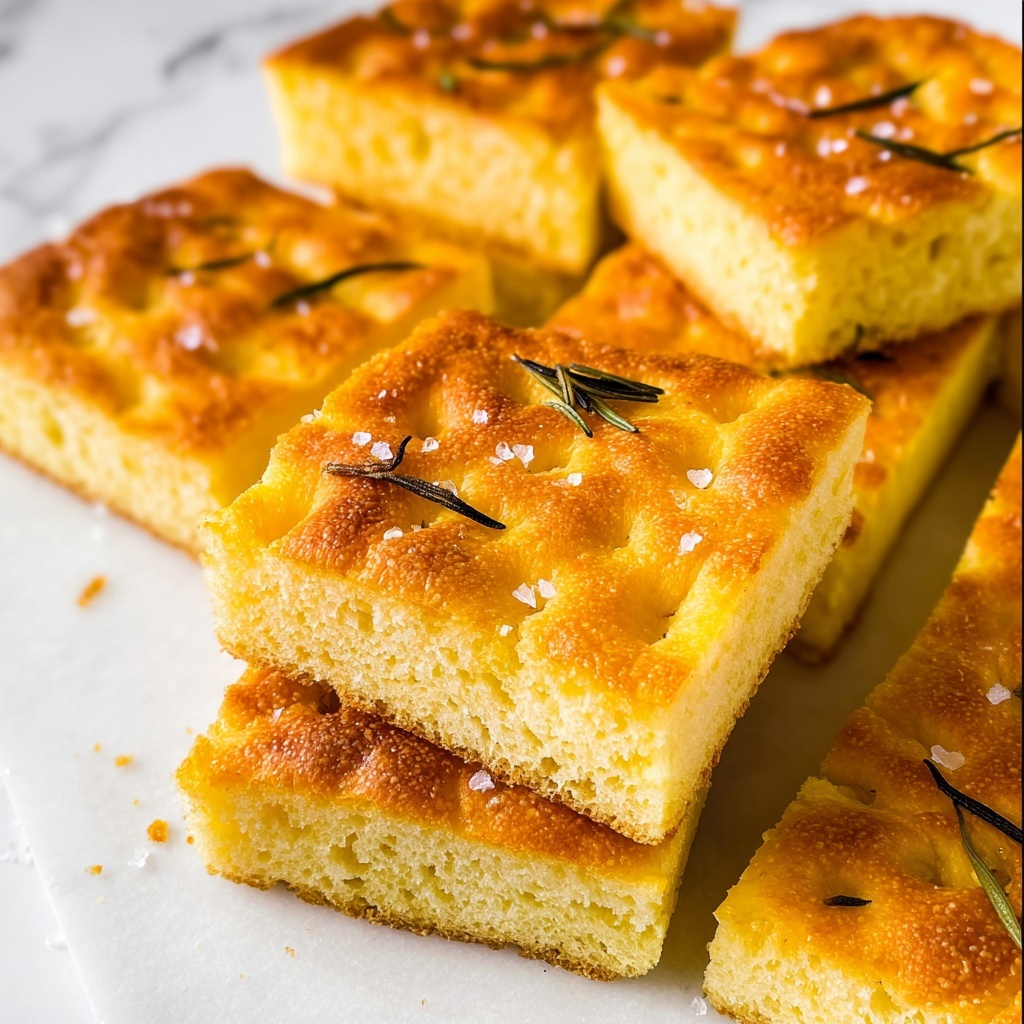
If you have ever wished to recreate a cozy Italian bakery moment at home, this Rosemary Focaccia Recipe is exactly what you need. Soft and pillowy on the inside with a delightfully crisp, golden crust, this focaccia sings with fragrant rosemary and a sprinkle of sea salt that brings every bite to life. It’s the perfect blend of rustic charm and simple ingredients, coming together to create an irresistible bread that makes any meal feel special.
Ingredients You’ll Need
The magic behind this Rosemary Focaccia Recipe lies in its simplicity. Each ingredient is carefully chosen to build layers of flavor and texture that complement one another beautifully, making the dough tender yet sturdy and bursting with freshness.
- Water (1¾ cups, warm 105-110°F): Activates the yeast and hydrates the flour for perfect dough consistency.
- Active dry yeast (2¼ teaspoons): The leavening agent that brings lightness and air to your focaccia.
- Granulated sugar (1 tablespoon): Feeds the yeast to help it bloom and rise properly.
- All-purpose flour (5 cups): The foundation of your focaccia providing structure and chew.
- Kosher salt (1 tablespoon): Enhances flavor and strengthens the dough’s gluten network.
- Extra-virgin olive oil (1 cup, divided): Adds richness, moisture, and helps create that crisp golden crust.
- Fresh rosemary (2 sprigs): Adds an aromatic, piney flavor that makes this focaccia unforgettable.
- Sea salt flakes: Sprinkled on top to create a delightful crunch and burst of saltiness.
How to Make Rosemary Focaccia Recipe
Step 1: Activate the Yeast
Start by whisking the warm water, yeast, and sugar together in a small bowl or measuring cup. Let this mixture sit for about 10 minutes until it becomes frothy and smells wonderfully yeasty, which means your yeast is ready to work its magic.
Step 2: Combine Dry Ingredients
In your stand mixer bowl, whisk together the flour and kosher salt by hand. This ensures the salt is evenly distributed throughout the flour so every bite has the perfect hint of seasoning.
Step 3: Mix Dough Ingredients
Pour in half a cup of olive oil and the activated yeast mixture to the flour mixture. Using a dough hook on low speed, mix everything until just combined, scraping down the sides to make sure no flour is left out of the party.
Step 4: Knead the Dough
Turn the speed to medium and knead the dough for about 5 to 6 minutes. You’re aiming for a dough that’s tacky but holds together enough to lift from the bowl. It’s okay if it feels a little loose—it will firm up with a few more kneads by hand.
Step 5: Final Hand Kneading
Lightly flour your work surface and knead the dough a few times until it is less sticky and easier to handle. This step helps build structure while ensuring the dough stays soft and pliable.
Step 6: First Rise
Coat a large bowl generously with olive oil, place the dough inside, and cover it with plastic wrap or a kitchen towel. Set it in a warm spot for about 60 minutes or until it doubles in size—this first rise is when the dough develops flavor and that airy texture.
Step 7: Prepare the Pan
Coat a rimmed baking sheet with the remaining olive oil using a pastry brush, making sure to cover the entire surface and sides. This prevents sticking and adds to the focaccia’s crispy edges.
Step 8: Shape the Dough
Transfer the risen dough to the oiled baking sheet. Gently press and stretch it with your hands until it fills the pan, embracing all the space with a perfect, rustic rectangle.
Step 9: Create Signature Dimples
Use your fingers to press down into the dough, making dimples all over the surface. These little pockets are essential for catching oil and toppings, and they give focaccia its iconic look and texture.
Step 10: Second Rise
Cover the dough loosely and let it rest again for around 60 minutes to puff back up, ensuring a wonderfully fluffy inside beneath that crisp top.
Step 11: Preheat and Top
While the dough is rising, preheat your oven to 425°F. Once the dough has doubled in size, drizzle the remaining olive oil all over it, sprinkle fresh rosemary sprigs evenly, and scatter sea salt flakes to taste.
Step 12: Bake to Perfection
Bake the focaccia for 25 to 30 minutes until it turns a gorgeous golden brown with crispy edges. The aroma as it bakes will fill your kitchen with that irresistible rosemary-scented warmth.
Step 13: Cool and Slice
Allow the focaccia to cool before slicing. This rest time helps the crumb set so each slice holds together beautifully and reveals its tender, airy texture underneath that salty, herby crust.
How to Serve Rosemary Focaccia Recipe

Garnishes
Enhance your Rosemary Focaccia Recipe with a drizzle of extra virgin olive oil or a sprinkle of flaky sea salt just before serving. A touch of freshly cracked black pepper or a grating of Parmesan cheese can also elevate it to something extra special.
Side Dishes
This bread pairs brilliantly with soups like tomato basil or creamy mushroom, as well as hearty salads and antipasti platters featuring olives, cheeses, and cured meats. It’s also divine alongside a simple bowl of marinated beans or roasted vegetables.
Creative Ways to Present
Try slicing your focaccia to make sandwiches with fresh mozzarella, sun-dried tomatoes, and arugula. Or cut it into small squares for appetizers alongside a lovely herbed olive oil dip. It’s such a versatile bread that can be dressed up or enjoyed as a rustic treat.
Make Ahead and Storage
Storing Leftovers
Store any leftover focaccia in an airtight container or wrapped tightly in plastic wrap at room temperature for up to 2 days to maintain freshness and softness.
Freezing
If you want to save focaccia for longer, wrap it well in plastic wrap and then foil before freezing. It will keep beautifully for up to 3 months. Thaw overnight at room temperature before reheating.
Reheating
For that freshly baked warmth, reheat slices in a toaster oven or regular oven set to 350°F for about 5-7 minutes. This revives the crust’s crispiness and warms the soft interior to perfection.
FAQs
Can I use dried rosemary instead of fresh?
While fresh rosemary gives the best aroma and texture for this focaccia, dried rosemary can be substituted in a pinch—use about a teaspoon and sprinkle it evenly. Just know that the flavor won’t be as vibrant as when fresh sprigs are used.
What can I do if my dough is too sticky?
If your dough feels too sticky during kneading, dust your work surface and hands lightly with flour. Avoid adding too much flour, though, as that can make the focaccia dense. The dough should remain soft and slightly tacky.
How important is the olive oil in this recipe?
Olive oil is crucial here. Not only does it contribute to flavor and color, but it also helps create that luscious crust that focaccia is famous for. Using good-quality extra virgin olive oil will make a noticeable difference.
Can I add other toppings besides rosemary?
Absolutely! This Rosemary Focaccia Recipe is a wonderful base for a variety of toppings—think caramelized onions, cherry tomatoes, olives, or even thin slices of garlic for extra savory depth. Just be sure not to overload the dough so it can rise properly.
Is it okay to use instant yeast instead of active dry yeast?
Yes, you can use instant yeast, but you should add it directly to the flour mixture without activating it in water first. You might see a slightly faster rise time. Adjust your rising times accordingly and enjoy the same delicious results.
Final Thoughts
This Rosemary Focaccia Recipe is a true joy to make and even greater to share. Whether you’re new to bread baking or a seasoned pro, it brings warmth, flavor, and a touch of rustic Italian magic to your kitchen. Grab your ingredients and dive into the process—you’ll be rewarded with a loaf that’s as inviting as a good conversation with a friend.
Print
Rosemary Focaccia Recipe
- Prep Time: 20 minutes
- Cook Time: 25 minutes
- Total Time: 1 hour 45 minutes
- Yield: 10 pieces
- Category: Bread
- Method: Baking
- Cuisine: Italian
Description
This Rosemary Focaccia recipe delivers a classic Italian bread that is soft, tender, and infused with fragrant fresh rosemary. Perfect as a side dish or for sandwiches, this focaccia has a golden crust topped with sea salt flakes and a generous drizzle of olive oil, making every bite richly flavorful and aromatic.
Ingredients
Dough Ingredients
- 1¾ cups water (397 grams), warm (105-110°F)
- 2¼ teaspoons active dry yeast (7 grams, 1 packet)
- 1 tablespoon granulated sugar (13 grams)
- 5 cups all-purpose flour (625 grams)
- 1 tablespoon kosher salt (9 grams)
- ½ cup extra-virgin olive oil (100 grams)
Topping Ingredients
- ½ cup extra-virgin olive oil (100 grams, divided)
- 2 sprigs fresh rosemary (leaves removed from stems, not chopped)
- Sea salt flakes (for topping, such as Maldon)
Instructions
- Activate Yeast: In a liquid measuring cup or small bowl, whisk together the warm water, active dry yeast, and granulated sugar. Set aside for about 10 minutes until the mixture becomes frothy and fragrant, indicating the yeast is activated.
- Mix Dry Ingredients: In the bowl of a stand mixer fitted with the dough hook, whisk together the all-purpose flour and kosher salt by hand to combine evenly.
- Add Wet Ingredients: Pour in ½ cup of the olive oil and the activated yeast mixture to the flour mixture. Mix on low speed using the dough hook until the dough starts to come together, scraping down the bowl as needed to incorporate all flour.
- Knead Dough: Increase the mixer speed to medium and knead the dough for 5 to 6 minutes. The dough should become tacky and loose but remain manageable enough to lift from the bowl.
- Finish Kneading by Hand: Dust your work surface with flour and knead the dough a few more times until it becomes less sticky and more cohesive, adding flour as needed.
- First Rise: Lightly oil a large bowl and place the dough inside. Cover with plastic wrap or a clean kitchen towel and let it rise in a warm place until it doubles in size, approximately 60 minutes.
- Prepare Baking Sheet: Coat a rimmed baking sheet with ¼ cup of the remaining olive oil, using a pastry brush to cover the bottom and sides evenly.
- Shape Dough: Transfer the risen dough to the prepared baking sheet and use your hands to press and stretch it until it fits the pan.
- Create Dimples: Using your fingers, press down firmly to create deep dimples in the dough, going through to the pan if possible. This helps create the signature texture of focaccia.
- Second Rise: Loosely cover the dough and let it rise again in a warm place until doubled in size, about 60 minutes.
- Preheat Oven: While the dough is undergoing the second rise, preheat your oven to 425°F (220°C).
- Add Toppings: After the second rise, drizzle the remaining olive oil evenly over the dough. Scatter the rosemary leaves on top, followed by a generous sprinkle of flaky sea salt.
- Bake: Place the baking sheet in the preheated oven and bake the focaccia for 25 to 30 minutes, or until the crust is golden brown and crisp.
- Cool and Serve: Remove the focaccia from the oven and allow it to cool slightly before slicing and serving to enjoy the perfect soft interior and crispy exterior.
Notes
- Ensure the water is warm but not hot to properly activate the yeast without killing it.
- You can substitute fresh rosemary with dried rosemary if fresh is unavailable, though fresh provides the best flavor.
- For a fluffier texture, avoid adding too much extra flour when kneading by hand.
- Use a rimmed baking sheet to prevent oil spills and help shape the focaccia.
- Letting the dough rise twice allows for a lighter and airier bread.
- Store leftover focaccia in an airtight container at room temperature for up to 2 days or freeze for longer storage.


